HOMEMADE WINDOW CLINGS

Why buy window clings- when you can make your own? It’s a fun and inexpensive project with easily found materials. Soon your windows will be personalized by your kids.
Materials:
- 2 Tbsp white glue
- 2 drops of dish soap
- food coloring
- plastic page protectors
- paintbrushes
- muffin tin
- image outlines (optional)
- scissors
- wet paper towels
To Create:
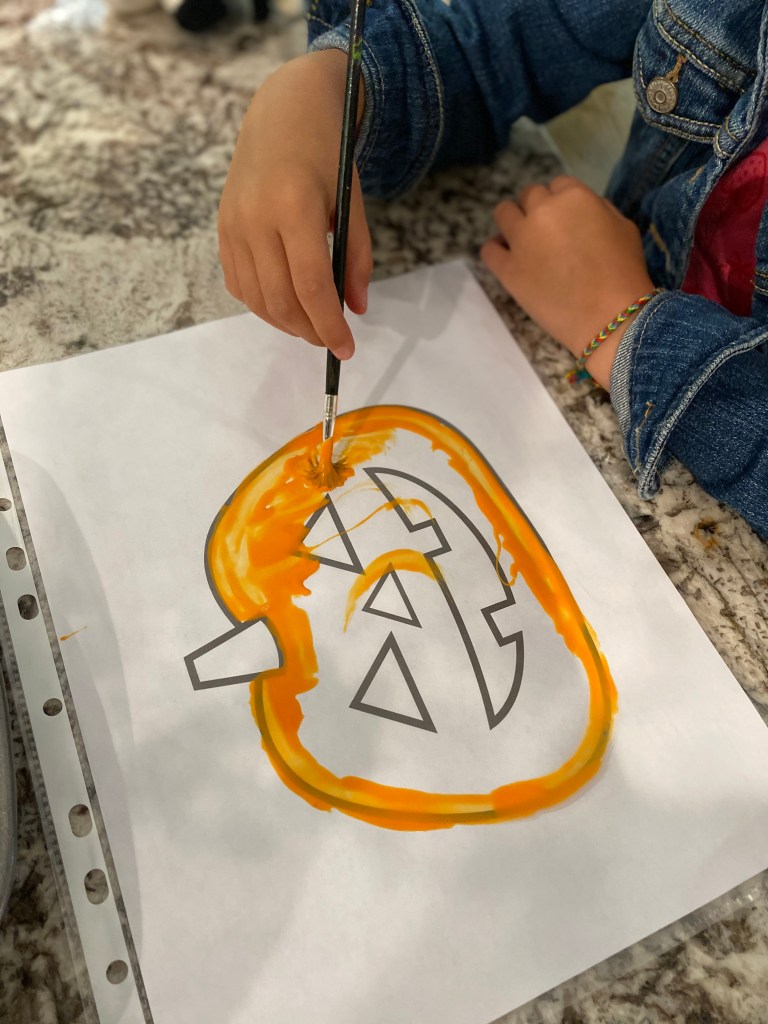
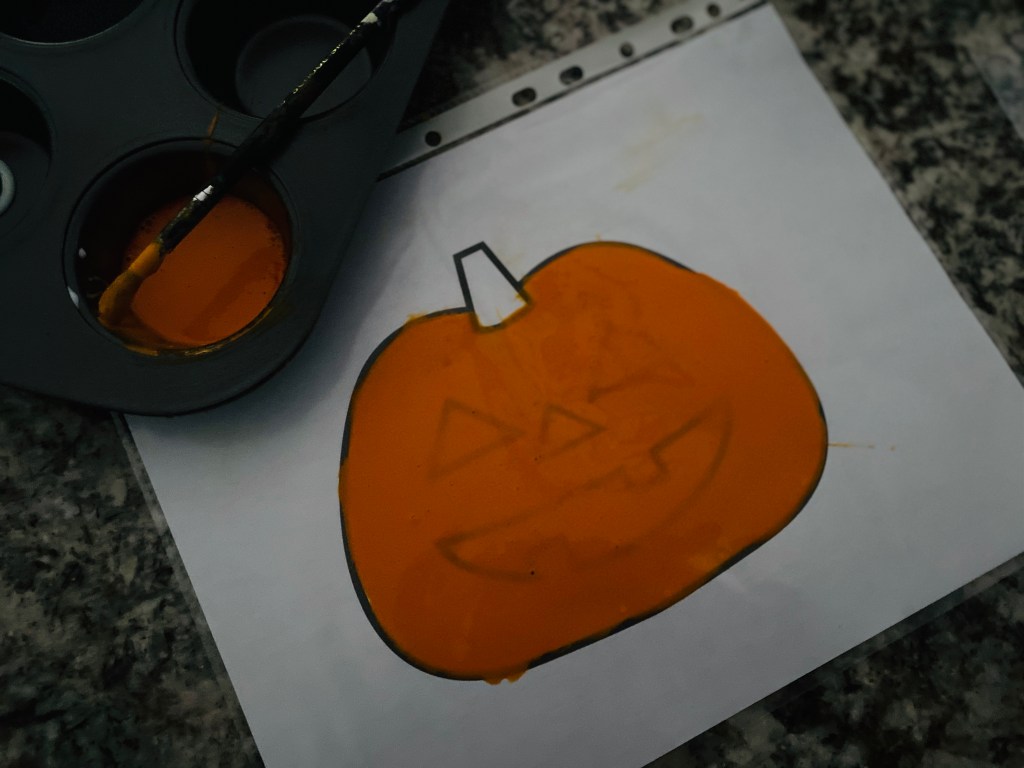
Ahead of time I printed out simple outlines of images my daughter likes. This is also a fun project to do for holidays. You can make pumpkins for Halloween or candy canes at Christmas time- endless possibilities! See pumpkin example below.
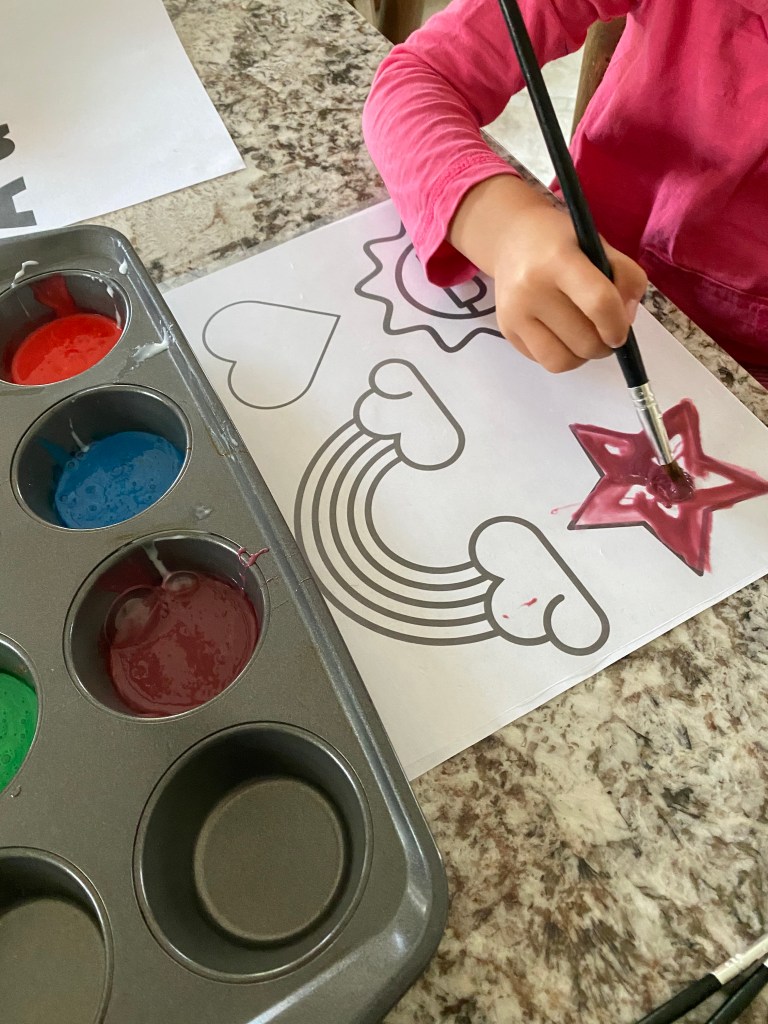
In a muffin tin, mix the glue, dish soap, and food coloring together. Repeat for each additional color. Put the page protector close to the muffin tin. If using image outlines, place in page protector. Paint directly onto the page protector. Paint the mixture on very thick or in layers (at least 2-3). If you mess up, simply wipe up with a wet paper towel. Let the designs dry on the plastic sheet protectors. It will take a few hours or overnight to be safe. If doing layers (like the pumpkin) let the first layer dry. Then, once dry, add the second layer on top (green stem/black face).
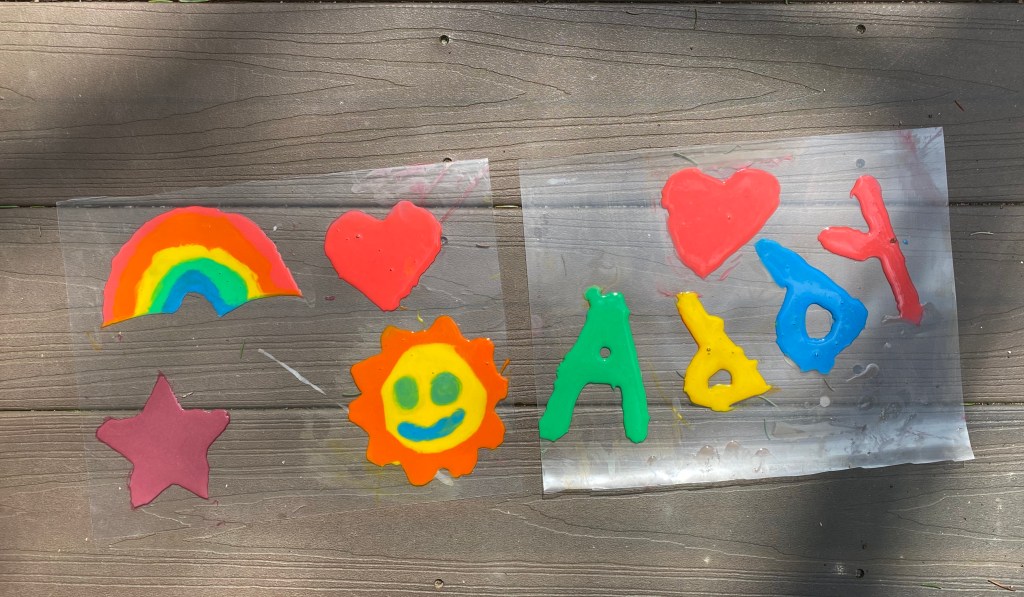
Once fully dry (they’ll be transparent), carefully peal them off of the sheet protectors. I then trimmed the edges with scissors to make them cleaner/neater. Place on windows and enjoy!
Note: Color fades on window clings from sun over time.
Example Pumpkin window cling: