PEEP VILLAGE

You know Easter is coming when you see the Peep Marshmallows on the shelf. They aren’t just for eating! Every Peep needs a house and friends to be with. Create a little Peep village! We’ve always done this project before Easter, but after would be just as much fun and the candy would be on sale!
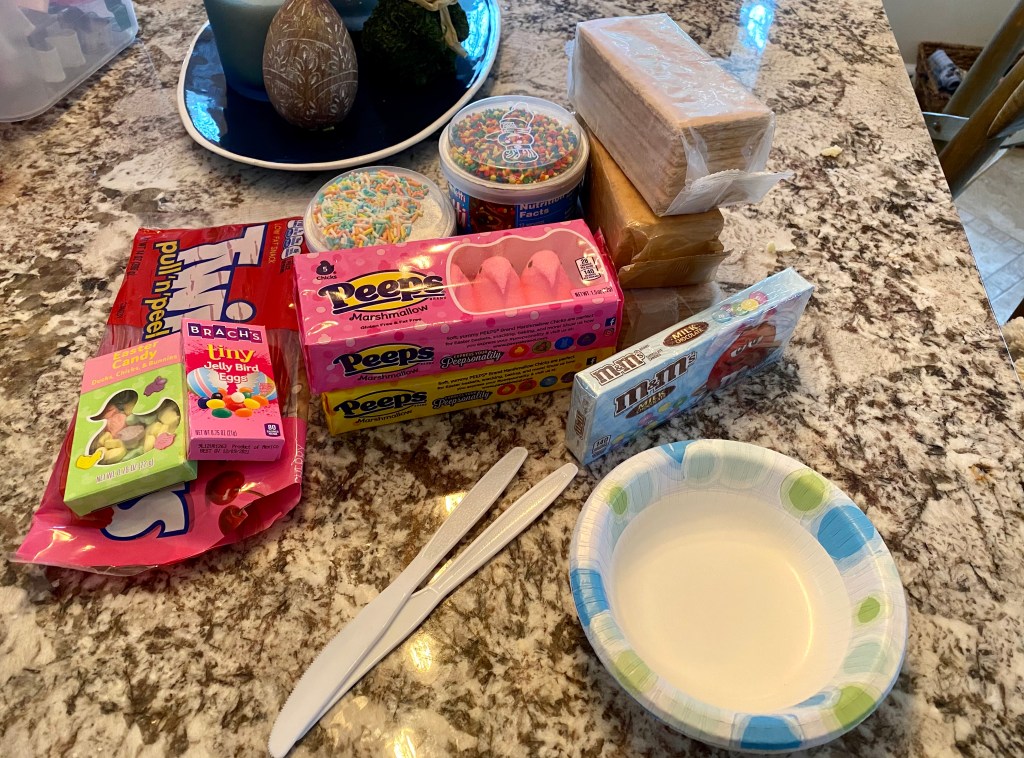
Materials:
- Peep Marshmallows
- graham crackers or Pop Tarts
- icing (bought or homemade)
- food coloring
- jelly beans
- assorted candy
- bowls (for candy)
- baking sheet
- plastic knife
Procedure:
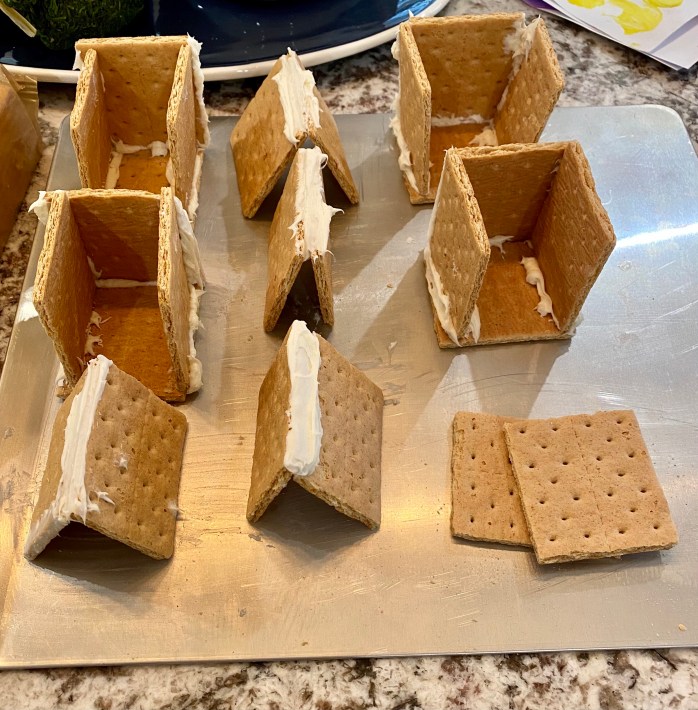
Note: This is a 2 day process or needs to be done in parts, a few hours in between. On day #1- make the houses. Day #2 complete everything else. The houses are too flimsy and fall apart when you try to decorate in the same day. Unless you build the houses and wait a few hours until dry.
Before buying supplies: have older kids complete a sketch of what they want their village to look like. Then brainstorm what materials you need to make their sketch/ideas possible. For younger kids, just buy an assortment of materials and design your village as you go.
Day #1:
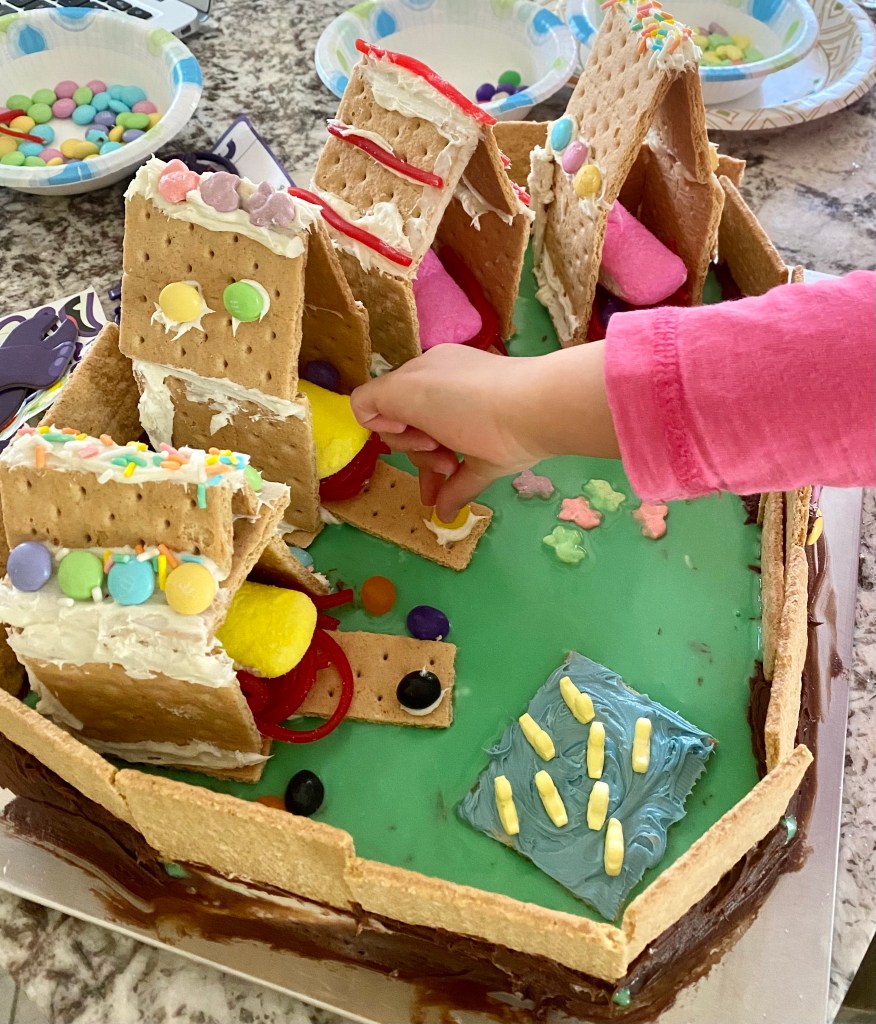
1.) Construct the houses! Using graham crackers and icing as glue. Our houses had 3 sides (2 sides and a back). The front was left open, so you can see inside. Complete the sides on the base (bottom) and the roof separate. Then on day #2 add the roof or after several hours on day #1. If using homemade icing, you want it to be thicker (see recipe above with crisco). We used store bought.
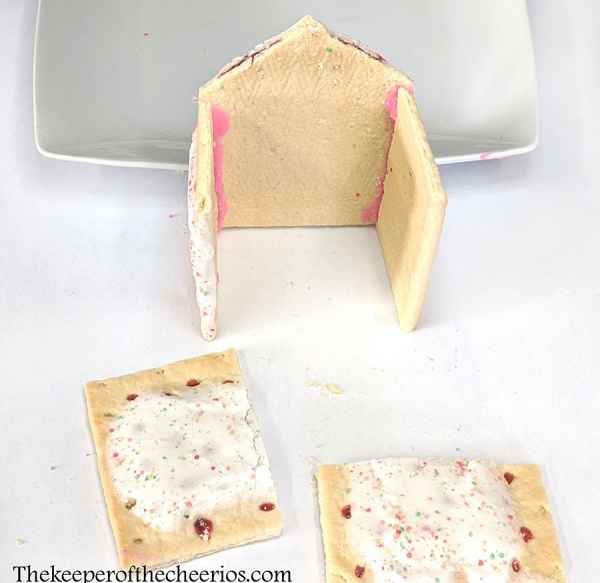
If using, Pop Tarts, here is a great video that explains how to make them. For ours, we used store bought icing. To complete the houses sooner, I used objects on each side of the house to hold them together, then removed once dry. I forgot to take a picture- so I used one from another blog.
Day #2:
Let the decorating fun begin! Let your child’s imagination take over. Grab your sketches if you made any.
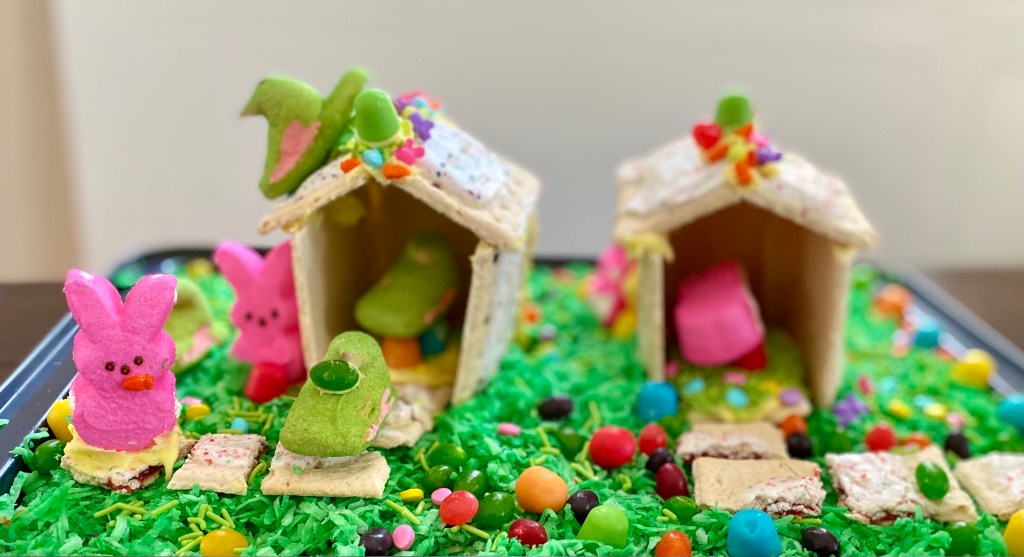
1.) Start by completing the peep houses, if you haven’t already attach the roofs. Then place them on the baking sheet.
Put candy in bowls (easy access and clean up).
Time to decorate your houses- inside and out! What else can go in your peep house? Nests! We used Twizzler Pull ‘N Peels to make our nests. If you wanted to make bird nest cookies – here is the recipe. Coconut would also work. Or you can buy premade chocolate nests.


2.) After the house are decorated, start creating the rest of the village.
We put up a graham cracker fence to protect the peeps. We also made a pond for our Sweet Tart ducks. I just added blue food dye to the icing we already had from building the houses.
For grass, I wanted it to be a thinner consistency, so I mixed powdered sugar with water and green food coloring. Or you could use coconut flakes.


3.) Create a story about your peep village! What are the peeps names? Who are their friends? Name of the village? Favorite activities to do in the village?
I loved the story that came out of this project just as much as making! My daughter built the wall to protect the Peeps from our dog eating them and the names she chose were very creative. Make sure to write down their story as they are telling it!
You can have your village on display only or allow your child to play with it once dry. After our village was complete, my daughter wanted to play with it, she move the peeps around and created different story lines. Luckily I took pictures first before she played with it.
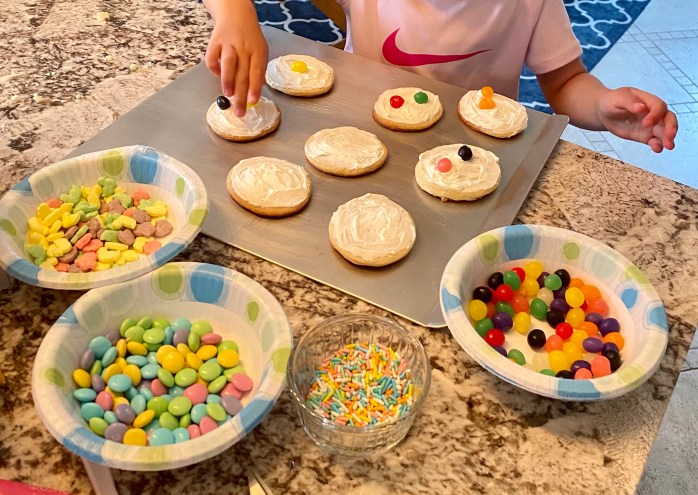
With the leftover candy we decorated sugar cookies. My daughter helped by making the dough into balls before we baked them. Then she iced and decorated them.
Happy creating & snacking!