I AM LUCKY BECAUSE…

It’s almost St. Patrick’s Day and those lucky Leprechauns will be back! The Leprechauns aren’t the only lucky ones. What makes you lucky? Complete the worksheet and then make a mini book or a banner to hang in your house to share with your friends and family.
Materials:
- templates
- green crayon
- green marker
- scissors
- glue/tape
- white cardstock or printer paper
- green cardstock or construction paper (optional)
Steps:
1.) Print out templates (3 pages). If you want more circles, print a page multiple times.
Cut out circles (child if able to, if not adult).
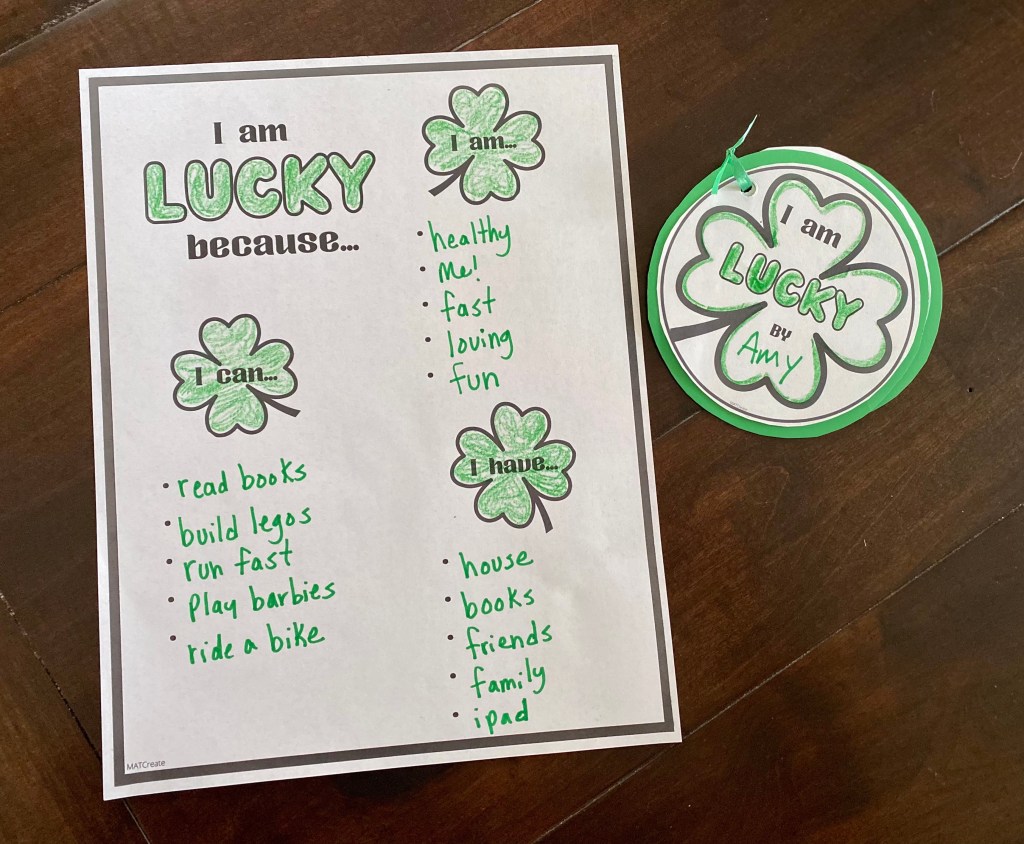
2.) Complete the worksheet. Brainstorm with your child ways they are lucky and write down on worksheet. Fit as many as you can on the worksheet- no limit.
Note: I wrote the answers down on the worksheet, then my daughter copied them onto her circles.
3.) Choose 6 reasons to write on your circles, two from each category.
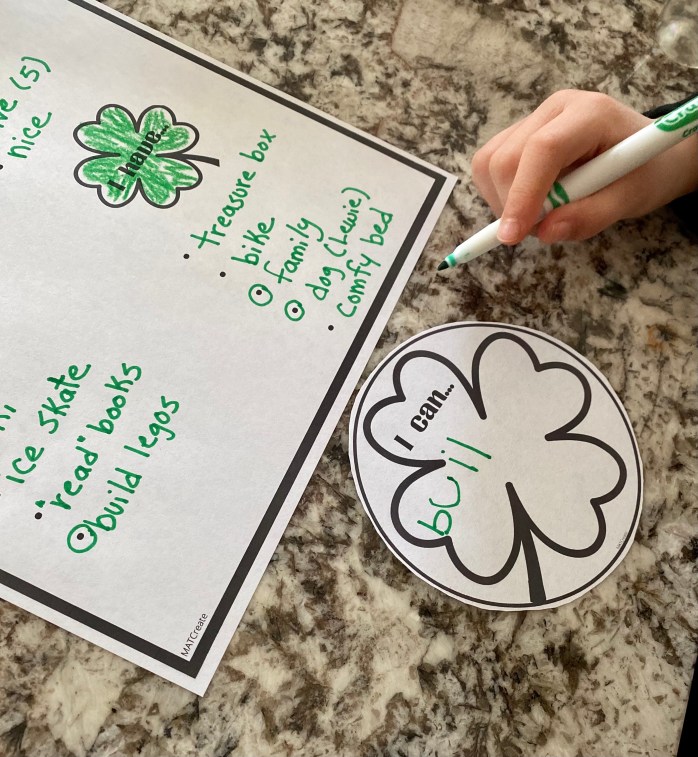
4.) Complete circles. On the first circle, “I am Lucky by” write your name. Then write your lucky reasons on each circle (6 total). Add color.
Note: We colored in crayon and wrote in marker, so that the marker would stand out. If child unable to write, an adult can write for them or assist if need help.
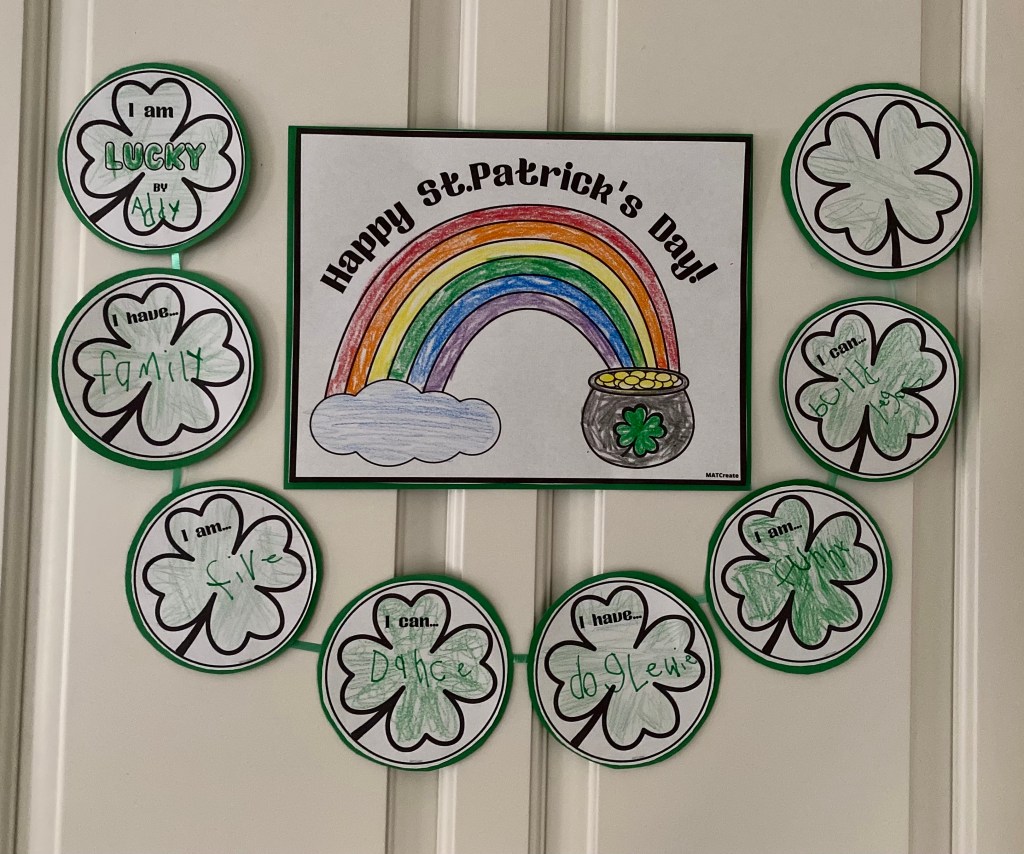
5.) Banner or Book? Decide which one you want to make.
The book can be made by stapling or using a hole punch with string (pictured below). For the front and back cover I added green cardstock to make more sturdy/add color.
For the banner, I used ribbon behind to attach it together and then hung. I also added green paper behind each circle to add more color.
For the coloring sheet above- click on image to print.
Happy St. Patrick’s Day!

ST. PATRICK’S DAY RAINBOW HAT

Celebrate St.Patrick’s Day in style by making a rainbow hat! Simple, easy, plus educational. Let the coloring begin!

Materials:
- Hat template
- white cardstock
- printer
- scissors
- black construction paper
- white crayon
- stapler
To Make:
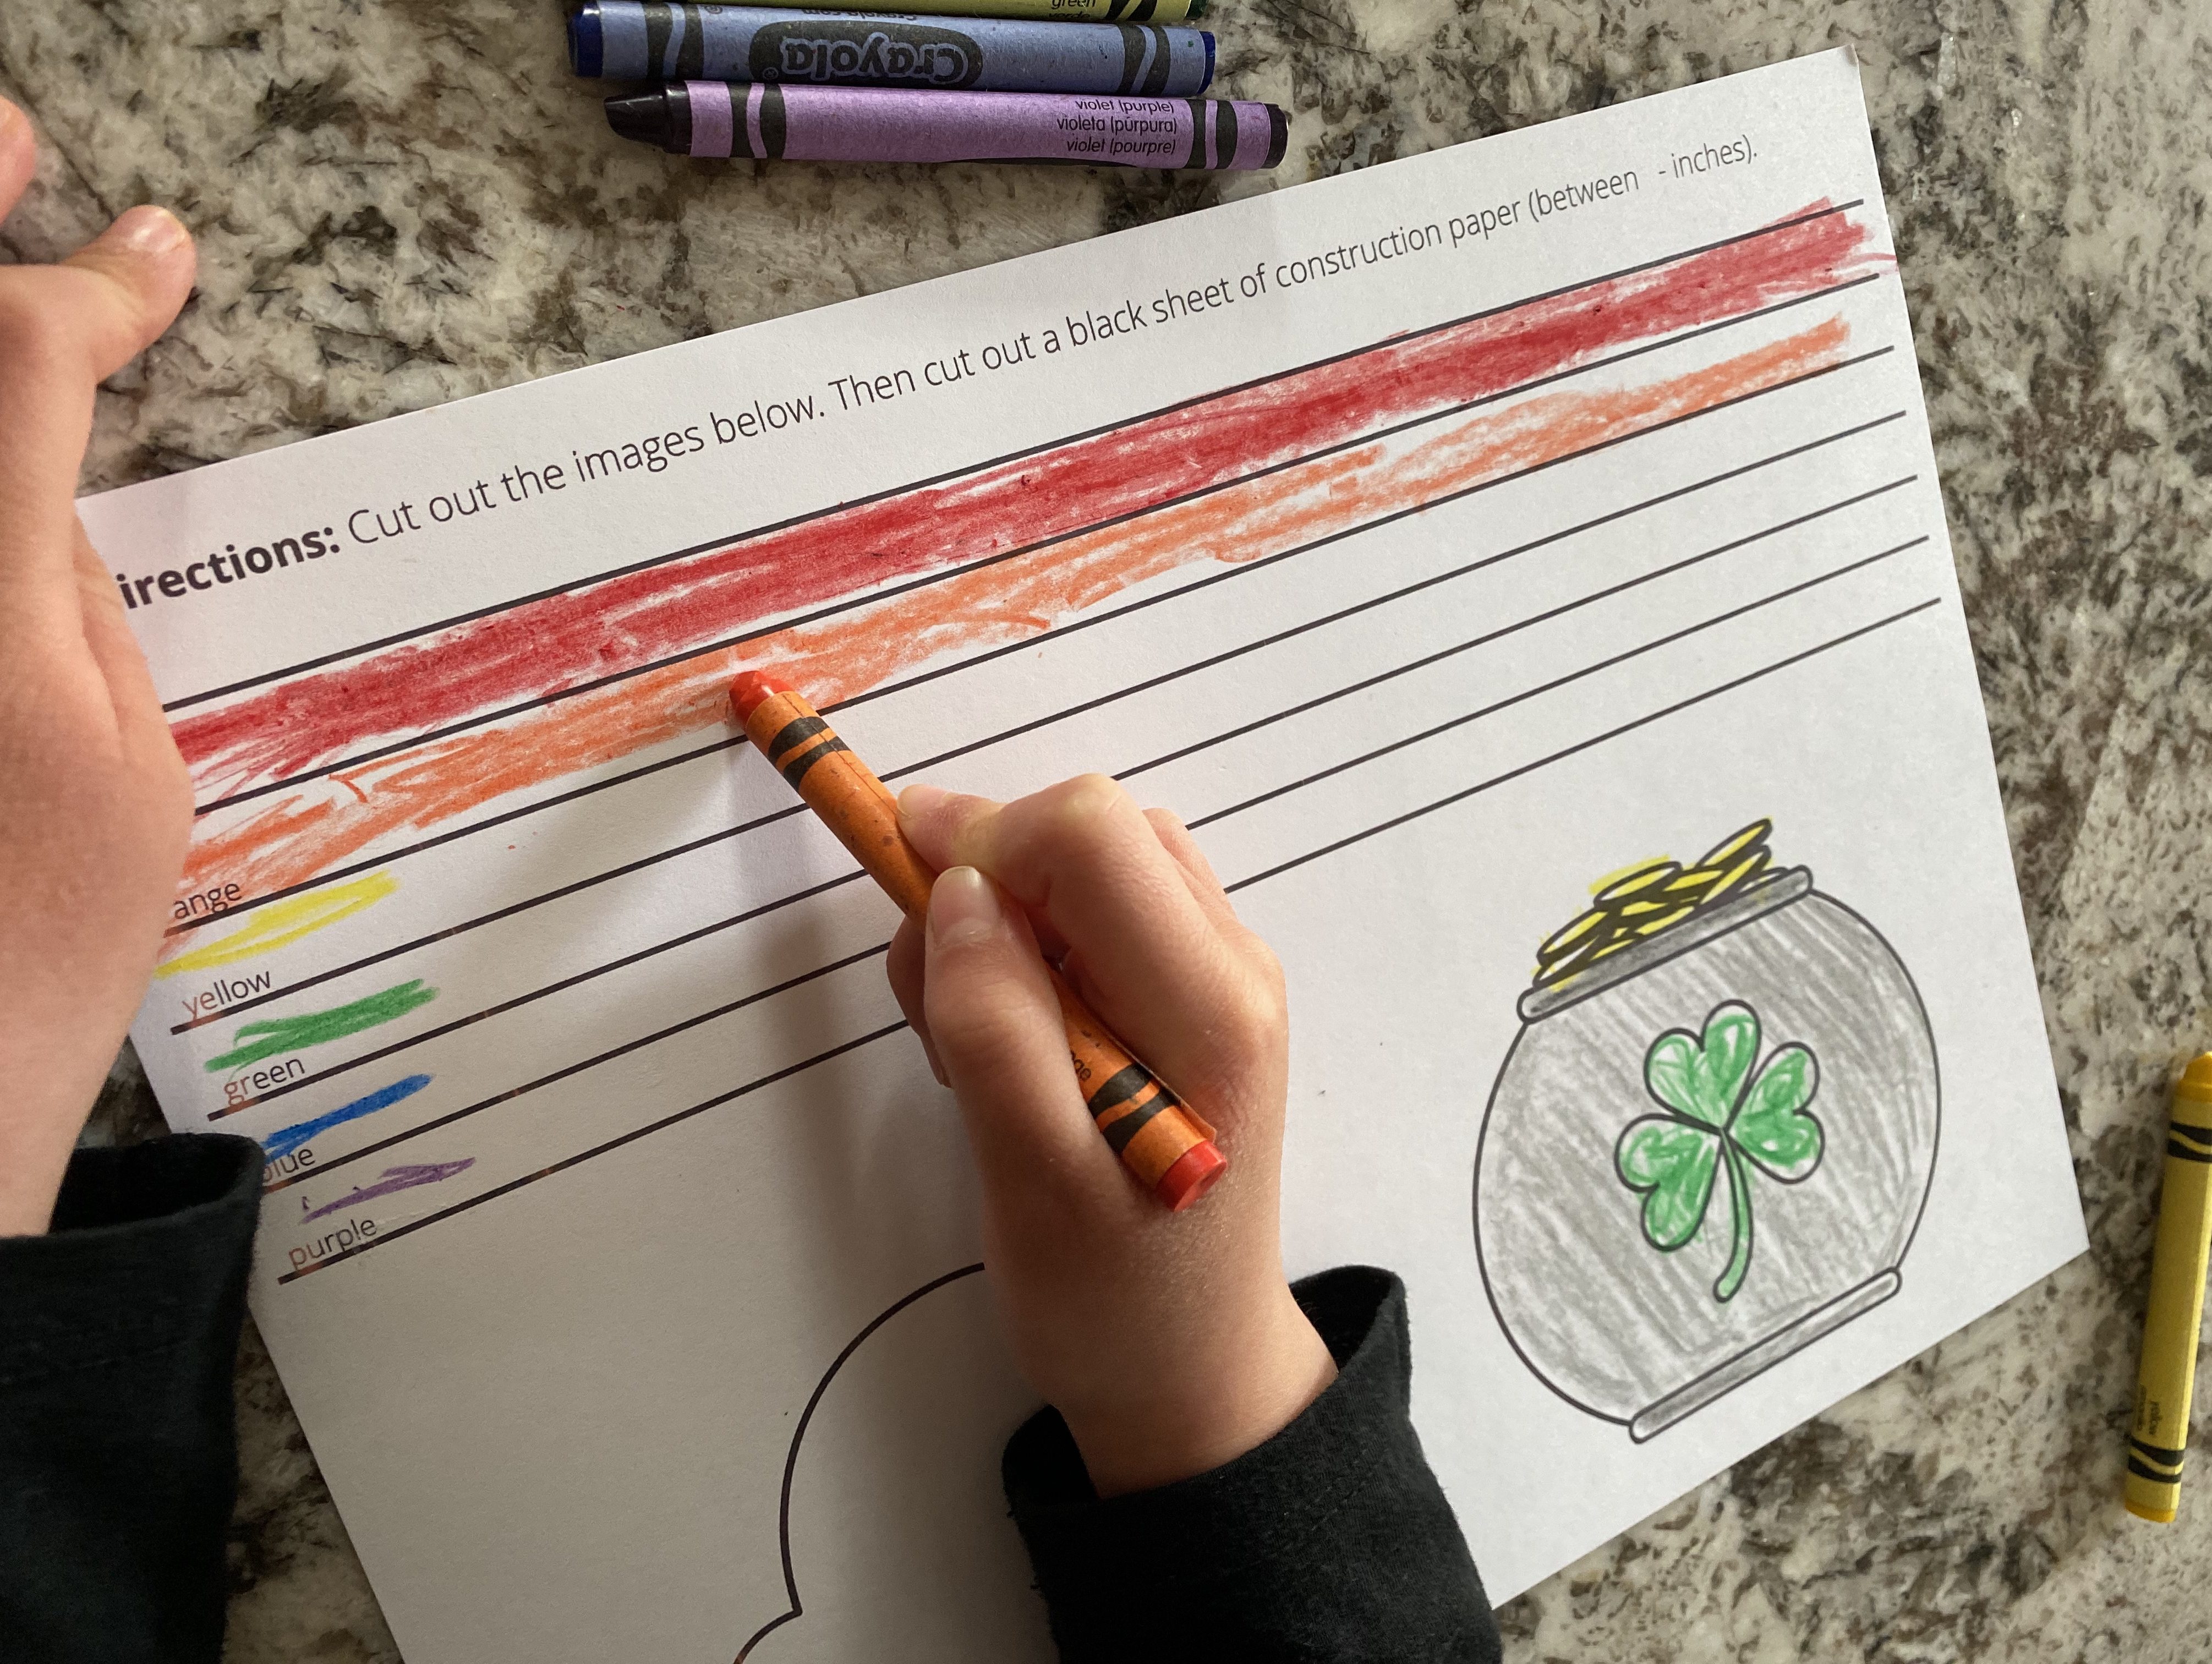
1.) Print out the rainbow sheet template.
2.) Have your child color in the rainbow (correct order listed on rainbow), cloud, and pot of gold. Cut out.
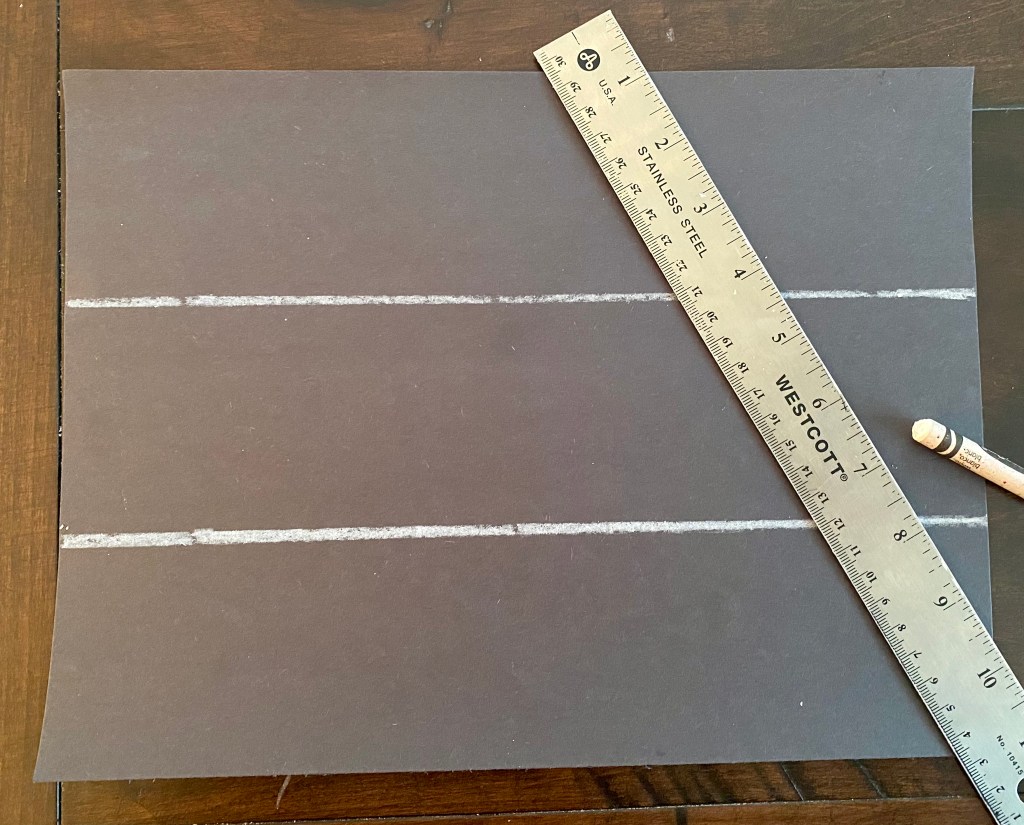
3.) Cut a 9 x12 sheet of black construction paper into 3 strips (3″ x12″). Measure your child’s head with the strips. You will need at least 2. If making for an adult, at least 3. Once measuring is complete staple the paper together to make a round crown.
4.) Attach the rainbow. Attach one side of the rainbow and then the other side. Slightly overlap the rainbow and black construction paper, then staple. You will cover up the color words that are listed on edge.
5.) With glue or tape, on the bottom outside of the rainbow, where the rainbow meets the black construction paper, place the pot of gold on one side and the cloud on the other side.
6.) Have your child write their name in the middle or an adult write it in white crayon.
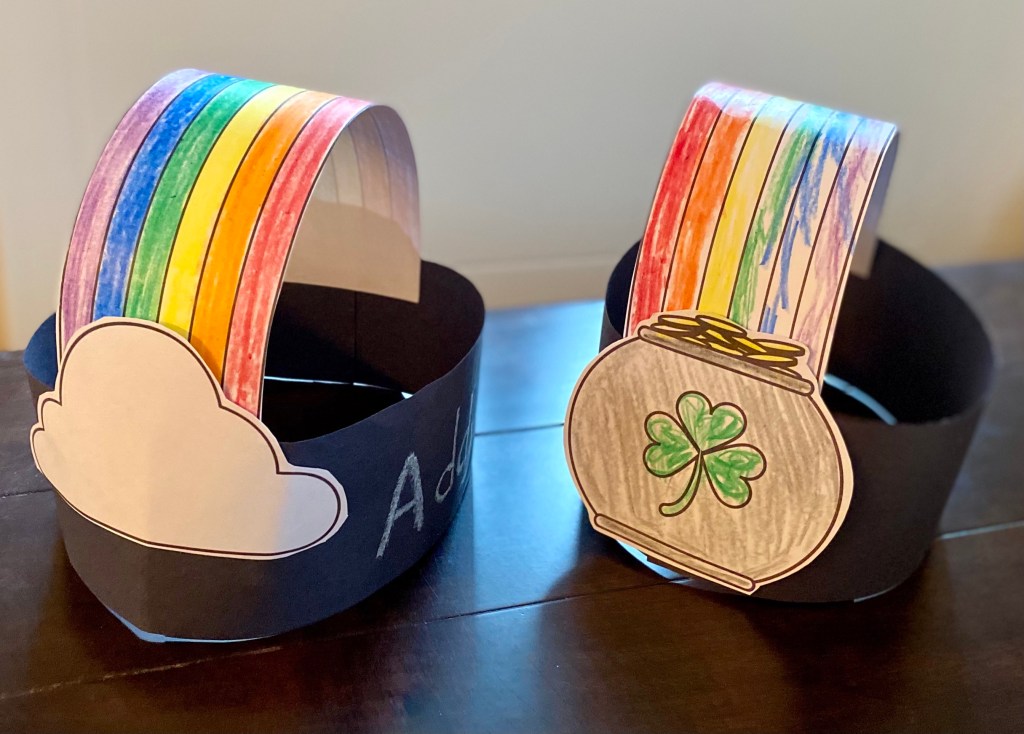
7.) Ready to wear! Let the fun begin!
Happy St. Patrick’s Day! Have fun celebrating!
DR. SEUSS Book Activities

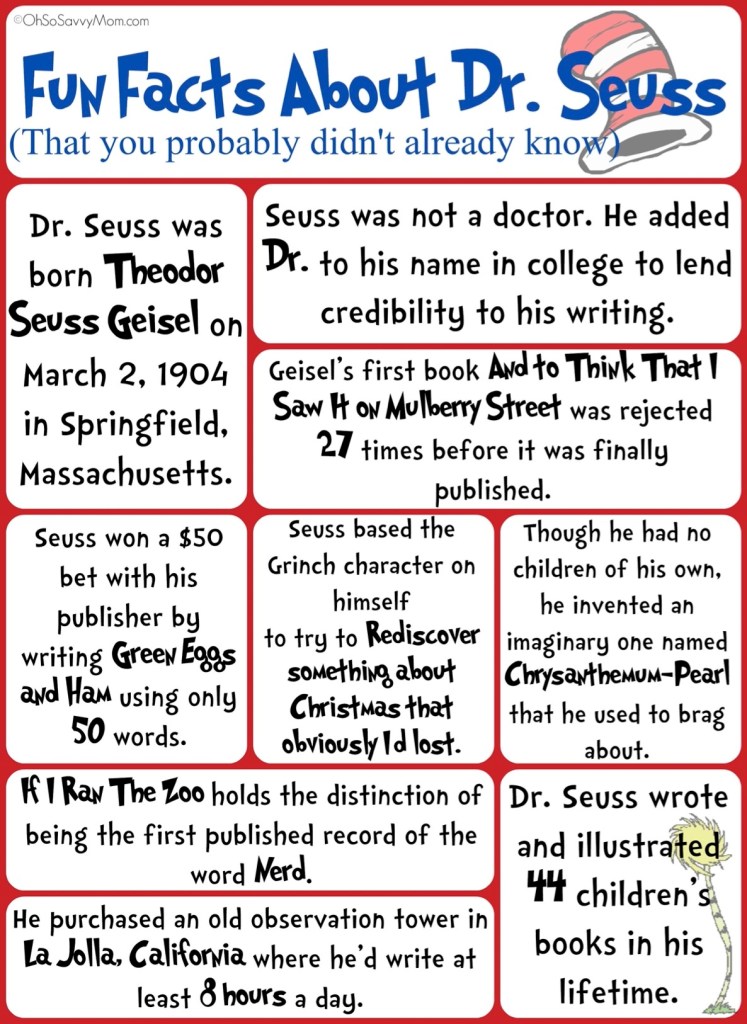
Dr. Seuss’s Birthday is a nationwide reading celebration that takes place annually on March 2nd. Theodor Seuss was an American children’s author. He wrote and illustrated over 60 books using the pen name “Dr. Seuss”. Some of his most famous books are The Cat in the Hat (1957), How the Grinch Stole Christmas(1957), Oh, the Places You’ll go(1990)and Green Eggs and Ham(1960). A few of his books have also been turned into movies.

Check out the Seussville website here to watch a few short videos of his books, there is also a great section for parents here. PBS Kids has The Cat and the Hat page with games, printables, and videos.
Want to go on a road trip? Check out The Amazing World of Dr. Seuss Museum, in Springfield Maine.
Some fun activities inspired by Dr.Seuss’s Books:
Read the books before the activities. Don’t have the books? Watch them as a read aloud on Youtube or borrow from your local library.
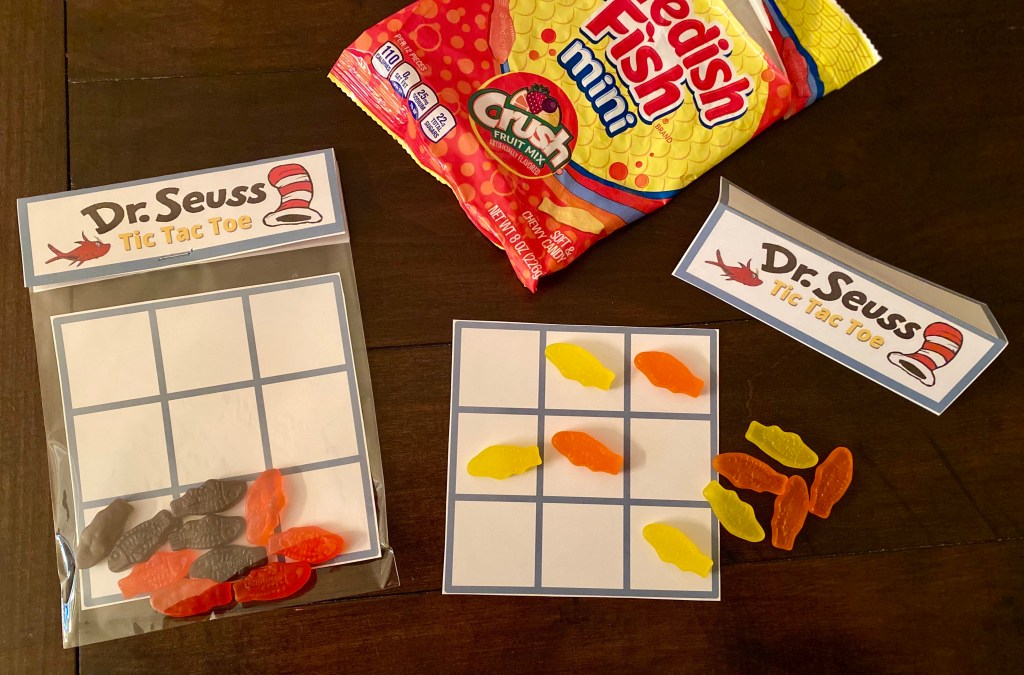
1.) Tic Tac Toe
Print out the tic tac toe board/label. Use Swedish Fish or Goldfish Crackers for the x’s and o’s. Place fish and board in clear plastic bag and attach label on top.
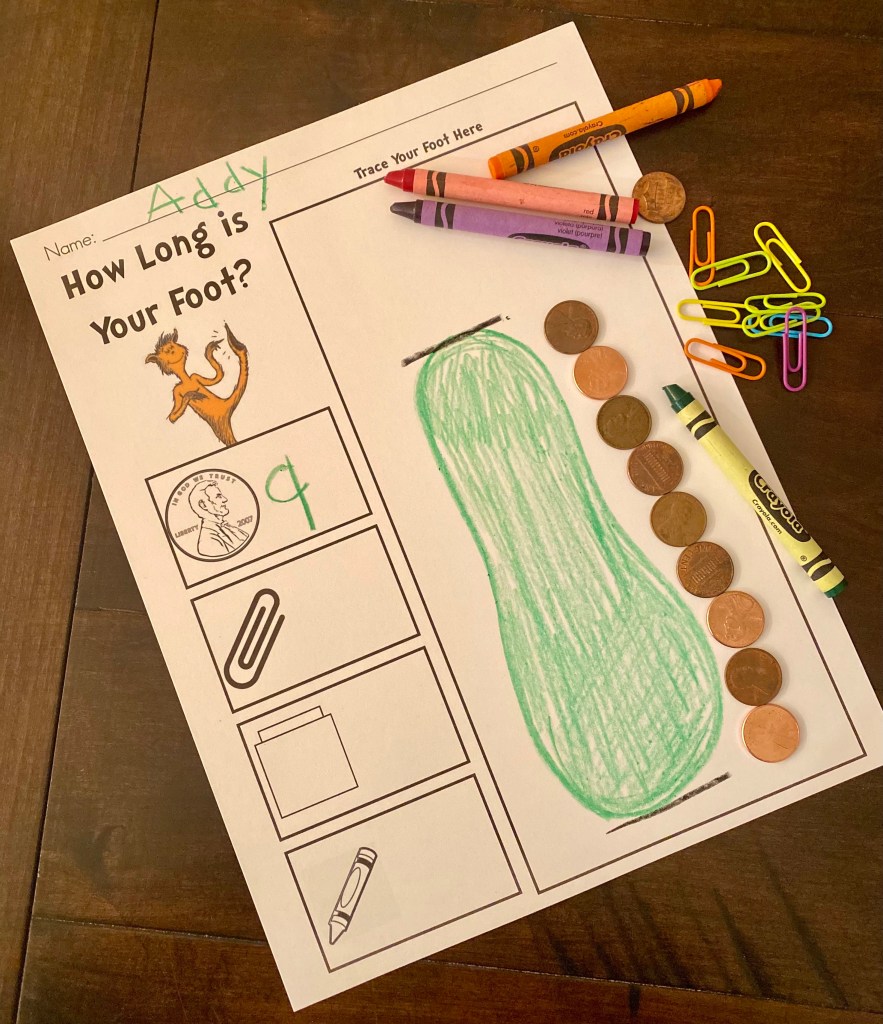
2.) Create Your Own Silly Fish
Fill out the questions and then create your own fish. Make your fish out of materials you already have at home.
Options: Draw and then cut out of construction paper. Draw on white paper, then color in. Make out of modeling clay or make online at ABCya.
We used red model magic clay and googly eyes for ours.
Full activity here from Seussville.

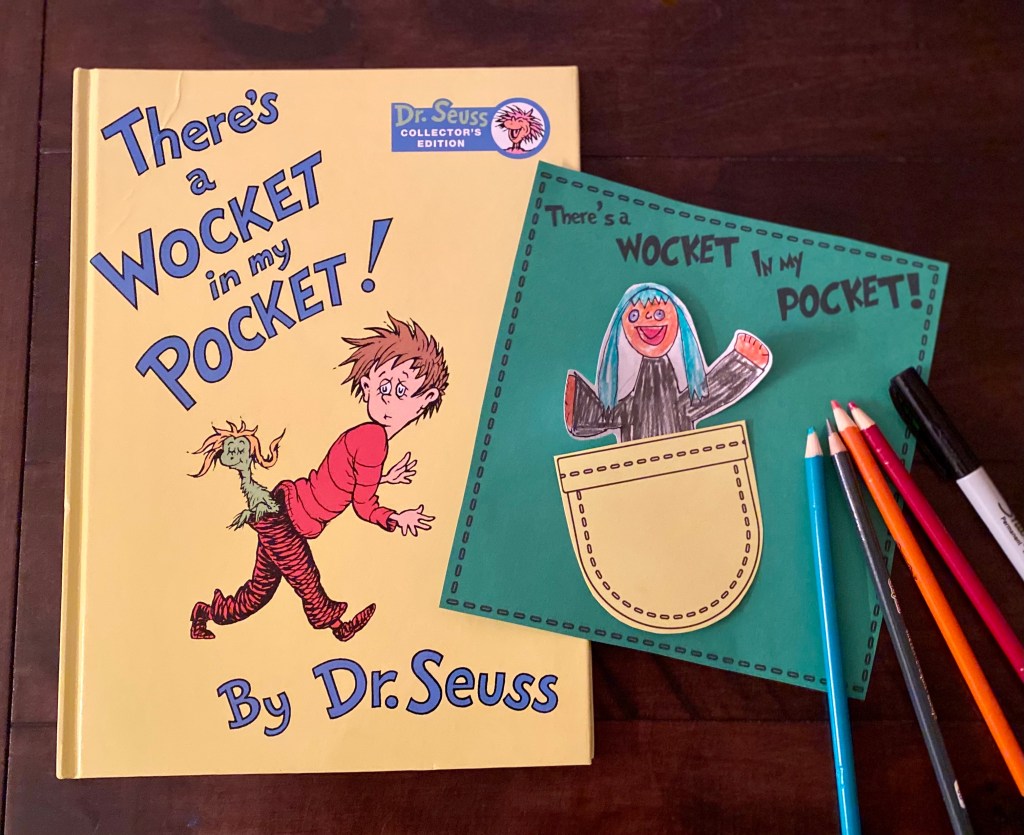
3.) Wocket In Your Pocket
Make your own unique wocket in a pocket like in the book, There’s a Wocket in my Pocket. Here is a template for the pocket & background. Print and cut out the pocket and big square. Attach pocket onto the big square. Leave top of pocket open, only glue/staple on the round edge. Then create your own unique wocket out of white paper, cut out, and place inside the pocket. You can even name it too! Our wocket (left) is Bobby.
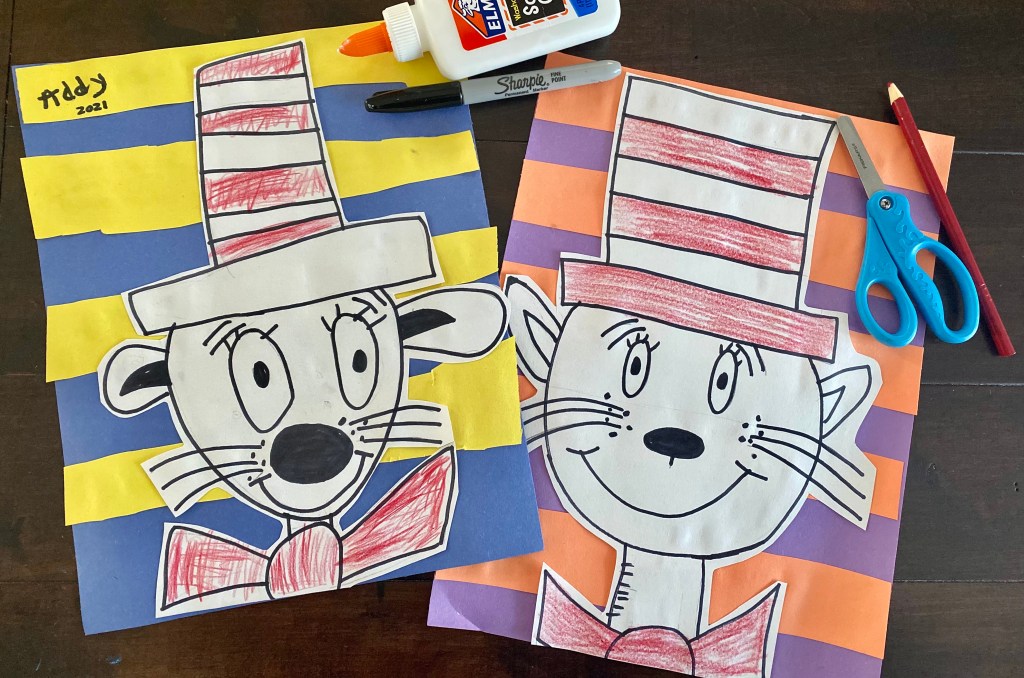
4.) Draw the Cat and the Hat
Dr. Seuss was known for his silly unique characters. His most famous character was The Cat and the Hat. Follow step by step simple directions on how to draw him here.
First, draw in pencil (can erase then). Second, outline in black marker or black sharpie. Third, add color. Optional- cut out your artwork and make a background.
We cut strips of paper and then glued them down on a solid sheet of construction paper to create the background.

Make yummy kabobs that look like the hat from Cat & the Hat. Recipe reviews AB pattern and basic cutting skills your little chefs can do. All you need is strawberries, bananas, and kabob sticks. We added on a face made out of a marshmallow and used an edible marker to make the face.
6.) Scavenger Hunt
Print out the scavenger hunt and start hunting! Click on the image or text above for a copy.
Have your child find something…..red, blue, under their bed, old, new, and in a Zoo.

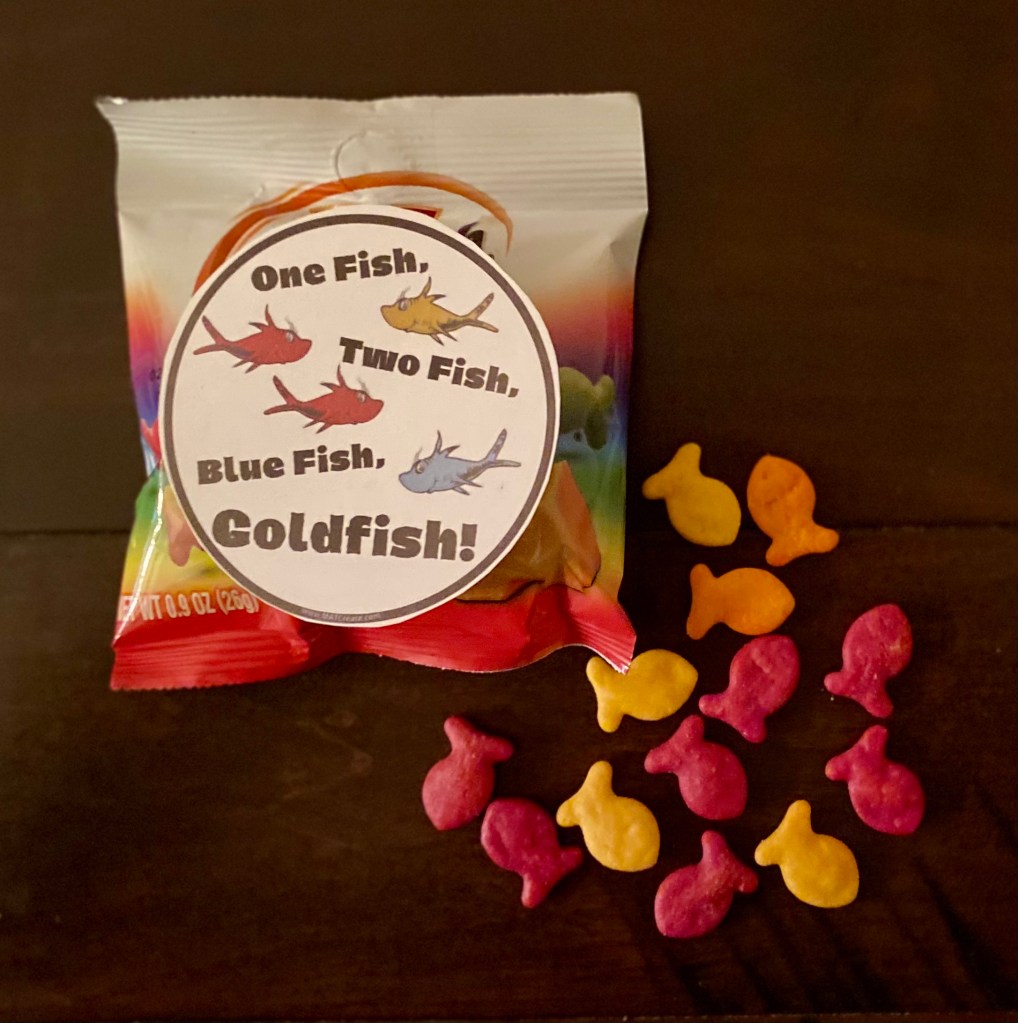
8.) Fish Snack
Read the book One Fish, Two Fish, Red Fish, Blue Fish and then have a special snack of Goldfish Crackers. Added bonus- have your child identify the colors as they eat them or make patterns. Here is the label to attach.
Want to have more fun? Check out Party City, Target dollar bins in February/March, DollarTree in the education section, and Oriental Trading for more Dr.Seuss materials. There is also a Dr. Seuss Coloring Book.
Happy Birthday Dr. Seuss! Hope you enjoyed celebrating his books with some of the these activities.

LOVEBUG VALENTINE

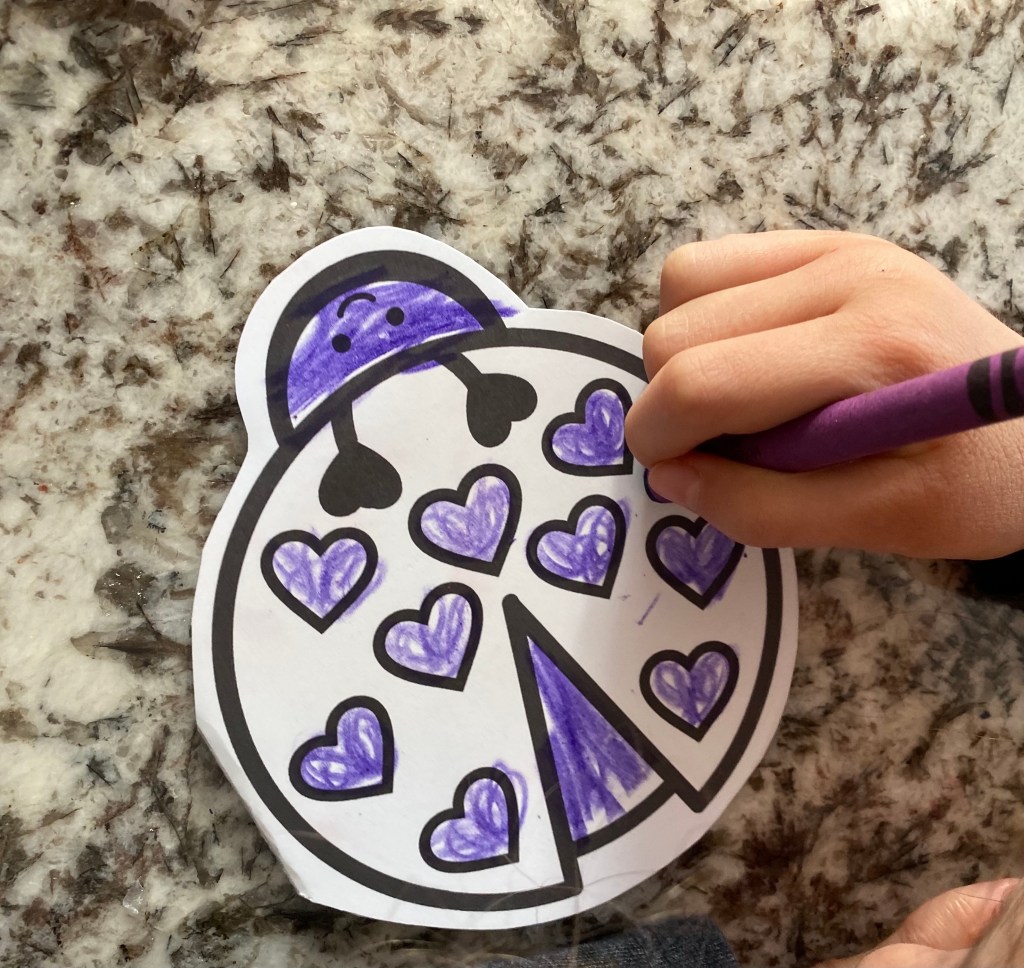
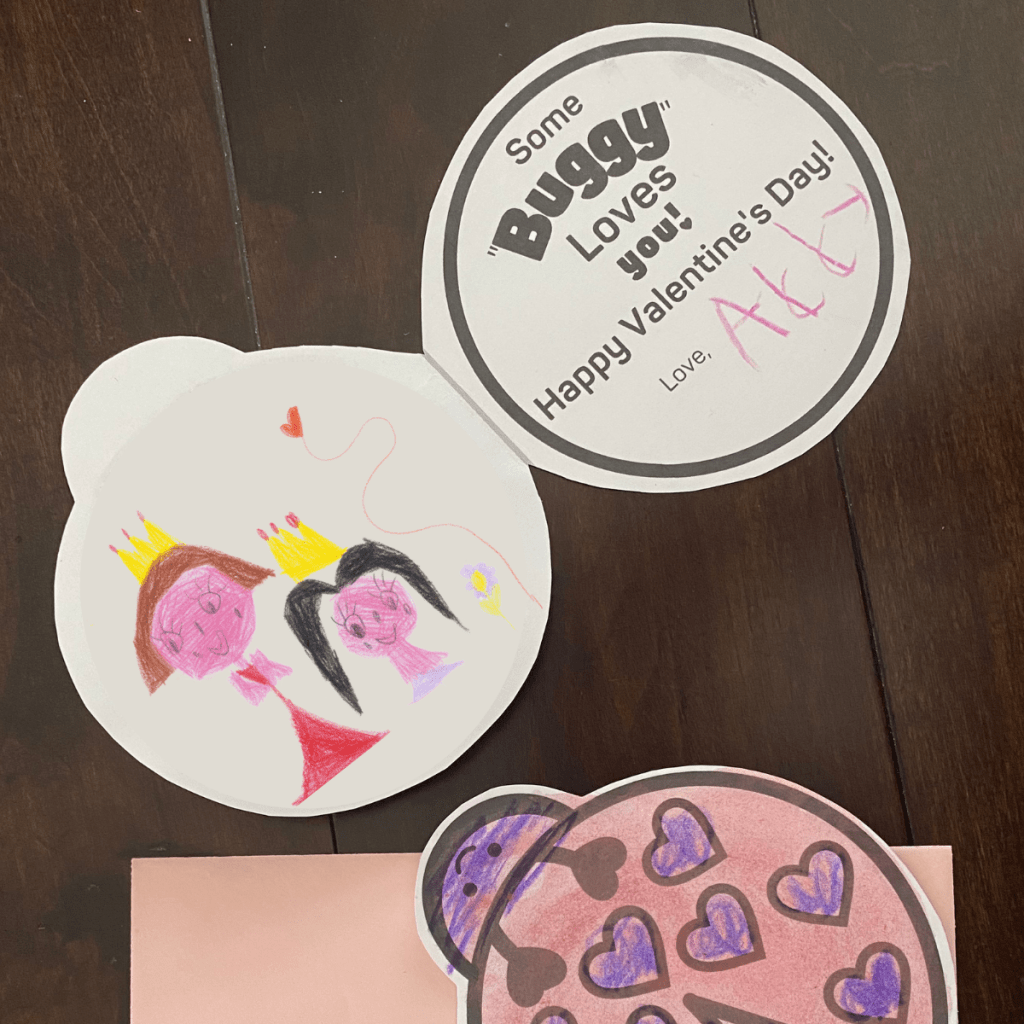
Have your child create a cute Lovebug Valentine for someone special in their life! They’ll have fun decorating & personalizing the Valentine.
Every Valentine’s Day since my daughter was one, we send Valentines to close family and friends. This year she enjoyed making this Valentine.
Materials:
- Lovebug Valentine Template
- white cardstock or colored cardstock
- printer
- Coloring tools- see list below
- scissors
- double sided tape or glue
- photo (optional)
- envelopes
Process:
1- Print template. Choose which size you want- one large one or two smaller cards. If you want it larger or smaller, change the scale in print settings. The template is 2 sided. If unable to do two sided, print 2 separate sheets and cut out inside of card & glue/tape inside.
2- Cut out. Fold card in half (on gray line). Then cut out template. Once cut out, open card up and trim off head on inside.
3- Add color. You can use several options to add color.
Suggestions to add color: crayons, watercolors, tempera cakes, markers, colored pencils, glitter glue.
*We colored our cards with crayon first, then used red tempera cakes on top. Make sure to use darker colors of crayons, so they show up against the paint.
4- Add Photo or artwork (optional). Add a photo of your child. I used a photo of my daughter with antenna on (like Lovebug on front of card). Or instead of a photo, your child can draw a picture.

5- Envelope. Place card in envelope. Have child address to recipient or if too young an adult can do it. My daughter loved putting the stamps on our cards and putting in the mailbox.
Happy creating & gifting!
- MAT Create is a participant in the Amazon Services LLC Associates Program, an affiliate advertising program designed to provide a means for MATCreate to earn small fees at no cost to you by linking Amazon.com and affiliated sites. The small fees are then used for supplies to make more posts.
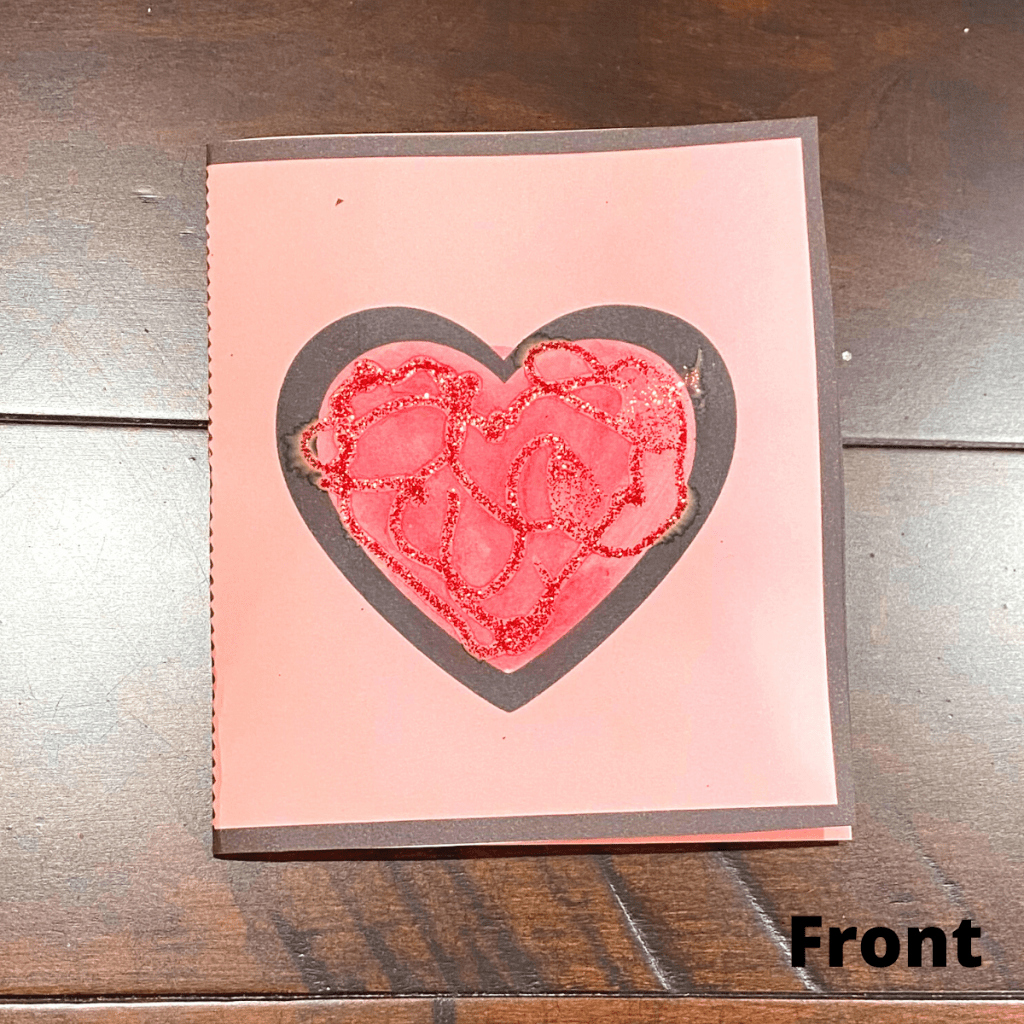
POP UP HEART VALENTINE

Need a Valentine for a friends or family? Surprise them for this cute pop up heart Valentine!
Materials:
- Pop Up Heart Valentine Template
- white cardstock or color cardstock
- printer
- scissors
- glue
- coloring tools (see list below)
Process:
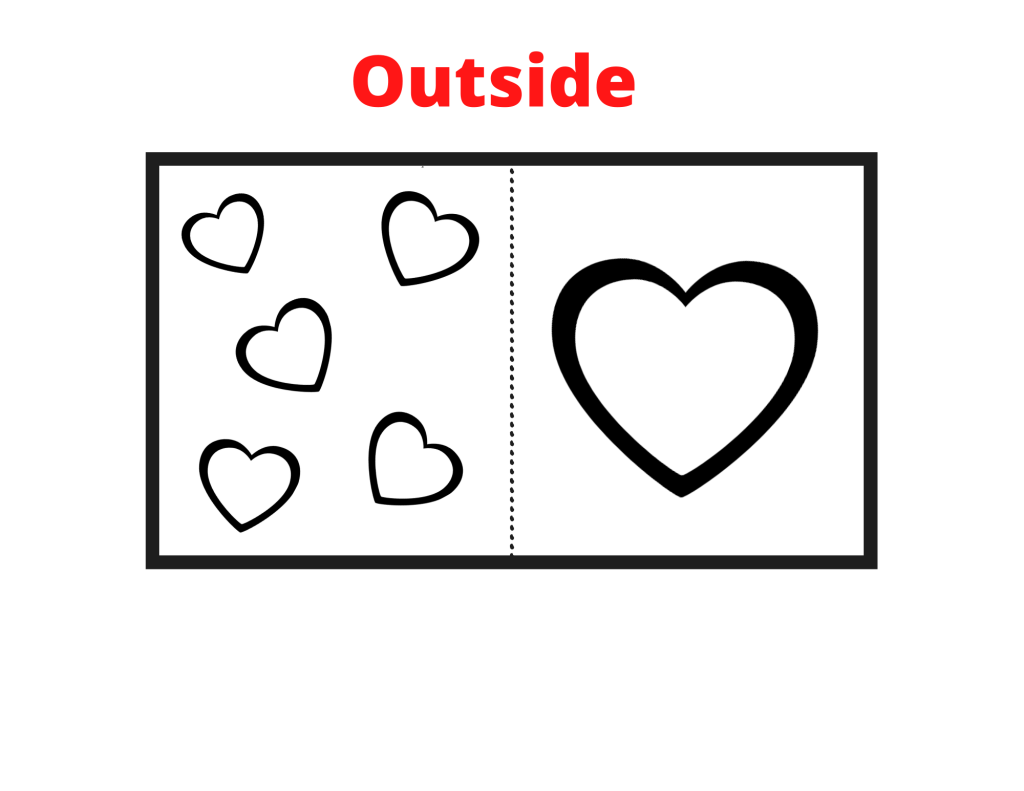
1.) Print templates (2 pages total). Print on white or colored cardstock. If using colored paper, use pastel colors. They will work best because you can add color on top and the color will show up. Cut out templates.

*If want card to be smaller or larger, change the scale in print settings.
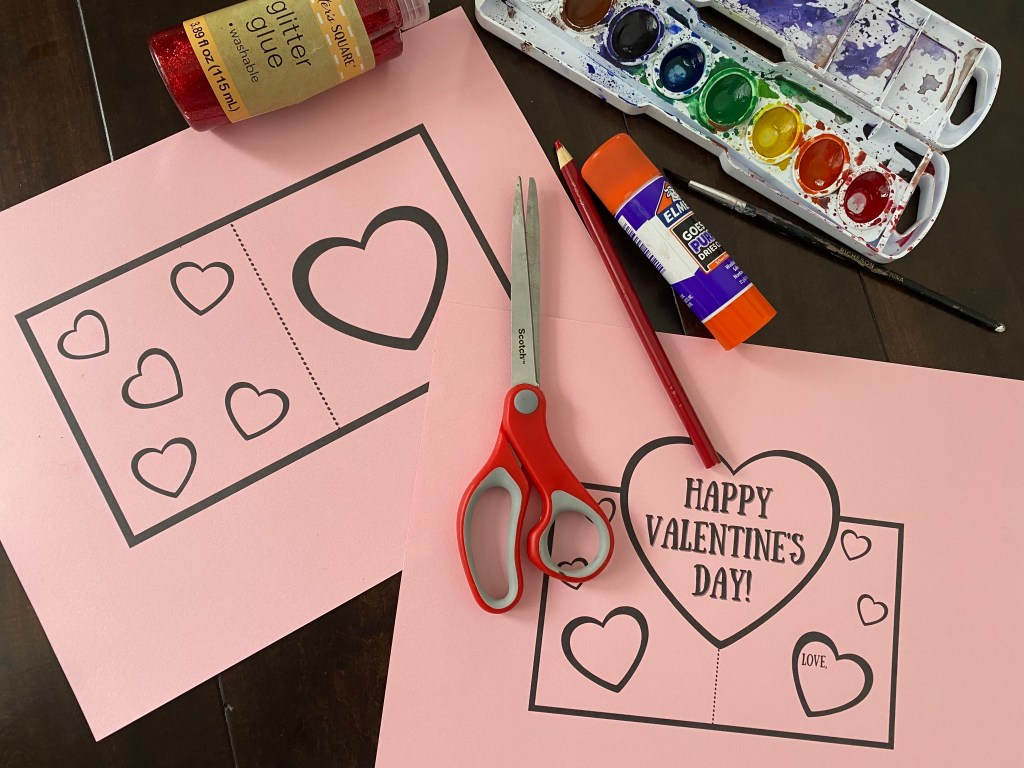
2.) Add color. You can add the recipients name in the big heart on front or just color it in, up to you. For ours we used red water color and red glitter glue. Use any materials you have available.
Color options: crayons, watercolors, markers, colored pencils, glitter glue, stickers, foam hearts
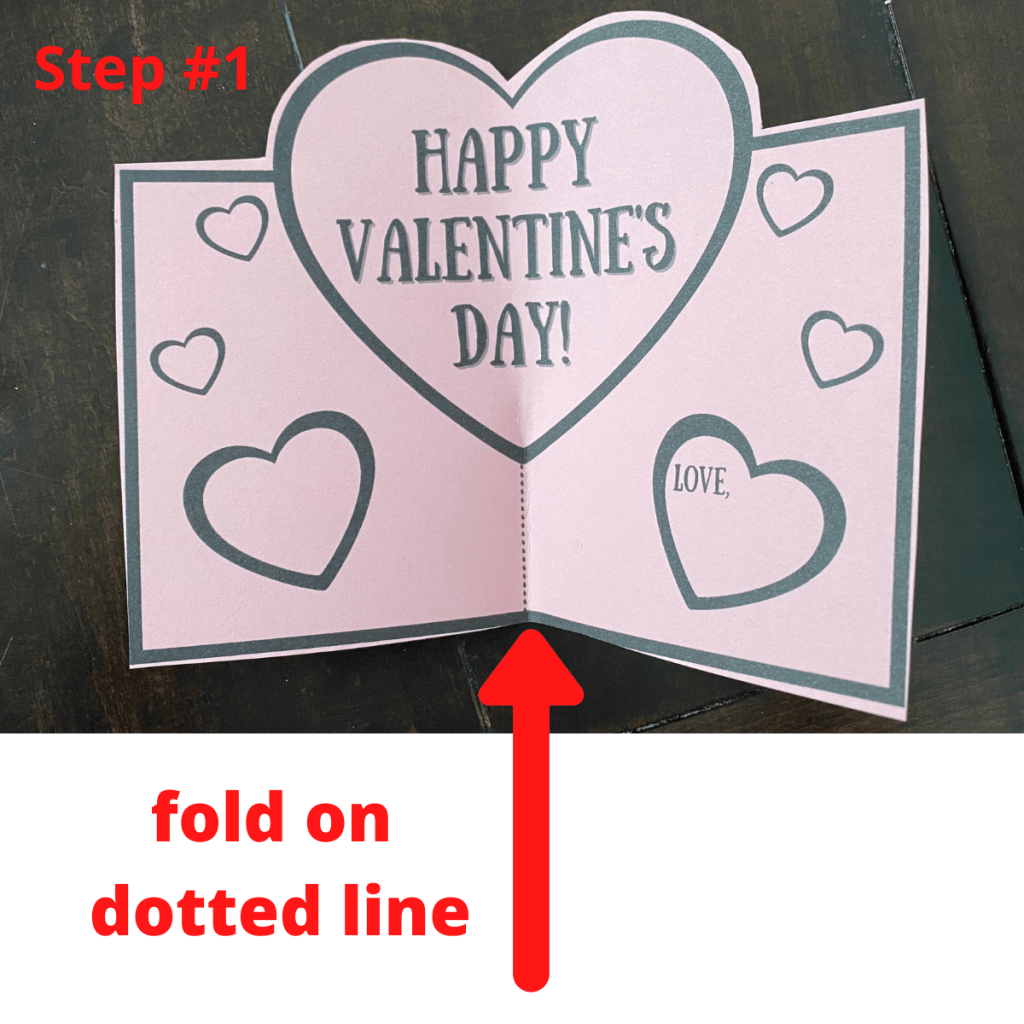
3.) Fold. Fold the the outside (bigger) card on the dotted line. Then fold the heart card (inside card) as shown below. Start by folding the bottom half and then the sides at an angle.

4.) Put together. With glue, double sided tape or a stapler (less messy), attach the heart card inside the larger card.

Happy Creating & Gifting!

- MAT Create is a participant in the Amazon Services LLC Associates Program, an affiliate advertising program designed to provide a means for MATCreate to earn small fees at no cost to you by linking Amazon.com and affiliated sites. The small fees are then used for supplies to make more posts.
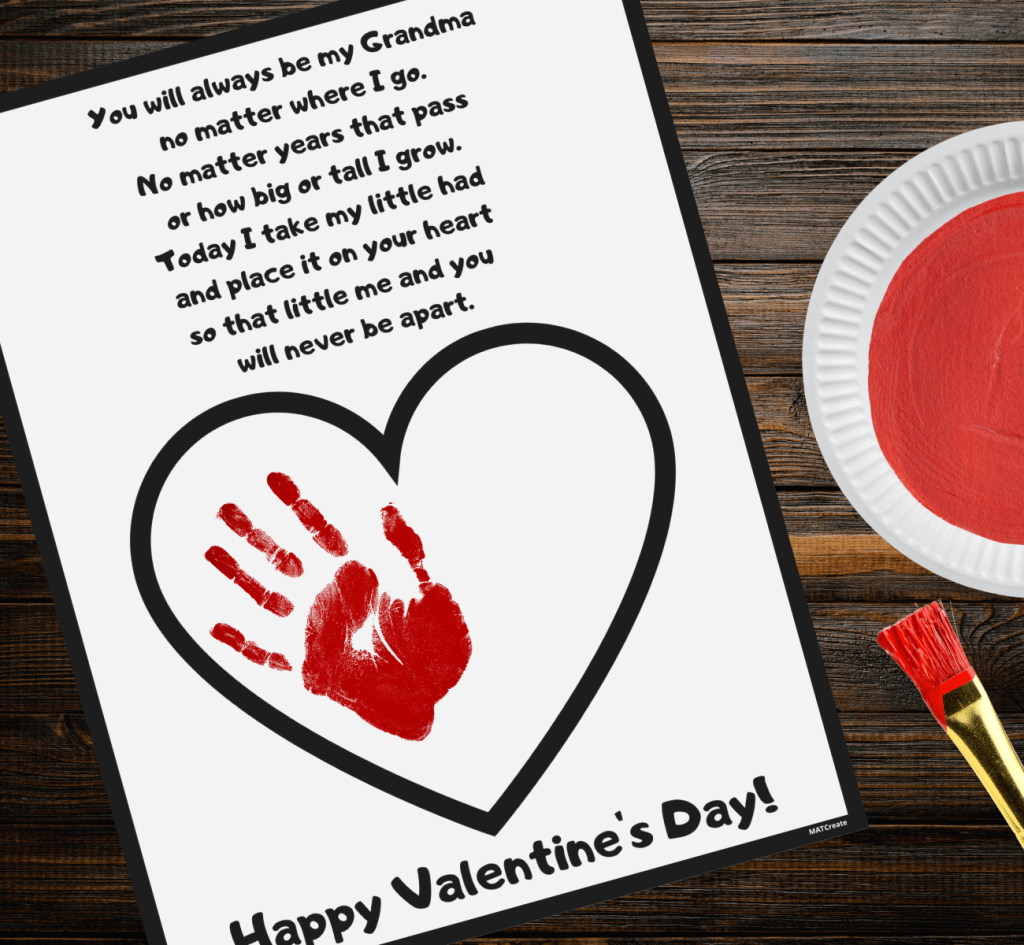
HEART HANDPRINT VALENTINE

Those little hands won’t be little forever. Make a memorable keepsake Valentine for Mommy, Daddy, Grandma/Nana or Grandpa/Papa to cherish! Only a few supplies needed to complete. They’ll love it!
Materials
- Heart Template
- white cardstock
- tempera paint
- paper plate
- large paint brush
- marker/crayon
Process:
1.). Choose which version of the template you want (Mommy, Daddy, Grandma, Nana, Grandpa, Papa). Names on first line in poem.
Print out the template on white cardstock
2.) Put tempera paint on a paper plate. With a brush evenly spread it out.
3.) Take one of your child’s hands and cover it with paint using a brush. Or they can place hand directly in paint, just make sure the entire hand is covered. You can always touch up areas missed with a brush.
Once hand is completely covered in paint, tilt their hand and place inside half of heart. Press down firmly on top of their hand.
4.) Repeat #3, but with other hand.
5.) After dry, have your child sign their name on the bottom left side. If too young, an adult can sign their name. Place date on opposite side.
Notes:
- If shipping, place inside an envelope, try not to bend it.
- If wanting to add more- add a photo of your child along with it and some chocolate hearts.
- As long as the paint isn’t applied too thick , you could also laminate before giving.
- Use construction paper behind it as a frame. Chid can color on the back side of it- then artwork on front & back.
Happy Creating & Gifting!

- MAT Create is a participant in the Amazon Services LLC Associates Program, an affiliate advertising program designed to provide a means for MATCreate to earn small fees at no cost to you by linking Amazon.com and affiliated sites. The small fees are then used for supplies to make more posts.
CANDY HEART ACTIVITIES

Every Valentine’s day it seems at least one box of candy hearts makes it way into our homes. Why just eat them when you can do lots of fun activities with them too?
I designed several worksheets for your littles to do. Best for ages 3+. They are of different skill levels. Print out only the pages you need. You can do them all at one time or break up into different days.
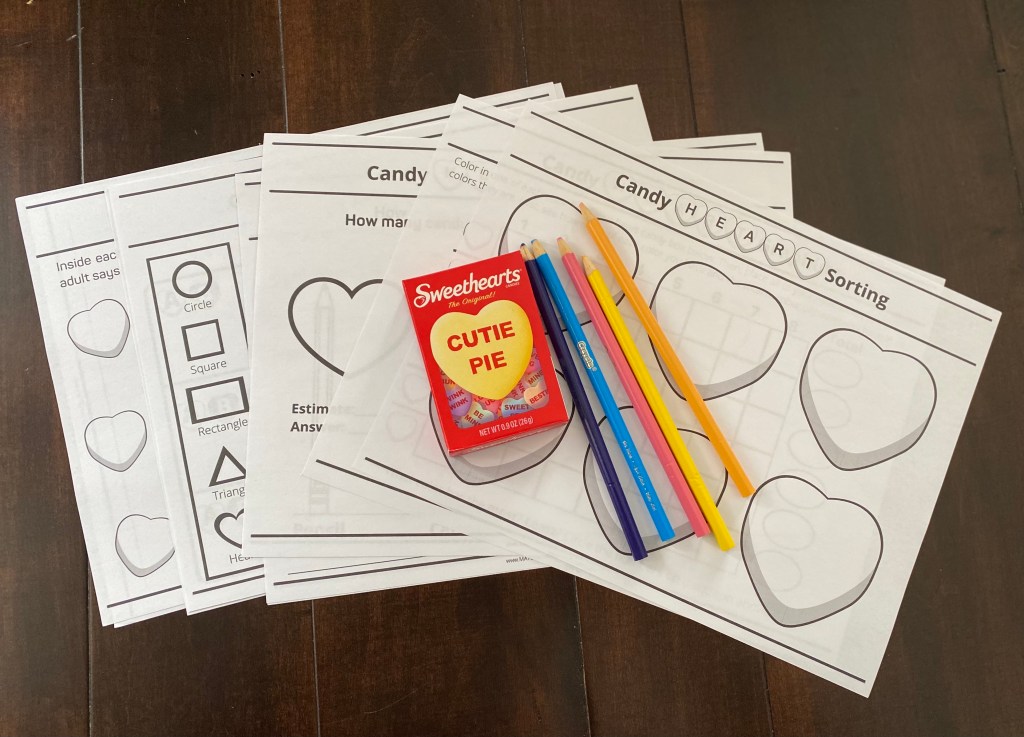
Materials:
- Candy Hearts
- Candy Heart Worksheets
- printer paper
- printer
- crayons or colored pencils
- pencil
I used a box of conversation hearts. There are lots of options out there- smaller boxes (may need 2) or bags. If you buy a bag ahead of time sort the hearts to make sure you have enough for each activity.
Sorting
Dump all of the hearts out into a bowl. Pick out one of each color and place each on their own heart.
Optional- color in hearts or write names of colors on hearts.
* If more than 6 colors, then just choose 6 to use for this activity. If more than eight of one color heart, eat the extra!


Graphing
Review the colors of the hearts from the first activity. Have your child color in one heart of each color.
Have your child/children take the hearts off of the sorting sheet and place in the correct columns on the graph. Then count to see how many of each color they have and then write the answer in the oval on the right.
Last, have them circle the colored hearts with the most and least (see example).
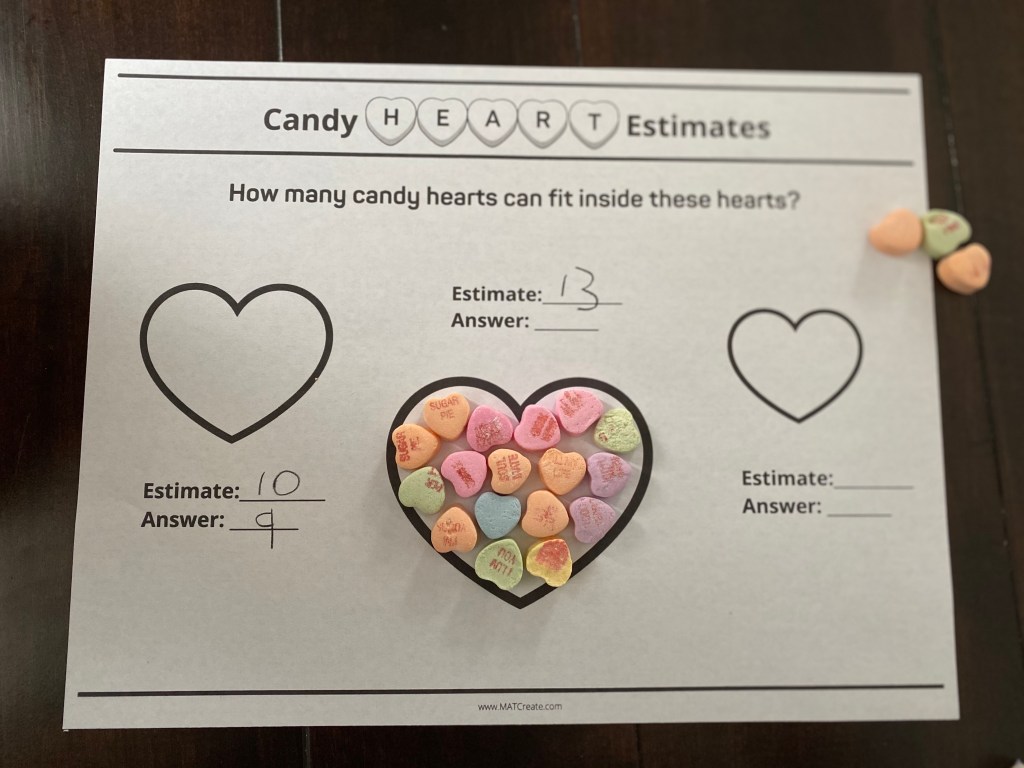
Estimating
Have your child guess how many hearts it will take to fill up the hearts on the worksheet. The candy hearts should not go over the black outline of the heart on worksheet.

Shapes Building Challenge
Have your child make the outline of shapes using the candy hearts. For younger children, draw the shape and then have them put candy hearts on the outline.
Optional: Make letters and numbers out of the candy hearts too.
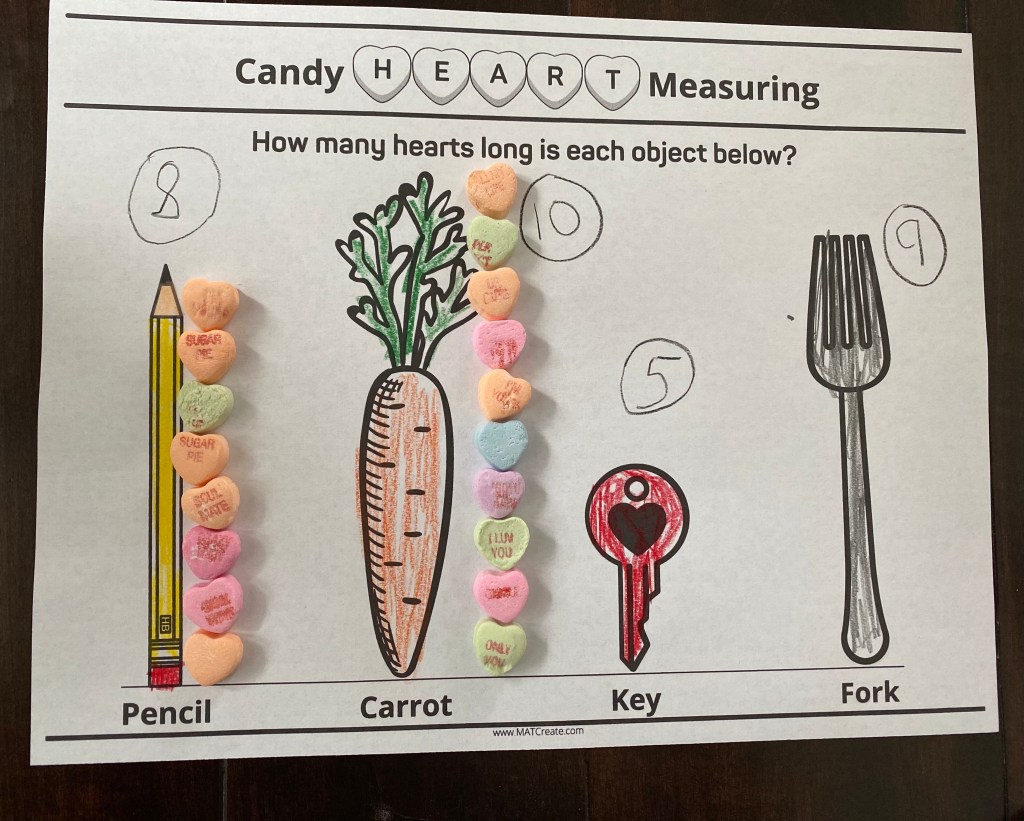
Measuring
Have your child figure out how many hearts tall an object is. Complete by stacking candy hearts in a vertical row the size of the objects on worksheet. Once complete, have them count the candy hearts and write down how many it took by the picture.
Optional: Find objects in your house and measure how many candy hearts long they are or wide. Make more challenging by having them guess before they do it. Then compare their guess and actual amount it was.
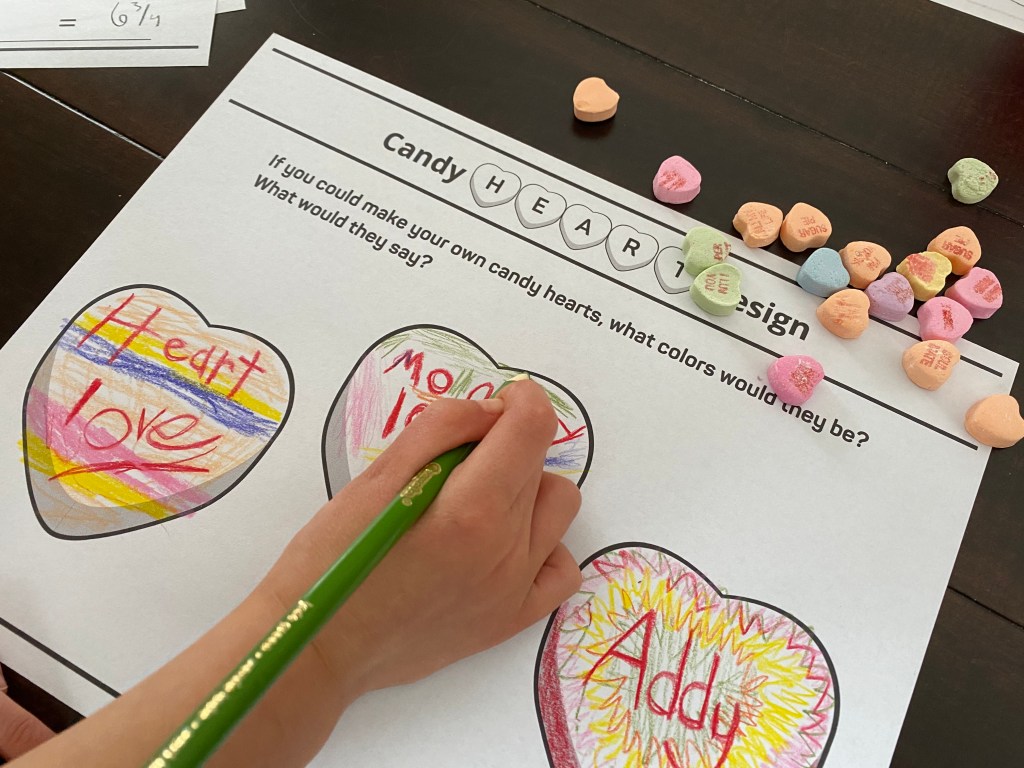
Design Your Own
What would your candy heart look like? Striped? Rainbow? No right or wrong way to do it. Have your child choose a phrase and then color the heart in. Review the phrases on the hearts before you write your own.
Patterns
Have your child complete color patterns. Copy the six examples in the boxes.
Optional: Can you come up with any more patterns?

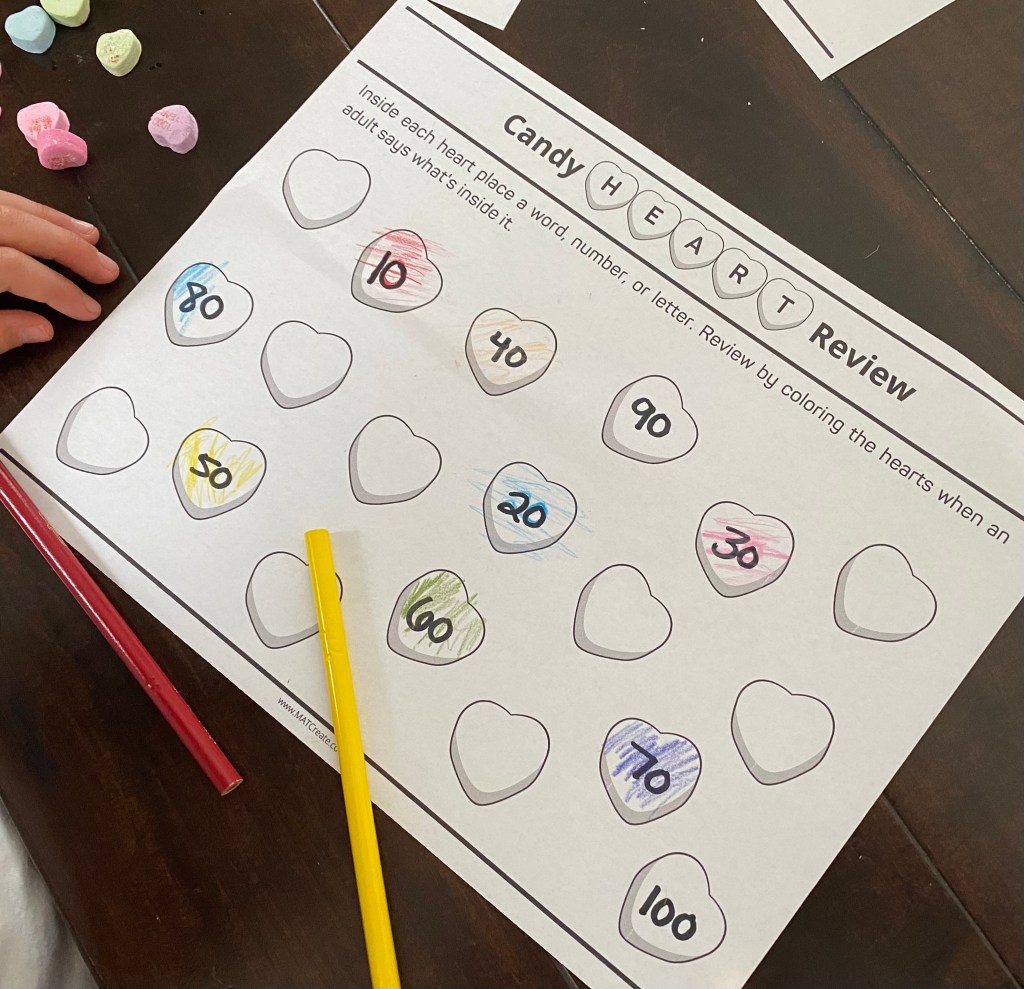
Review
Have your child review numbers, letters, or sight words by coloring them in once you say them. Ahead of time you will have to write what you want inside of the hearts.
You could also have them make a pattern in each row.
Example: My daughter is working counting by 10’s so she started out by coloring in 10 and then continued on until 100.
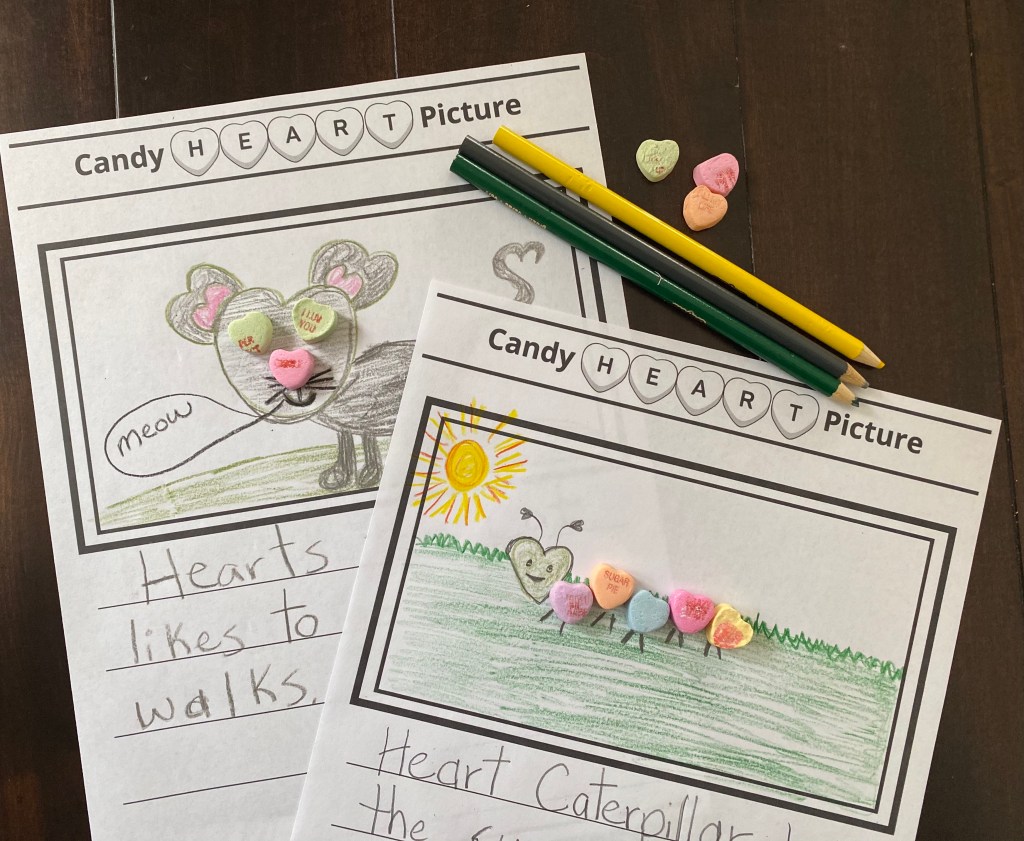
Draw a Picture
Make a picture that incorporates candy hearts. Then below have your child write a brief story or sentence about the picture they created. If too young to write, write the sentence/story for them.
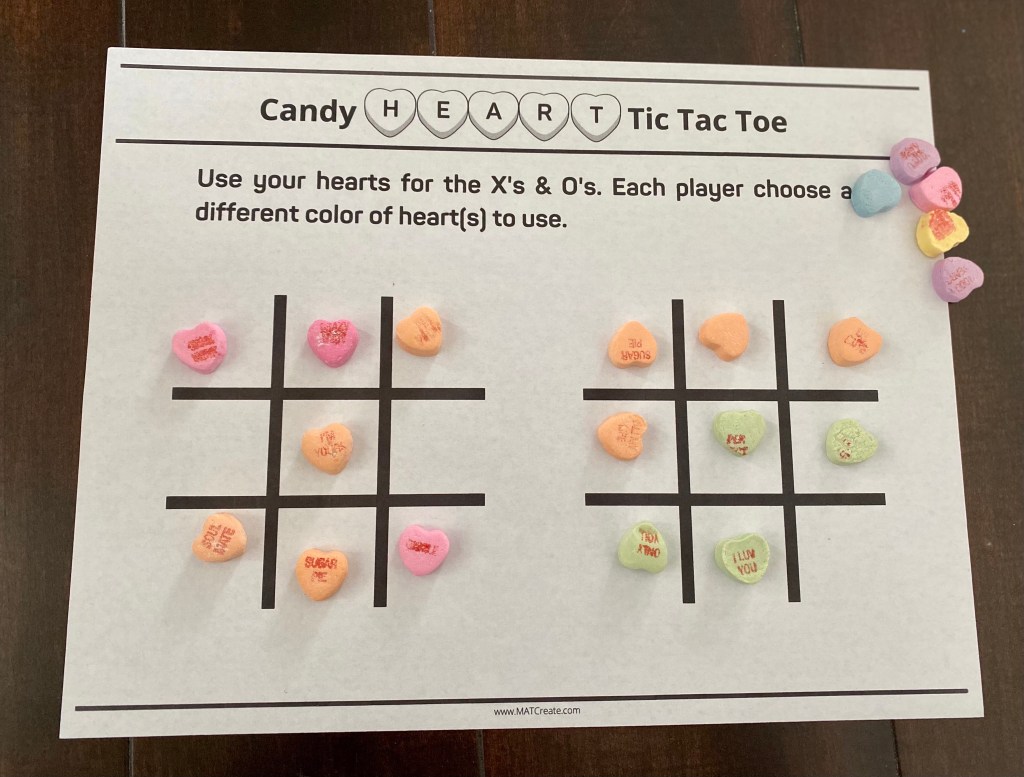
Tic Tac Toe
Play Tic Tac Toe! The winner of each game gets to eat one candy heart. Play until you run out of candy hearts.
Happy Candy Heart Day!

- MAT Create is a participant in the Amazon Services LLC Associates Program, an affiliate advertising program designed to provide a means for MATCreate to earn small fees at no cost to you by linking Amazon.com and affiliated sites. The small fees are then used for supplies to make more posts.
Sweet Valentine’s Day Coloring sheet

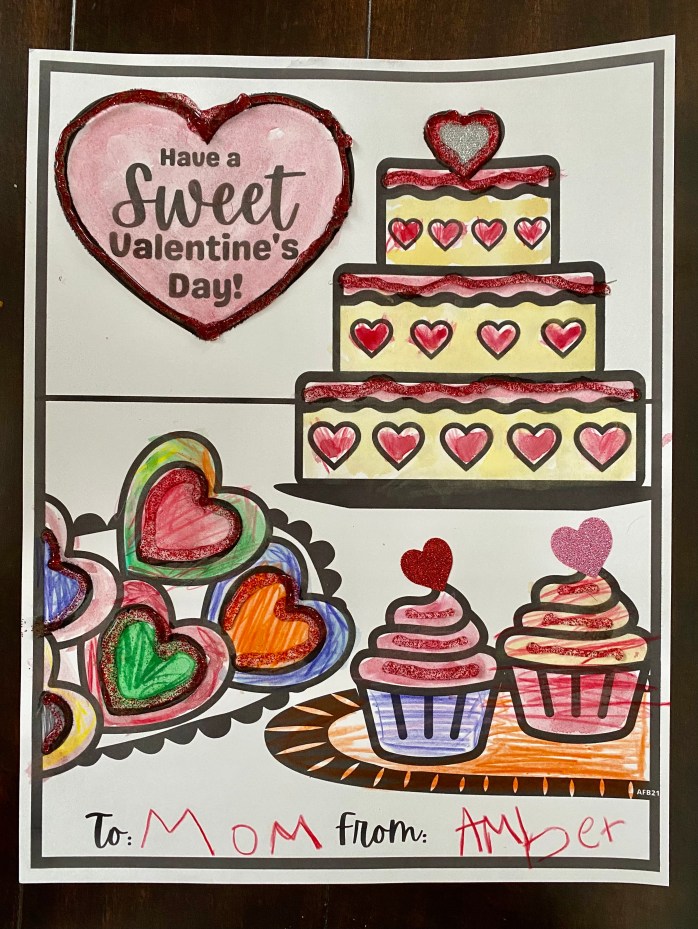
There is nothing more special than getting artwork from a child. The thought that they made something just for you is heart warming. This Valentines Day have your child/children complete this coloring sheet and give as a Valentine to a loved one. There are two options (differentiated by age).
The first option, for younger children, is simply just a coloring sheet. The second option, for older kids, allows kids to create their own cupcakes and decorate the cake & cookies. They can become pastry chef designers!


Materials:
- coloring sheet templates
- white cardstock
- coloring tools (see below)
- glitter, glitter glue pens, puffy paint, stickers (optional)
Lots of options to color in. You can use markers or crayons. Or you can use crayons first and then watercolors on top. I like to use tempera cakes if doing bigger areas. Can always add glitter, glitter glue pens, or puffy paint to make extra fancy too.
Want to get babies involved? Use their fingerprints to decorate and make hearts on the cookies, cake, and cupcakes. Simply place in washable ink pad or tempera paint.

Happy Creating & Gifting!

- MAT Create is a participant in the Amazon Services LLC Associates Program, an affiliate advertising program designed to provide a means for MATCreate to earn small fees at no cost to you by linking Amazon.com and affiliated sites. The small fees are then used for supplies to make more posts.
LOVEBUG VALENTINE

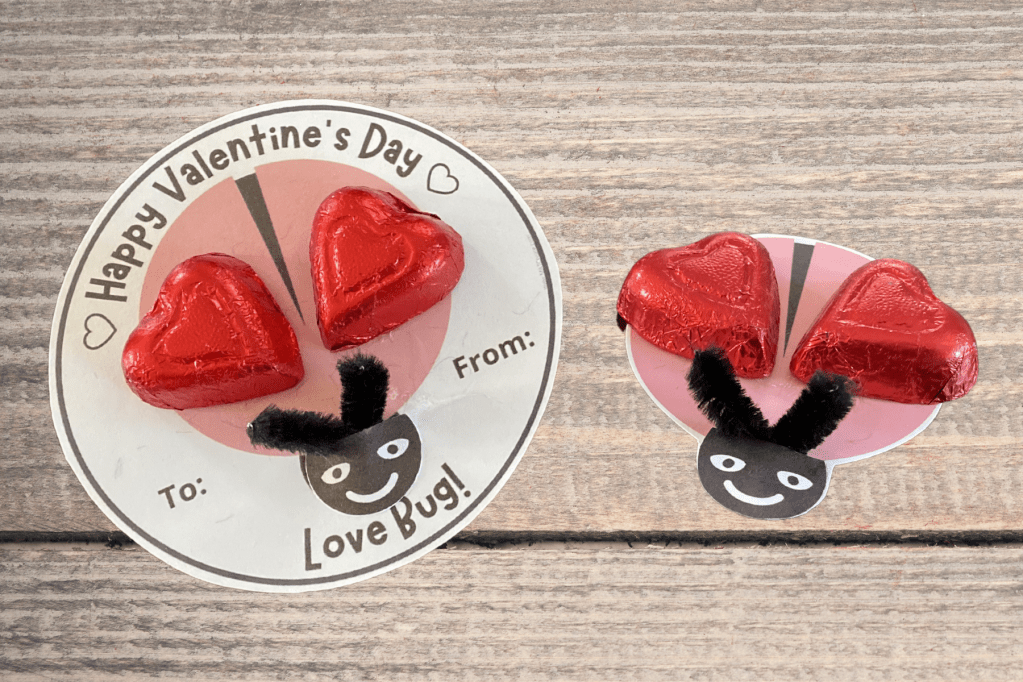
It’s almost Valentine’s Day- create a simple and sweet Lovebug Valentine for your family and friends. Simply print out the template, add antennae, and attach chocolate hearts. It’s cute and yummy!
Materials:
- Template
- white cardstock
- scissors
- printer
- black pipe cleaners
- glue ( glue or hot glue)
- marker/pencil
- chocolate hearts
Process:
1.) Print & Cut: Begin by printing the template. Decide if making the Lovebugs or the Lovebug Valentine card. Cut out.
2.) Antennae: Cut the black pipe cleaner, so that it is about an inch long. Fold in half. Bend the base side down. With glue, attach to the head (bent base). Then spread two ends apart to look like an antennae. See below:
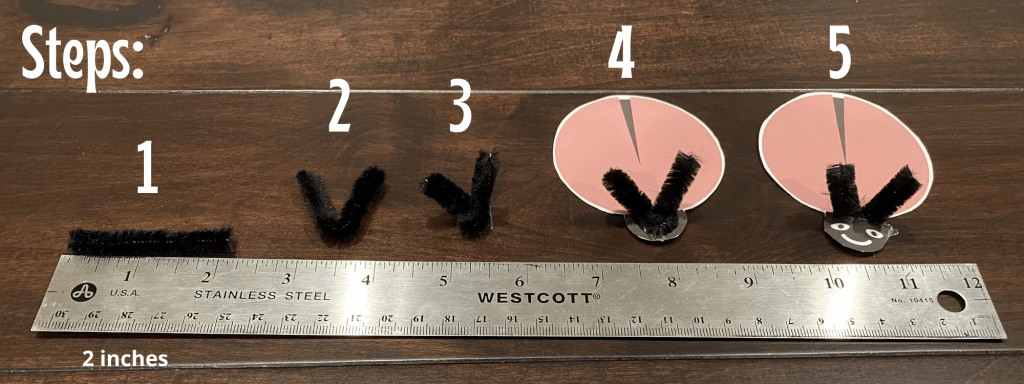
3.) Attach head: On top of the pipe cleaner base, place more glue. Place head on top, push down. See above example.
4.) Attach Candy: place glue on top of the wings, then place chocolate on top to create the wings.
5.) Address: fill in to and from.
Happy Creating & Gifting!

- The Lovebug Valentine templates are an original design. The templates are for personal or classroom use only. By using them, you agree that you will not copy, or reproduce the templates, except for your personal use, noncommercial use.
- MAT Create is a participant in the Amazon Services LLC Associates Program, an affiliate advertising program designed to provide a means for MATCreate to earn small fees at no cost to you by linking Amazon.com and affiliated sites. The small fees are then used for supplies to make more posts.
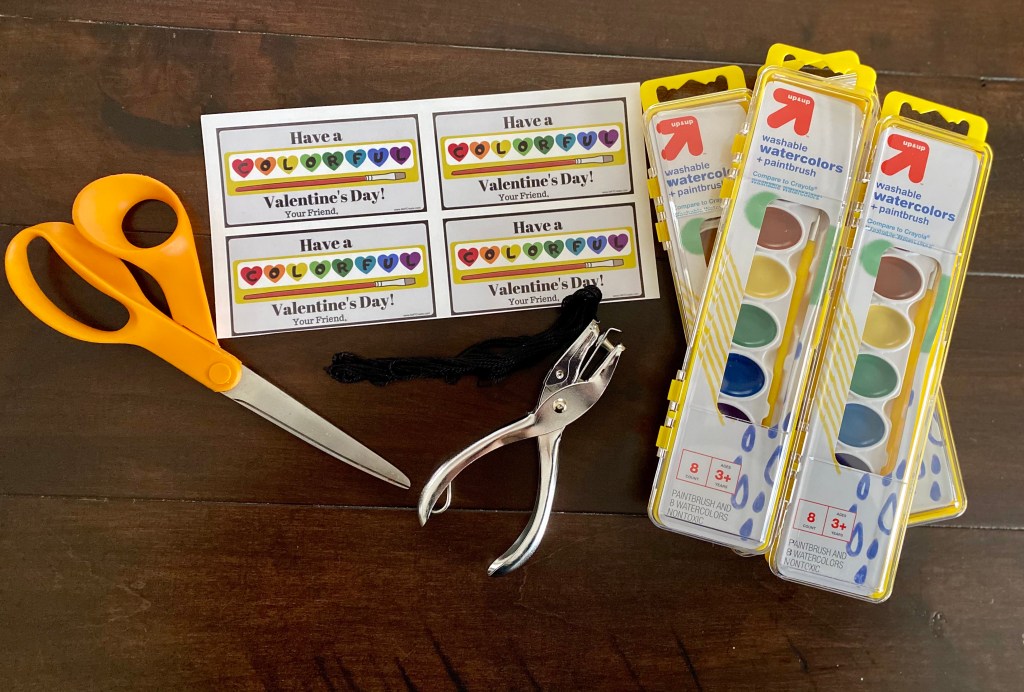
COLORFUL WATERCOLOR VALENTINE

These Valentines are easy to make, fun to get, & provide lots of fun at home too. Watercolors are always a big hit with kids and you don’t need many supplies to use them- just water and paper. Plus they don’t stain surfaces or clothes (like some paints) and easy clean up.
I made these two years ago for my daughters class and a few of her friends too. I wanted a non-candy valentine. It was perfect because incorporated art as well. They were a big hit.
Materials:
- Colorful template
- white cardstock
- scissors
- printer
- single hole punch
- yarn (to attach)
- watercolors
To make:
1.) Print out templates. Cut out.
2.) Sign your child’s name on template. Remove paper inserts from watercolors.
3.) With a hole punch, punch a hole at the top of template (see example). Slide string through and attach to the watercolors.

Notes: If buying for a class, buy watercolors in bulk, you’ll get a better price. The going price for watercolors is about $1.00 each (not professional grade). You can get them also at Target, Walmart, Hobby Lobby, DollarTree.
* The Valentine Templates are an original design. The templates are for personal or classroom use only. By using them, you agree that you will not copy, or reproduce the templates, except for your personal use, noncommercial use.
Happy Creating & Gifting!
- MAT Create is a participant in the Amazon Services LLC Associates Program, an affiliate advertising program designed to provide a means for MATCreate to earn small fees at no cost to you by linking Amazon.com and affiliated sites. The small fees are then used for supplies to make more posts.
