LEAF MAN NATURE WALK & ACTIVITIES

When the leaves start to fall off the trees- it’s fall! . That also means it’s time to read the book Leaf Man by Lois Ehlert. A wonderful book about a pile of leaves that look like a man. Hence, the title “Leaf man”. The leaf man travels with the wind and sees more amazing things made out of leaves. The illustrations are made from actual leaves and die cut pages- not only is it a book, but also beautiful artwork! Create your own beautiful artwork out of leaves by completing the activities below.
Materials:
- Leaf Man by Lois Ehlert
- bag (to put collected leaves in)
- leaves, acorns, sticks, rocks (get on nature walk)
- construction paper
- scissors
- crayons (no paper on)
- regular white paper (ink jet)
Process:
Start by reading Leaf Man to your child/children. If you don’t have a copy or are unable to get one fro your local library. Here is a great link to watch a read aloud on YouTube. After reading/watching the book, discuss where you can find leaves, acorns, pine cones and the other objects used to create the pictures in the book.
Now, go on a nature walk. Bring along a bag to put your collection in.

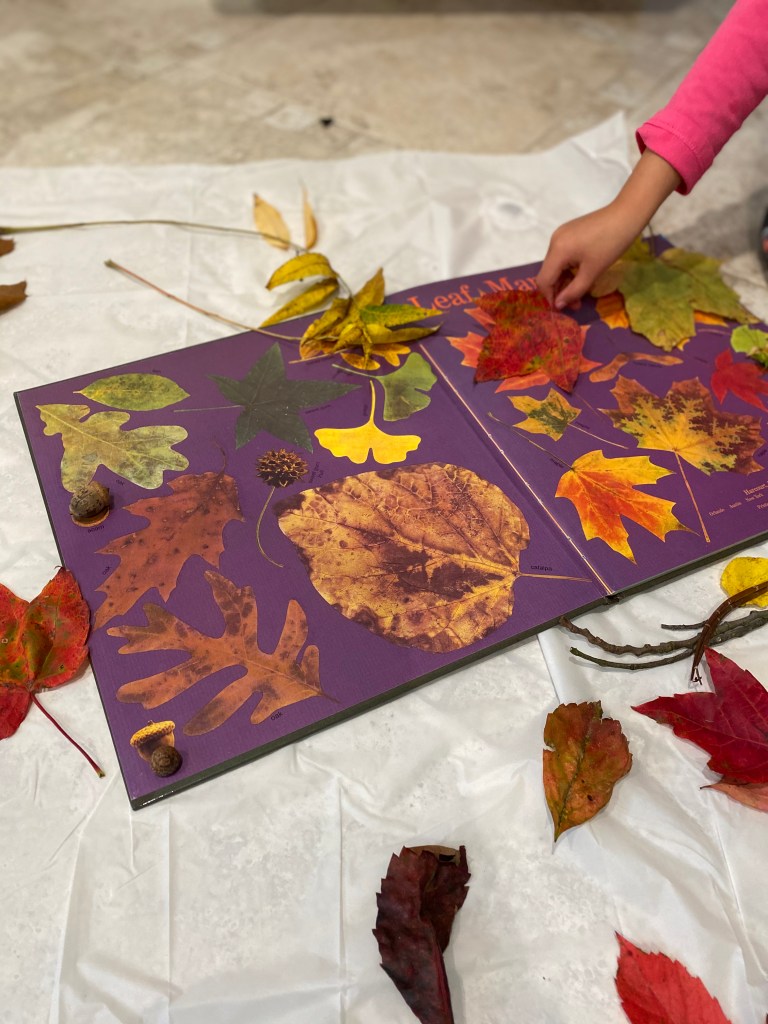
Once home, spread all of your collection out and organize by category.

Once organized, using the book, try to identify the leaves you have found.

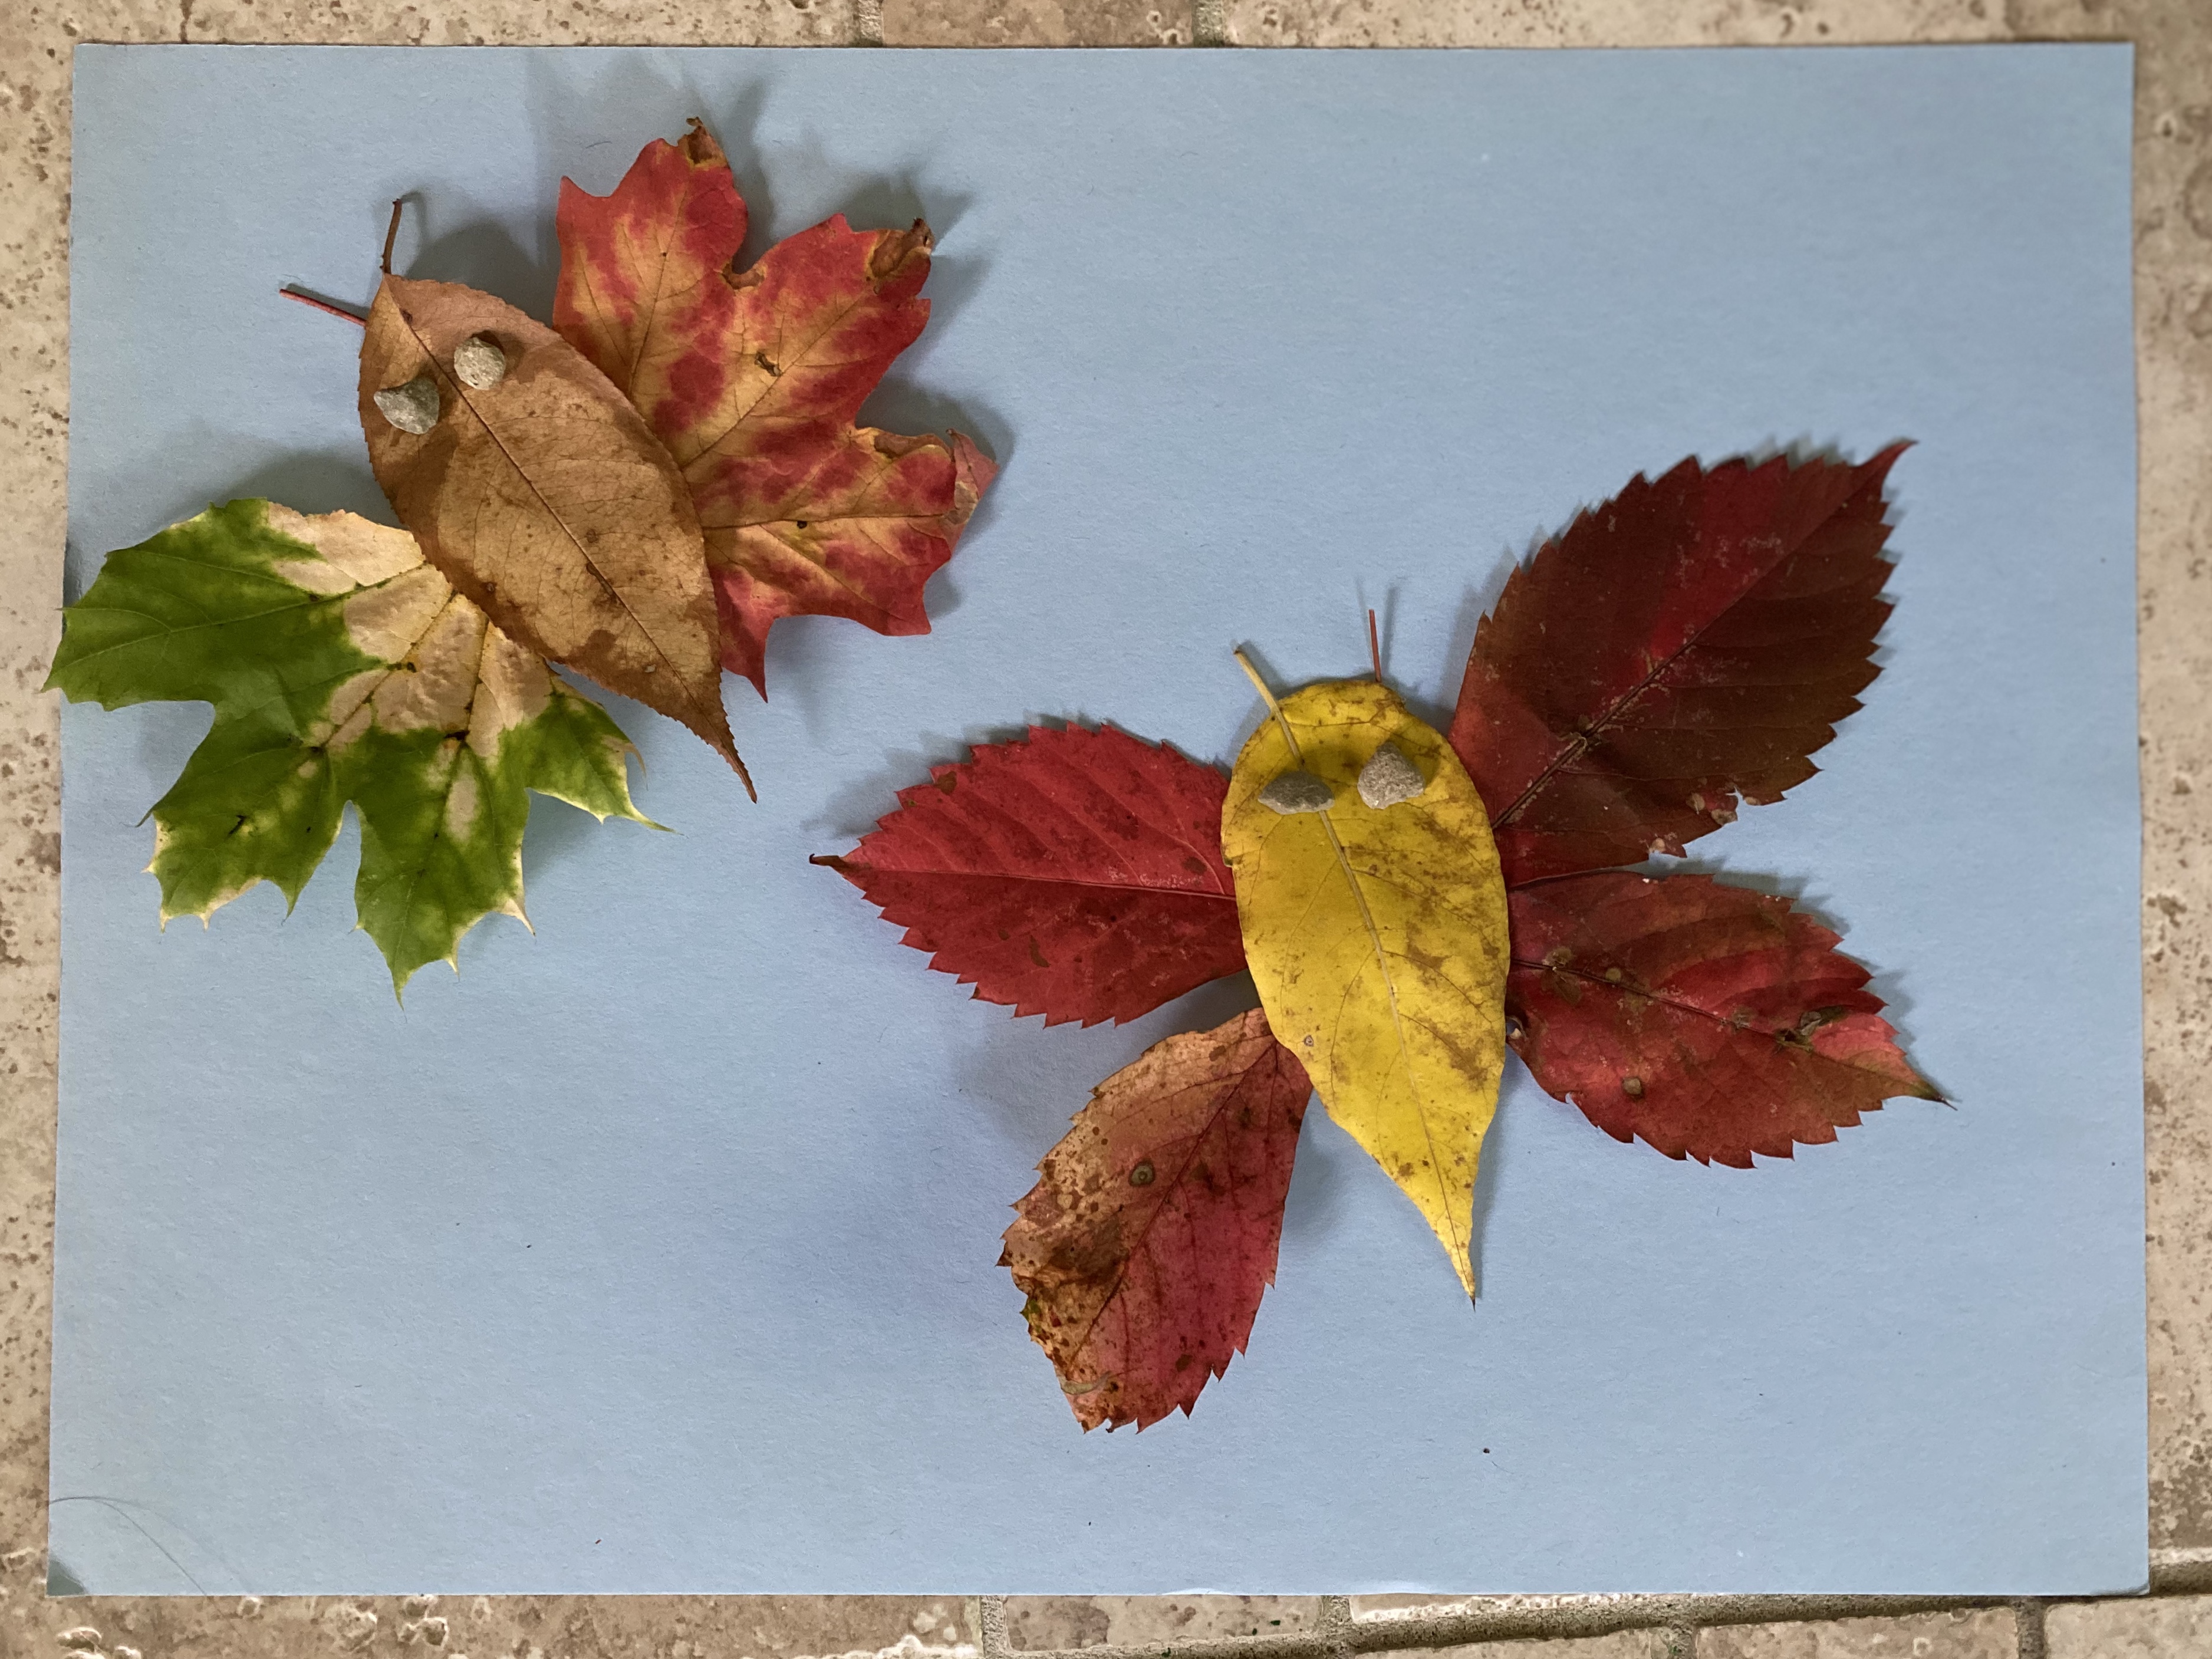
Now, let your imagination and creativity take over. Create your very own Leaf Man! It can look like the Leaf Man in the book or
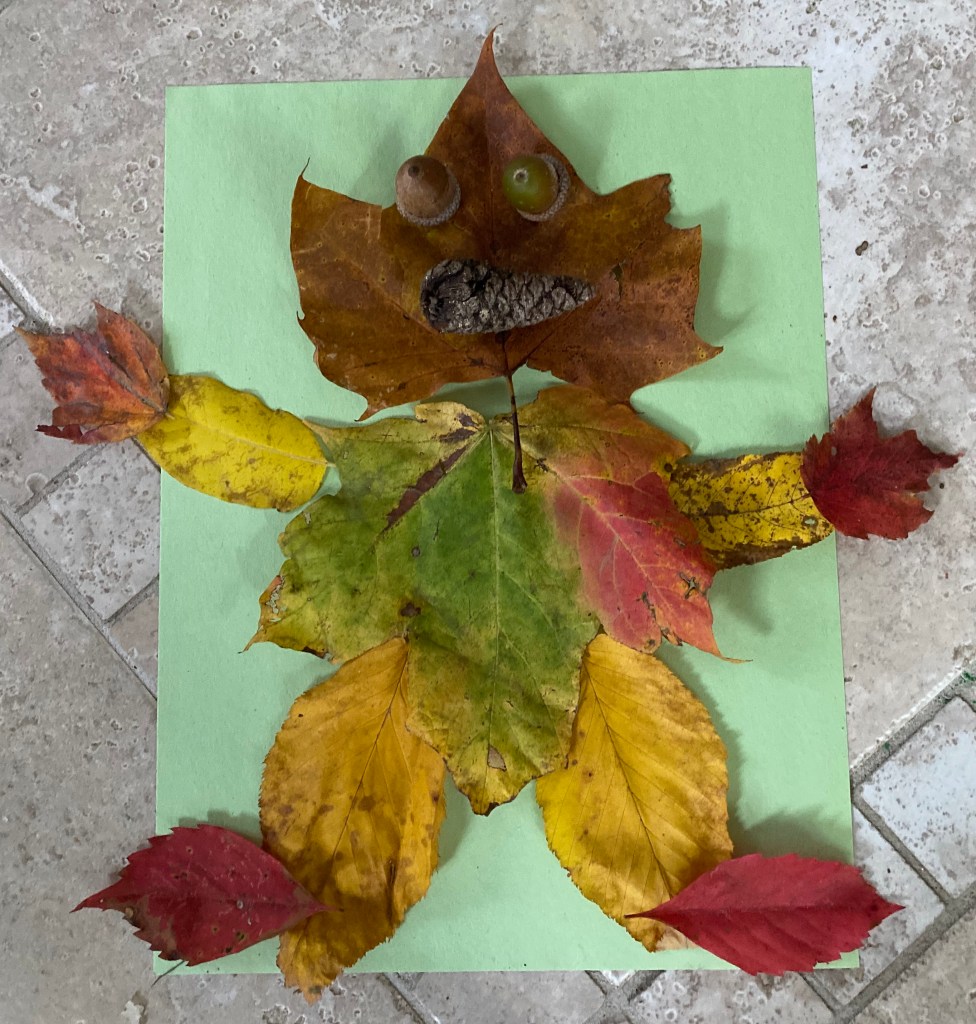
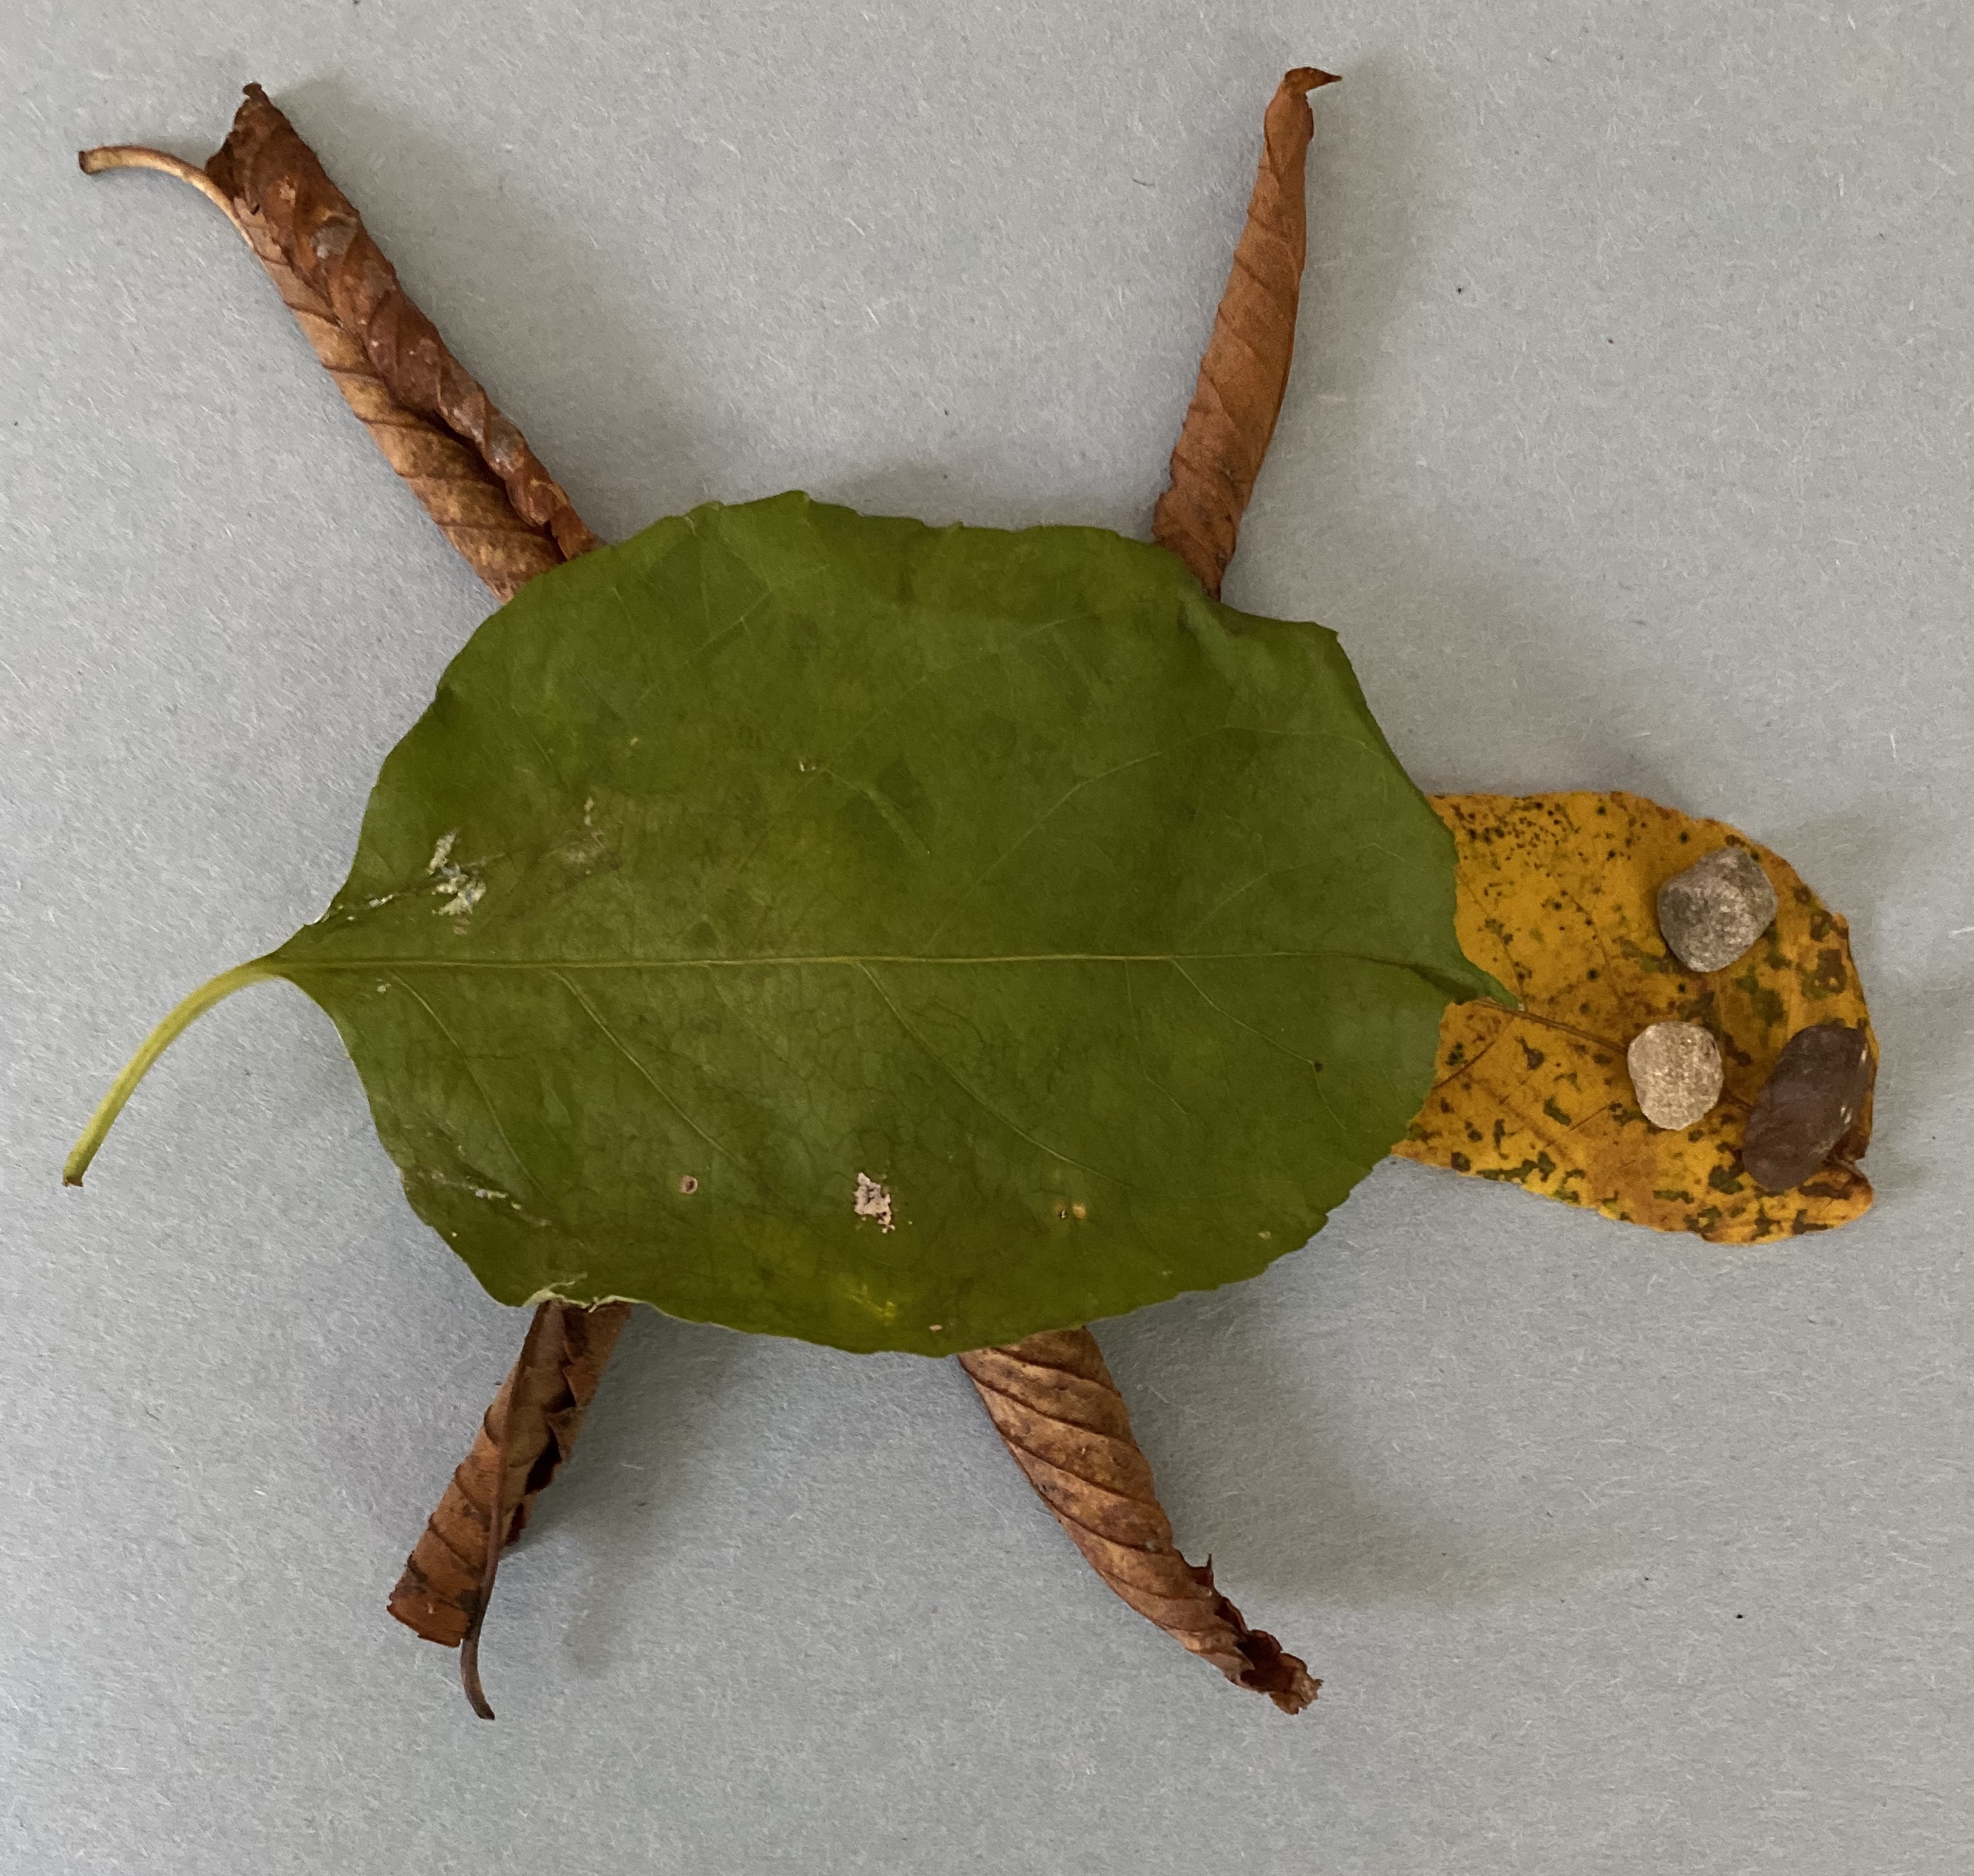
Older children can try to remake the images in the book or smaller children with help from an adult. Try to make up new animals or creatures as well!
Here are some examples we made:


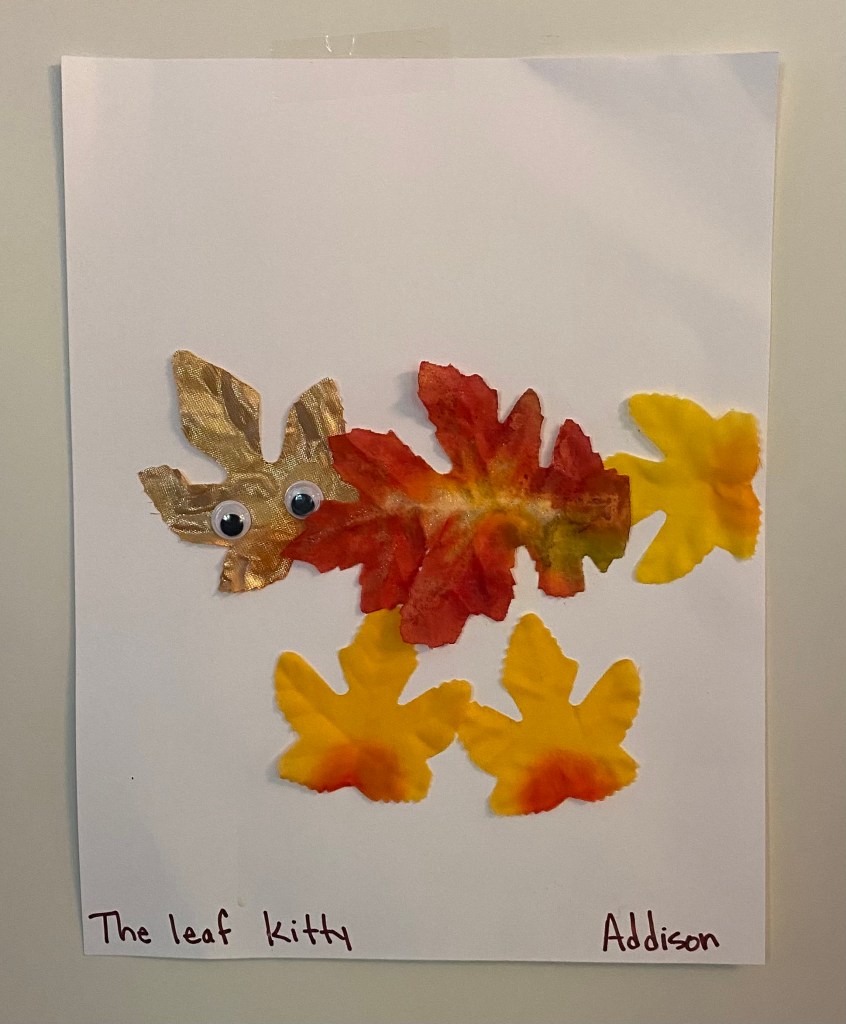
Unfortunately the artwork we made won’t last more than a few days due to the leaves shriveling. In order to keep our creations, we made a leaf rubbing collage of our leaf person. If you want to keep your pictures, buy artificial leaves. Artificial leaves do not work as well for leaf rubbings. Below is an exmaple of a kitty my daughter made in school.
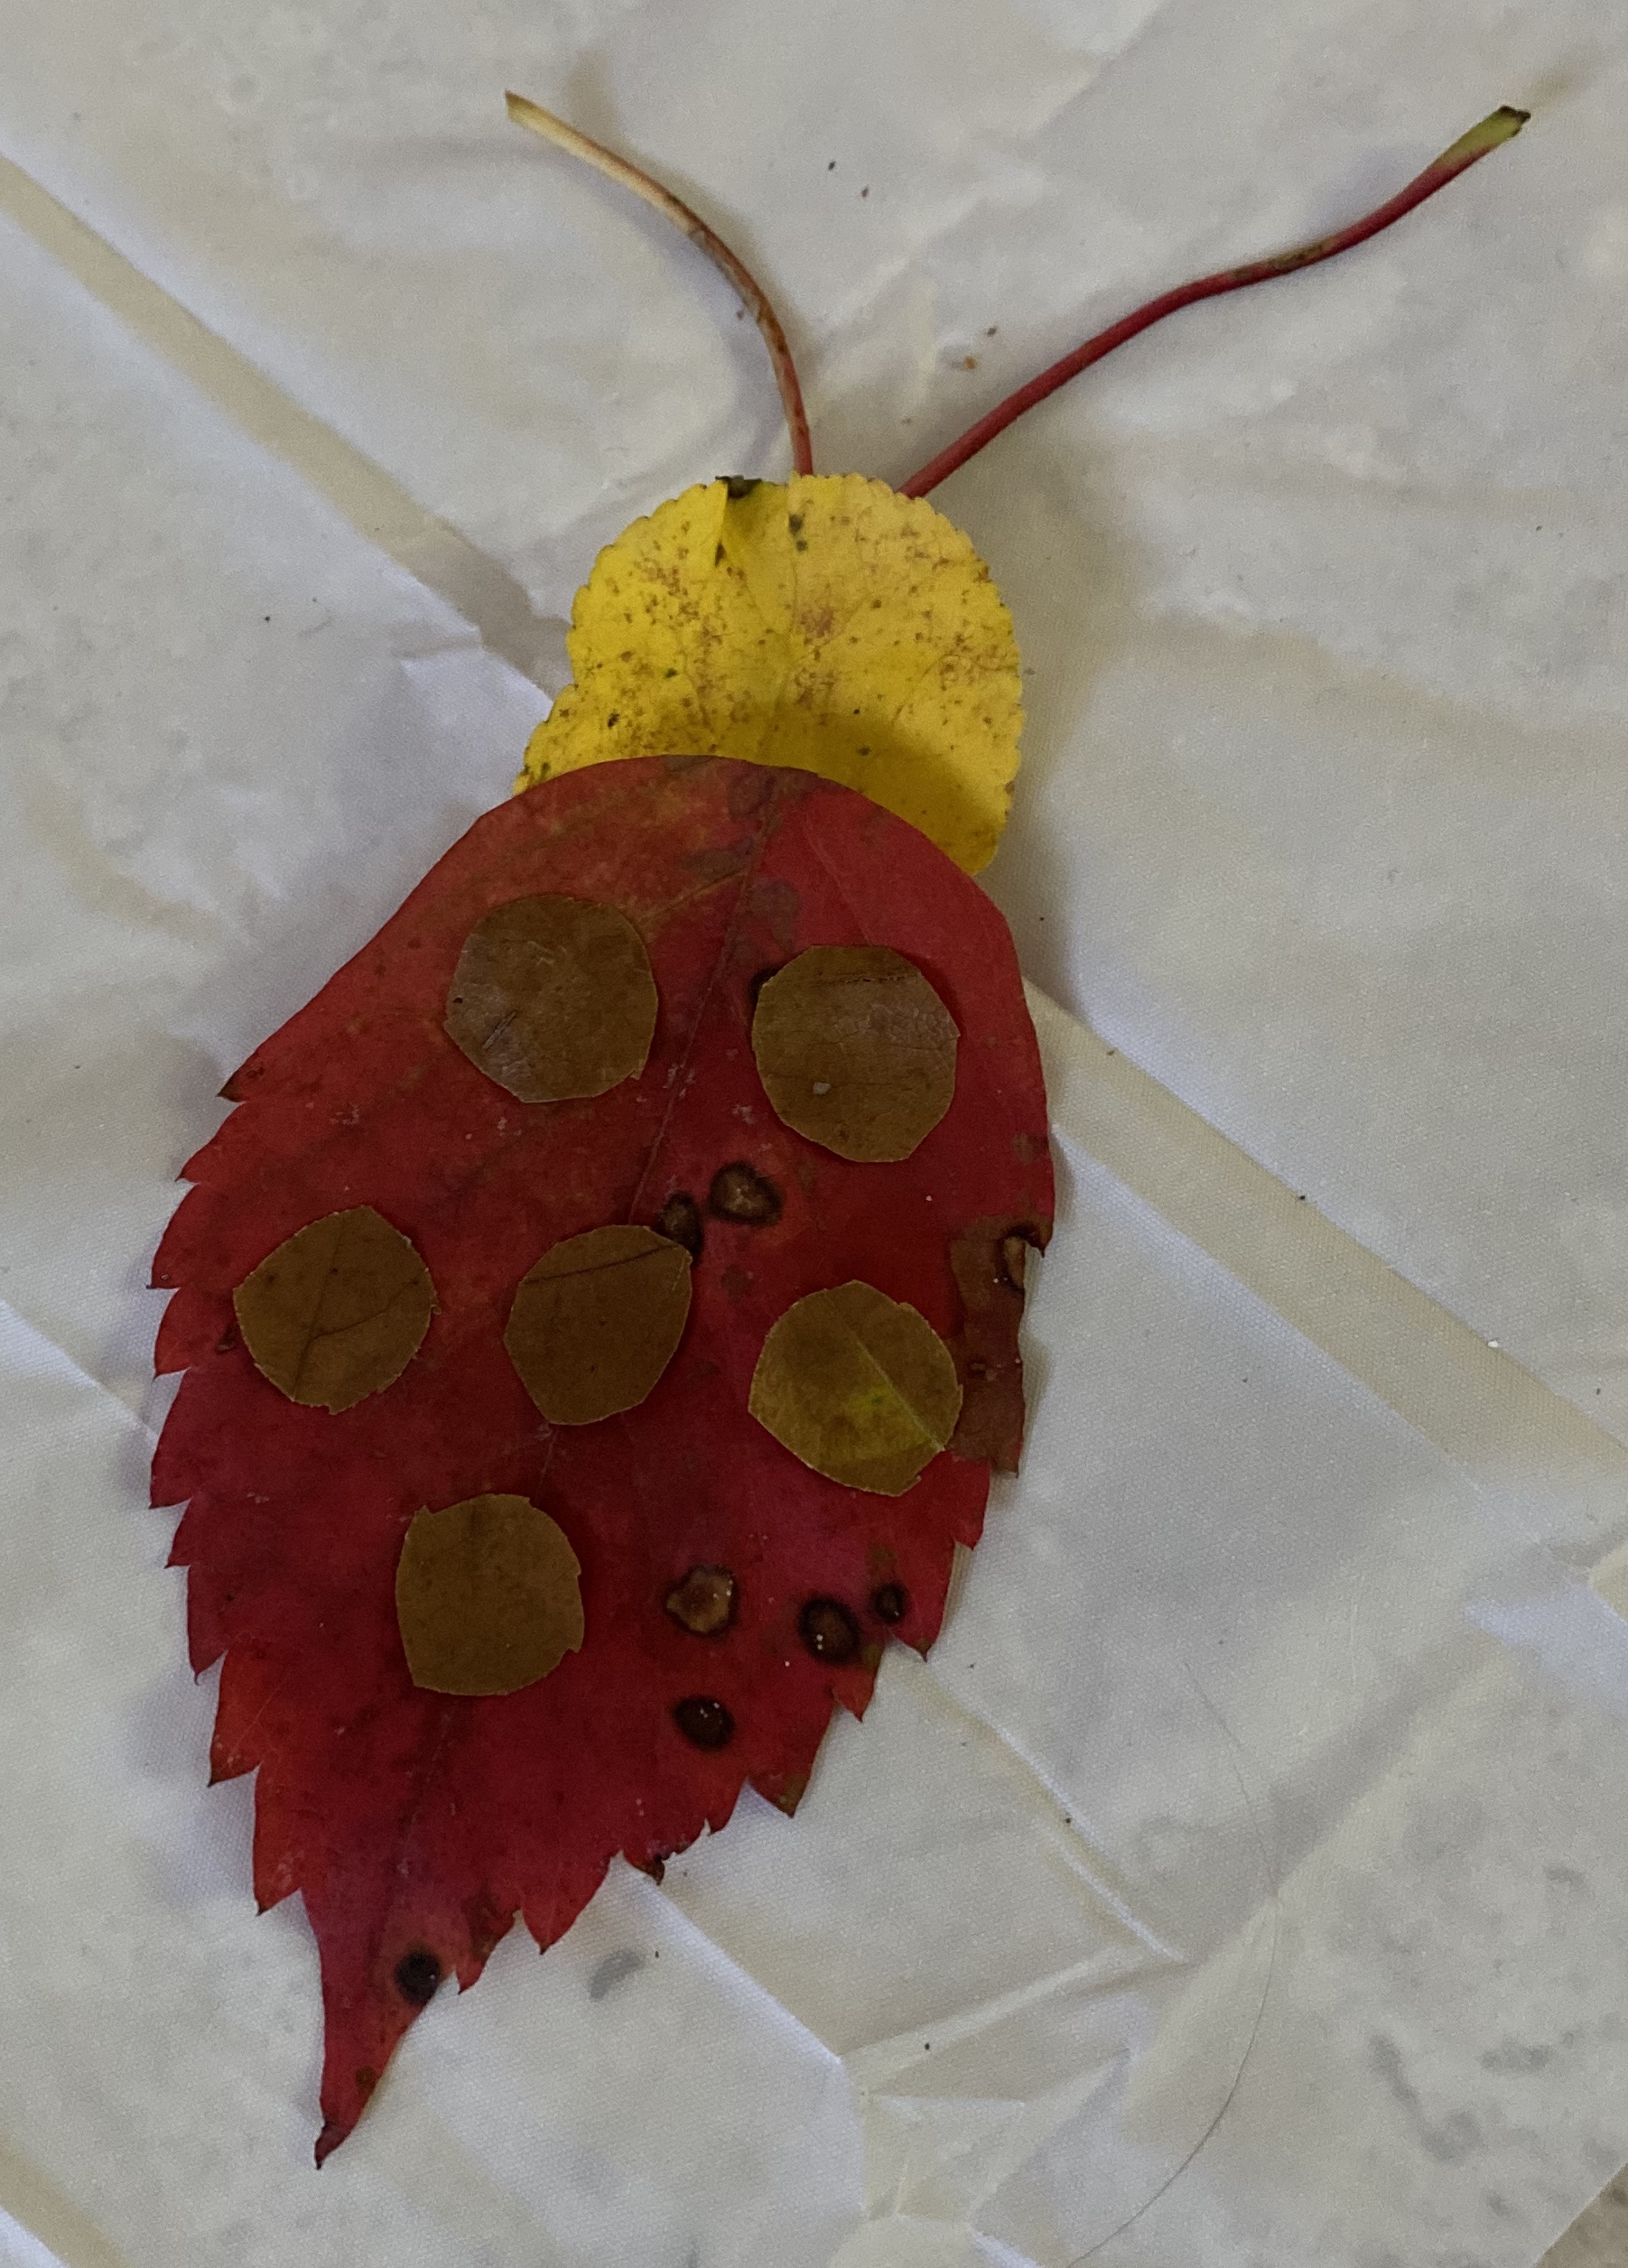
To do a rubbing:
1.) Place leaf (bottom side facing up)under a white sheet of paper.
2.) Using a crayon on its side, rub across the paper where the leaf is under. The outline of the leaf will start to come through, the more your rub.
3.) Repeat with another leaf on the same paper if room, or on a new sheet.
Once you have done rubbing of all the leaves in your leaf person, cut them out and assemble him/her back together.


Note: You can use artificial leaves to create leaf creatures if you want to save them.
POST HALLOWEEN TRICK OR TREAT

Why let trick or treating be only one day? Take advantage of all the candy you have and trick or treat again and again. The fun doesn’t have to end.
My daughter was so upset that Halloween was over and she couldn’t trick or treat anymore. We came up with a solution. Trick or treating inside our house. We did it multiple ways, many times to keep it fun. Each time we did it, she changed her costume too.
Materials:
- candy
- bowls
- stuffed animals
- Halloween music
- cardboard (for door) or actual doors
- costumes
Options:
Option #1: Place stuffed animals behind a doors in your house. Have your child/children knock on the door and then the adult opens the door. Child/children then take a piece of candy from the bowl. Repeat at all of the doors in your house. If an adult doesn’t want to be behind the door to open, then child/children can open the door after knocking.
You can also do this with adults and siblings, instead of stuffed animals behind the doors. Then take turns trick or treating.
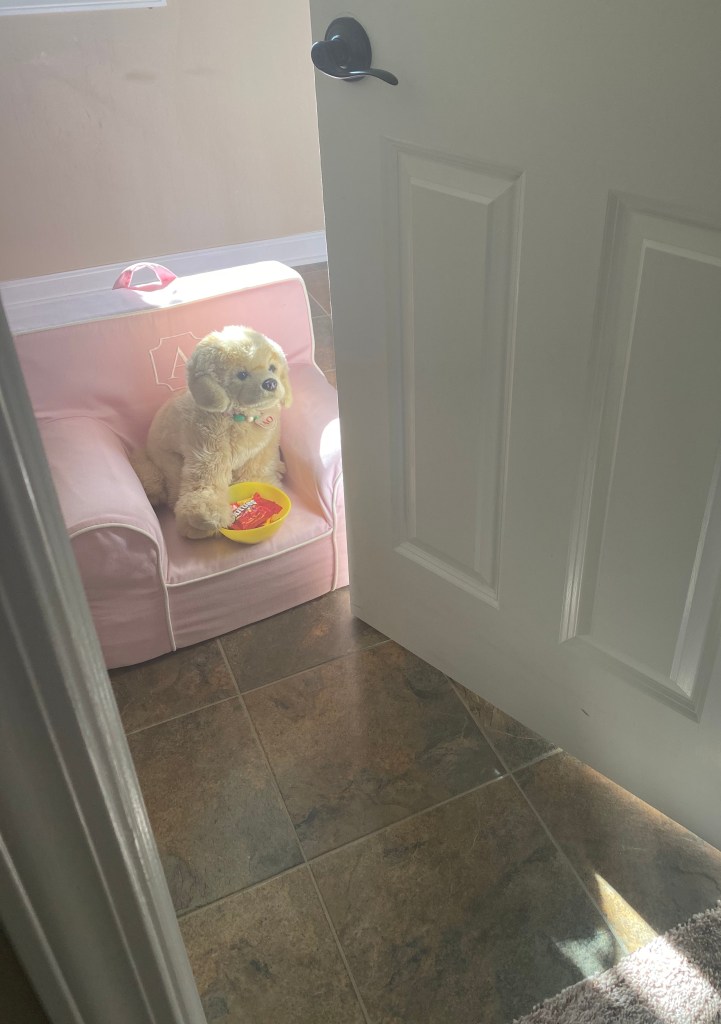
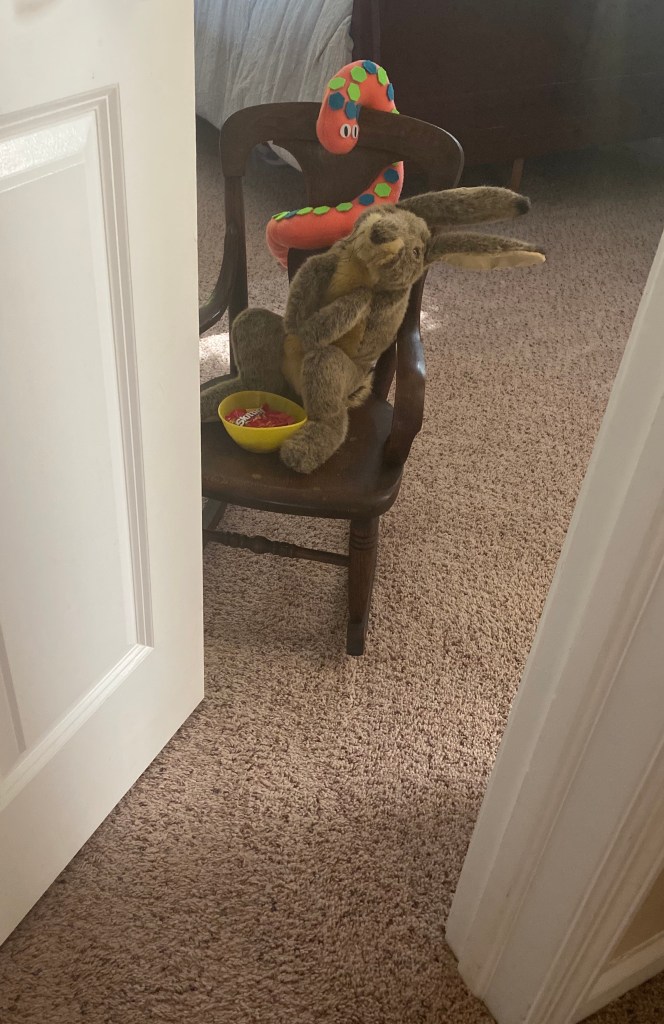
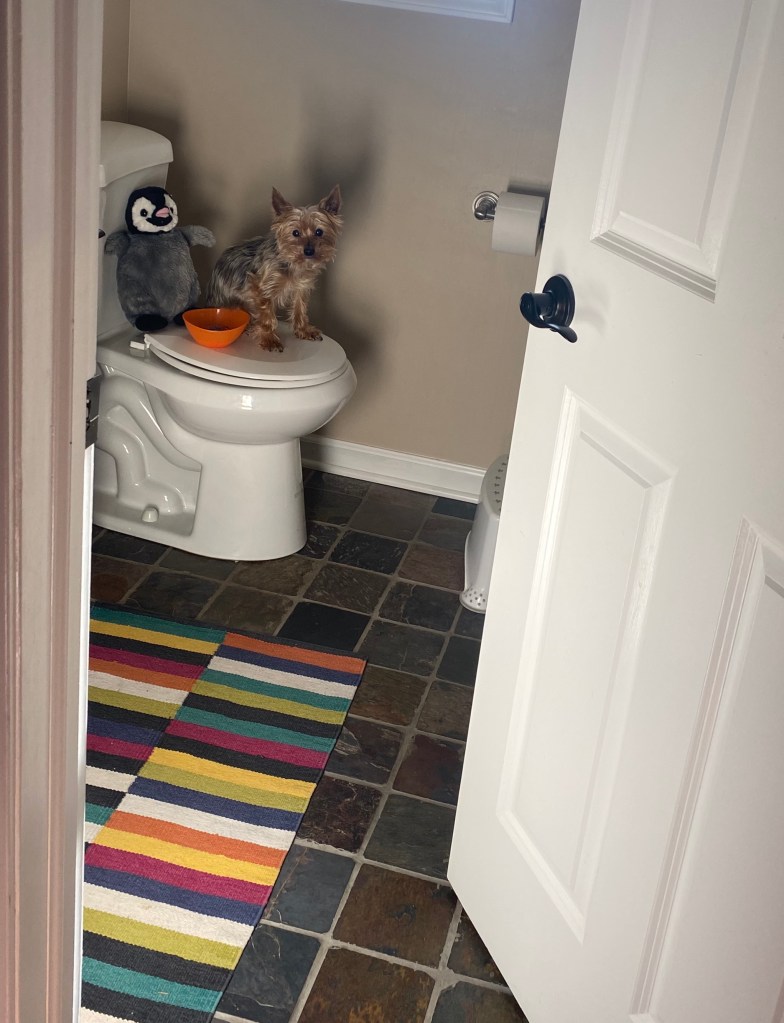
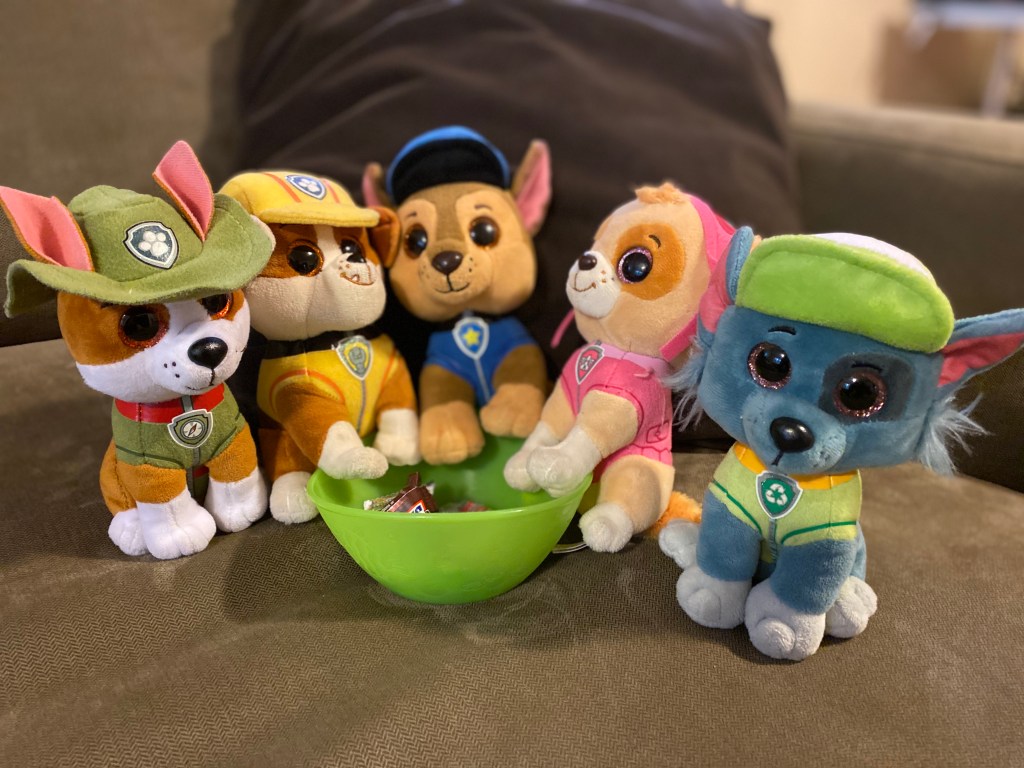
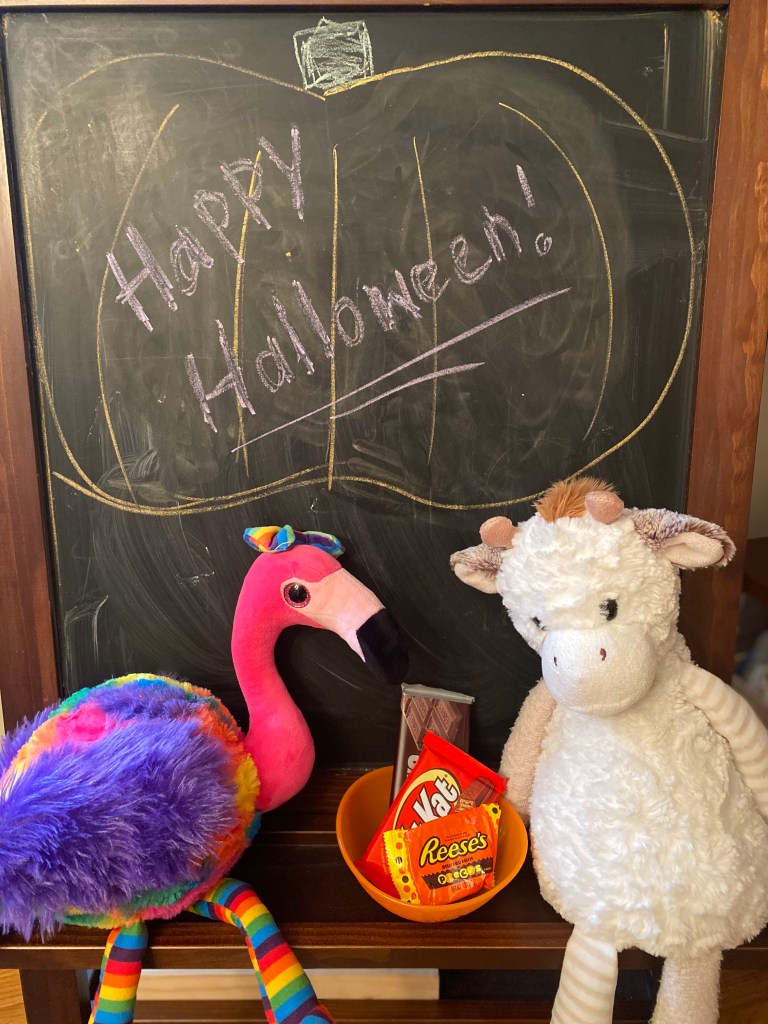
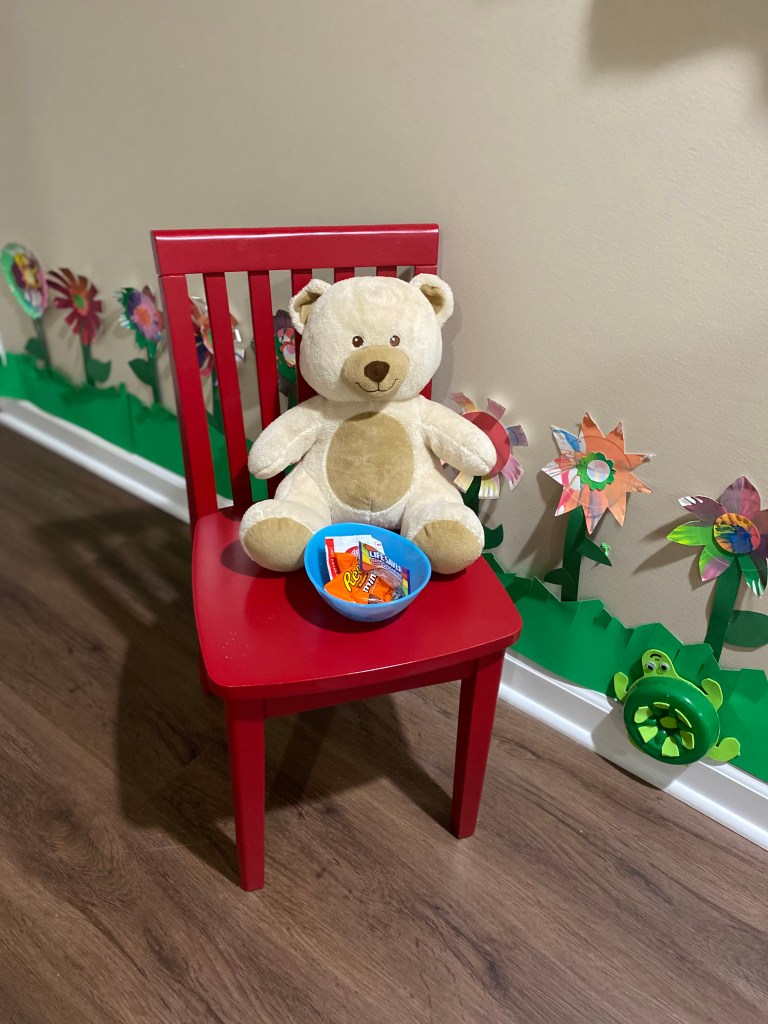
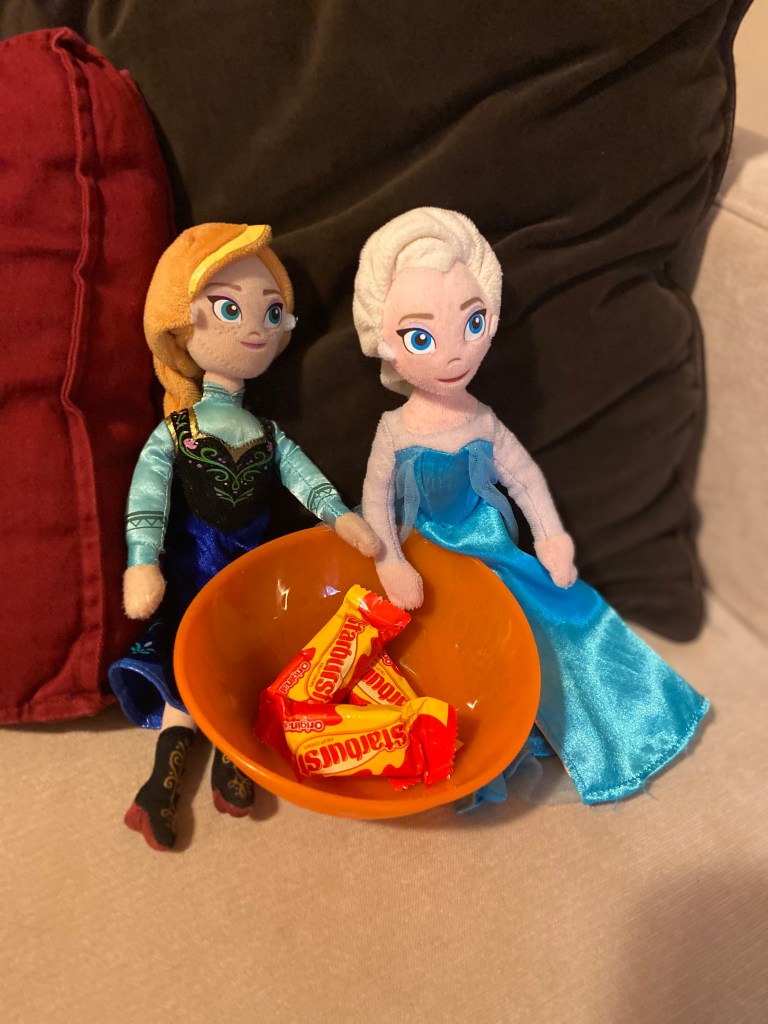
Option #2: Throughout your house set up stuffed animals with bowls of candy. Then have your child/children explore through their house and find them. Say trick or treat and then take on piece of candy out of each bowl.
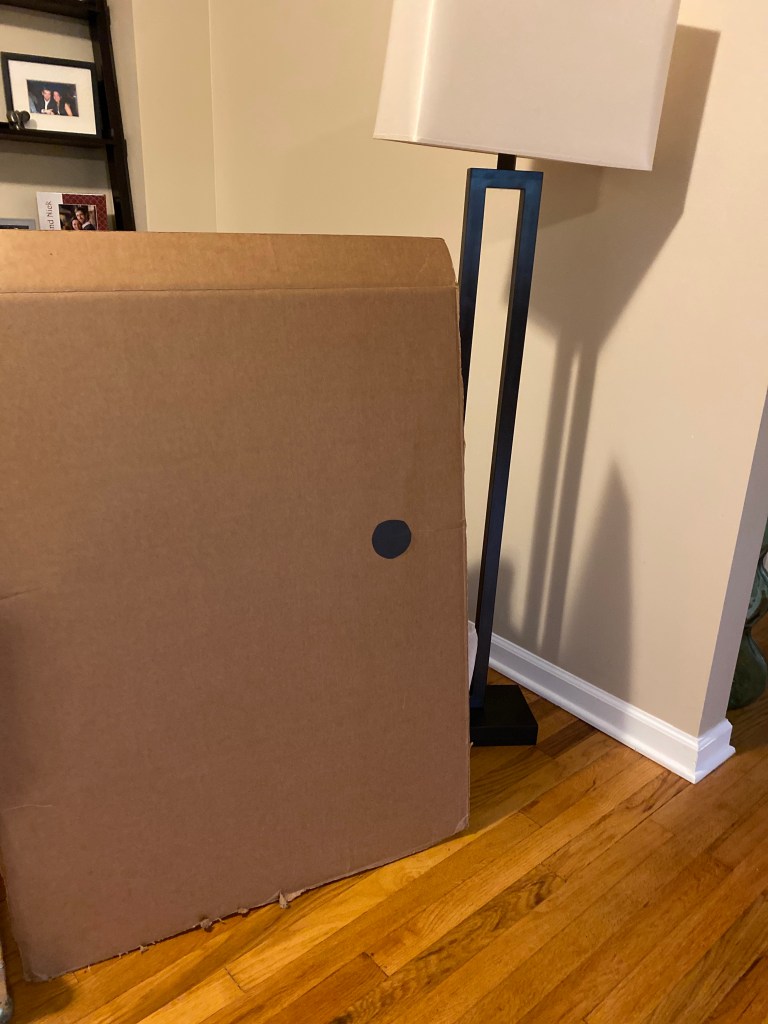
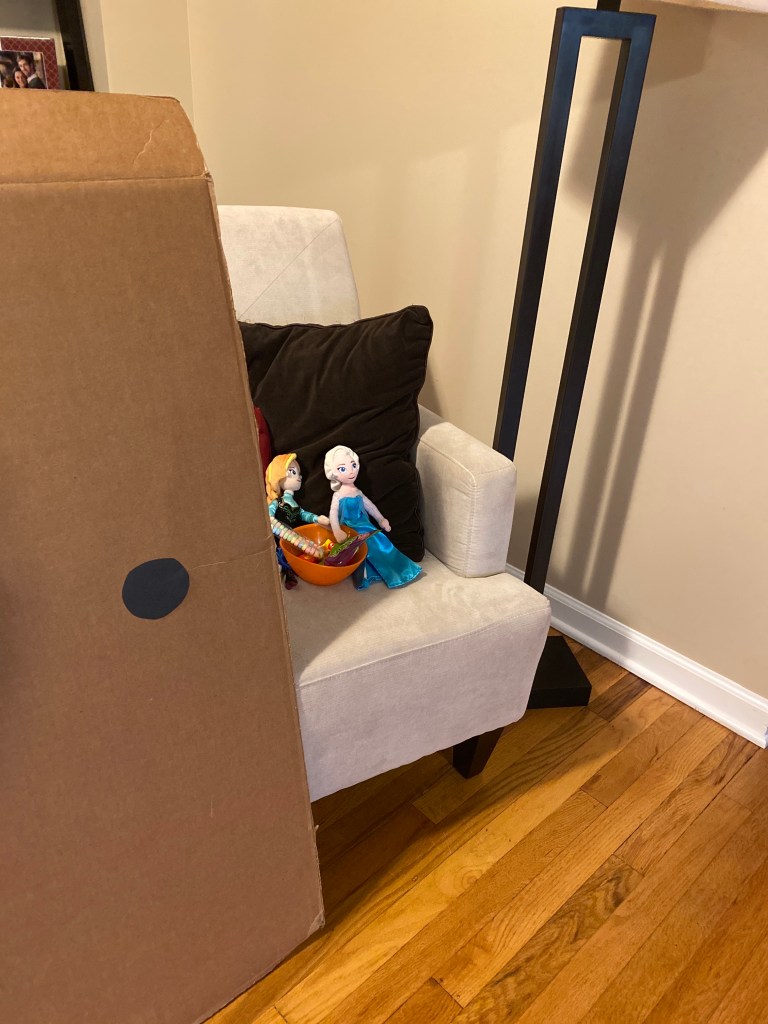
Option #3: If your house has a lot of open space and few doors, or if you want to stay in one part of the house- make a door! We made a door out of cardboard and then moved it after every stop. Once done knocking and the door opens, move the door to the next spot as child/children is getting candy from current spot.
After Trick or treat:
Sort!
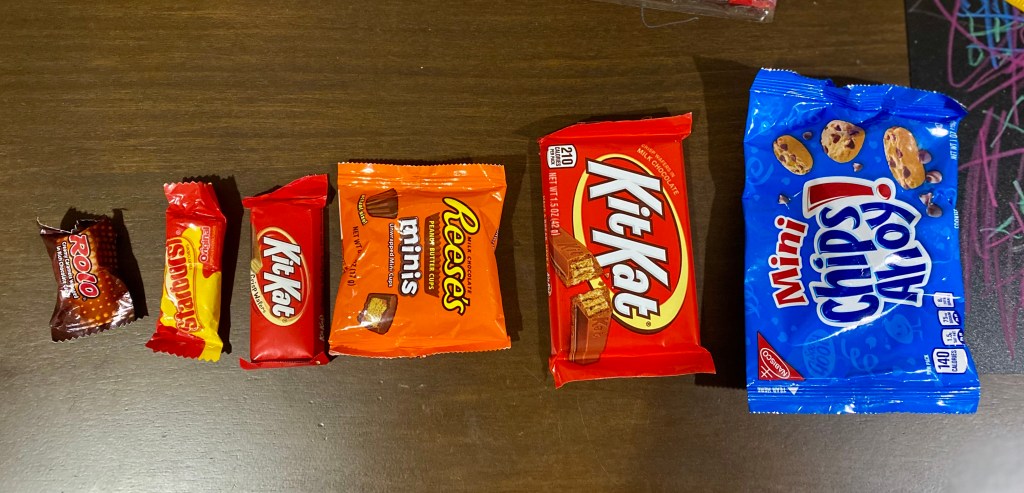
What did you get? How many of each? Put your candy in size order! Smallest? Biggest? Favorite?
Play “I Spy” Game…colors, letters, words, shapes
Examples: “I spy with my little eye something blue”, “I spy with my little eye something that starts with a K”, “I spy with my little eye the word minis”, “I spy with my little eye something orange & a square”.
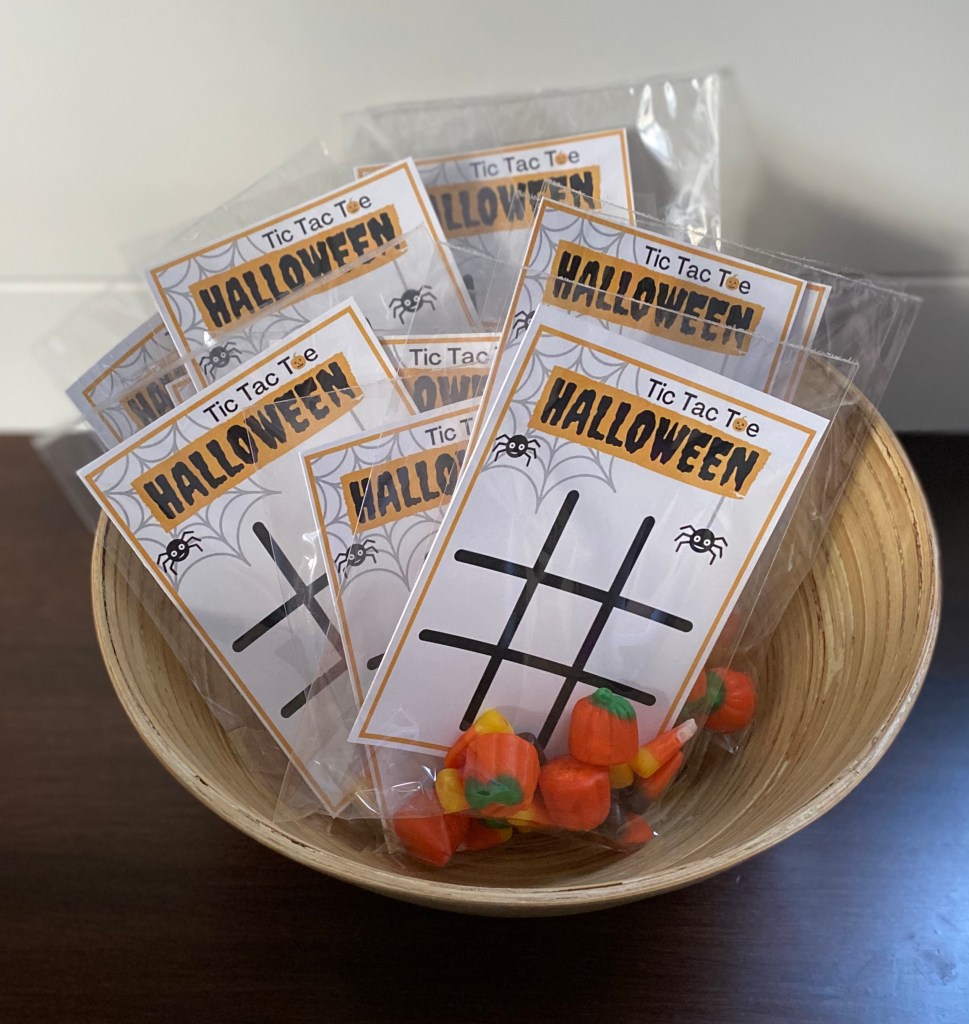
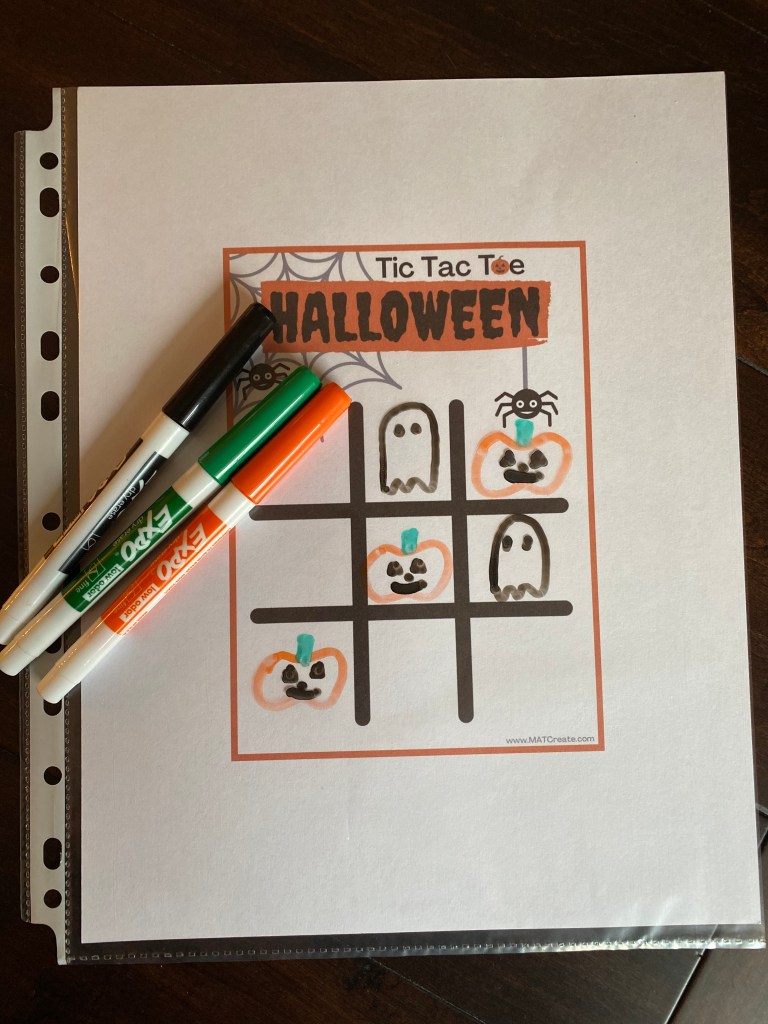
HALLOWEEN TIC TAC TOE

Tic tac toe is a hit with kids of all ages! Win the game and you get to eat a piece of candy! Once the game is over everyone wins and gets to eat all of the candy! Great Halloween treat for little friends!
Don’t have candy corn & pumpkins? This is a great game to play with Halloween candy too (Skittles, M&Ms, Gummies).
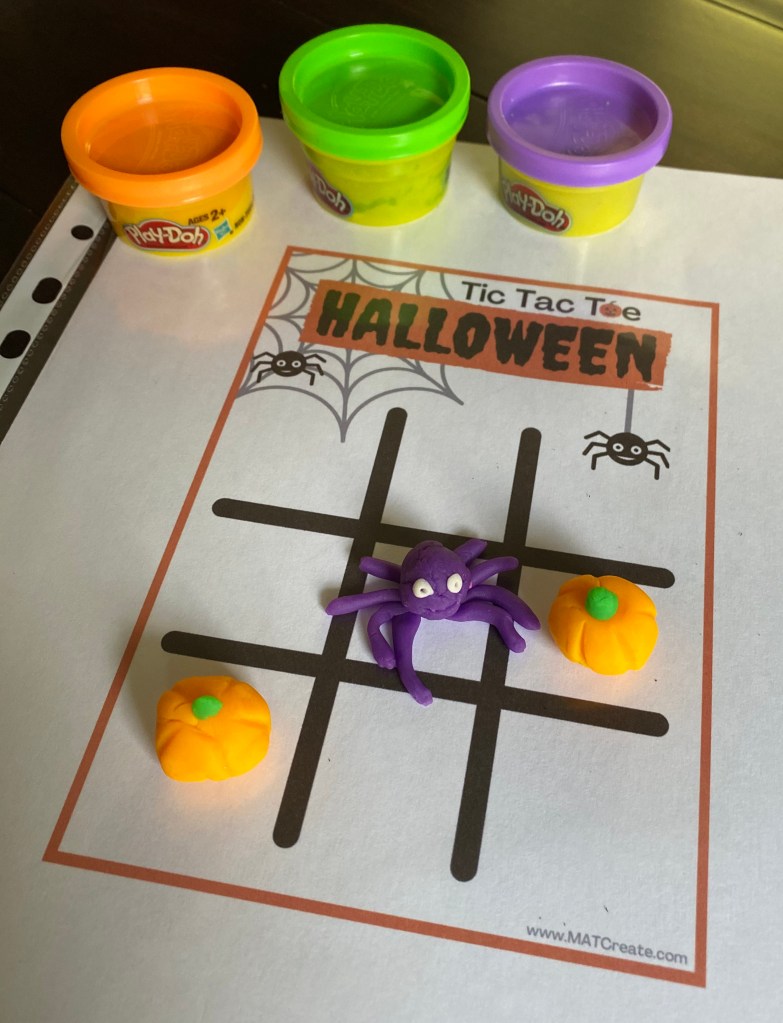
No candy? Use dry erase markers or Play-Doh instead. Great game to play while waiting for dinner to be ready.
Option #1: Candy Bingo

Materials:
- Bingo template
- white cardstock
- printer
- candy corn/pumpkin mix (any candy small enough to fit in board)
- clear plastic bags
- ribbon/twist tie/twine/ sticker (to seal bag)
- scissors
- Bingo Boards
To make as gifts or save for later:
Print the bingo template with 4 boards. Cut out. In a bag, place the bingo card and candy. Include at least 12 pieces. The 3 extra pieces will be for the first 3 games played- the winner gets to eat them. Seal the bag closed with either ribbon or fold back and attach a sticker.
No candy? No problem.
Option #2: Dry Erase Bingo Drawings
Materials:
- Bingo template
- white cardstock
- printer
- clear sheet protectors
- creative bingo markers (dry erase markers, Play-Doh, stickers, rocks, coins, small figures)
- dry erase Bingo board
Play this game multiple times by placing the entire page in a sheet protector. Then use a dry erase marker and draw halloween themes images for the x and o’s (see below). Or make something out of play doh/non-hardening clay to use as a marker (like a pumpkin, ghost, or bugs). Lots of options to find creative bingo markers in your house.
HOMEMADE WINDOW CLINGS

Why buy window clings- when you can make your own? It’s a fun and inexpensive project with easily found materials. Soon your windows will be personalized by your kids.
Materials:
- 2 Tbsp white glue
- 2 drops of dish soap
- food coloring
- plastic page protectors
- paintbrushes
- muffin tin
- image outlines (optional)
- scissors
- wet paper towels
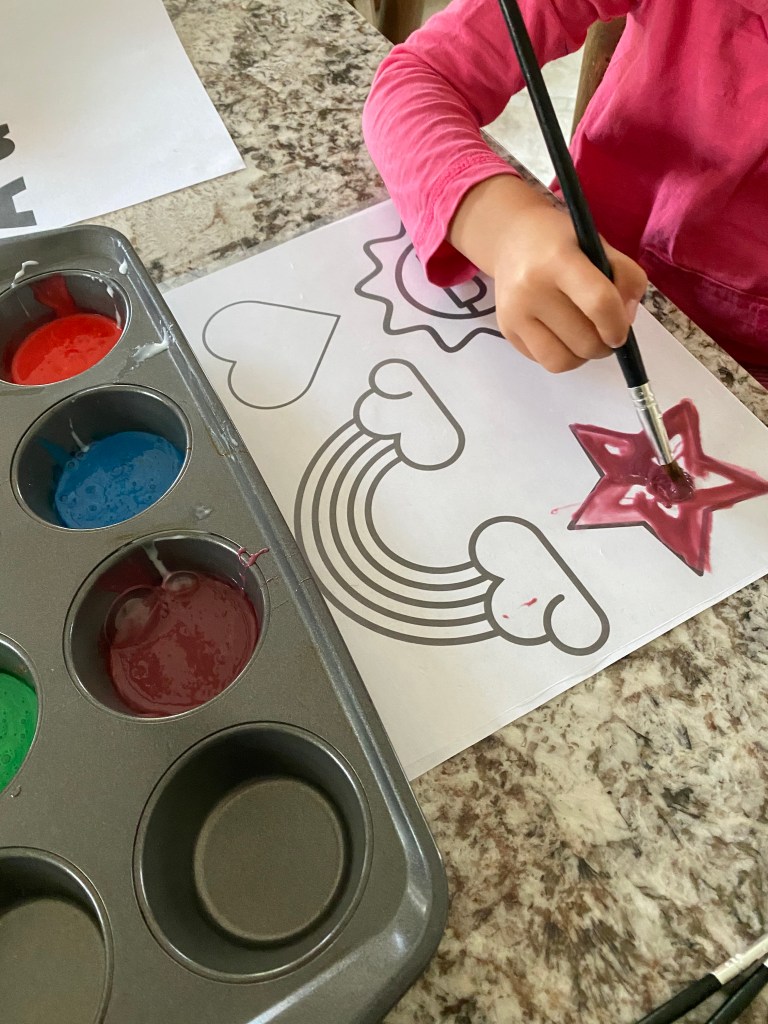
To Create:
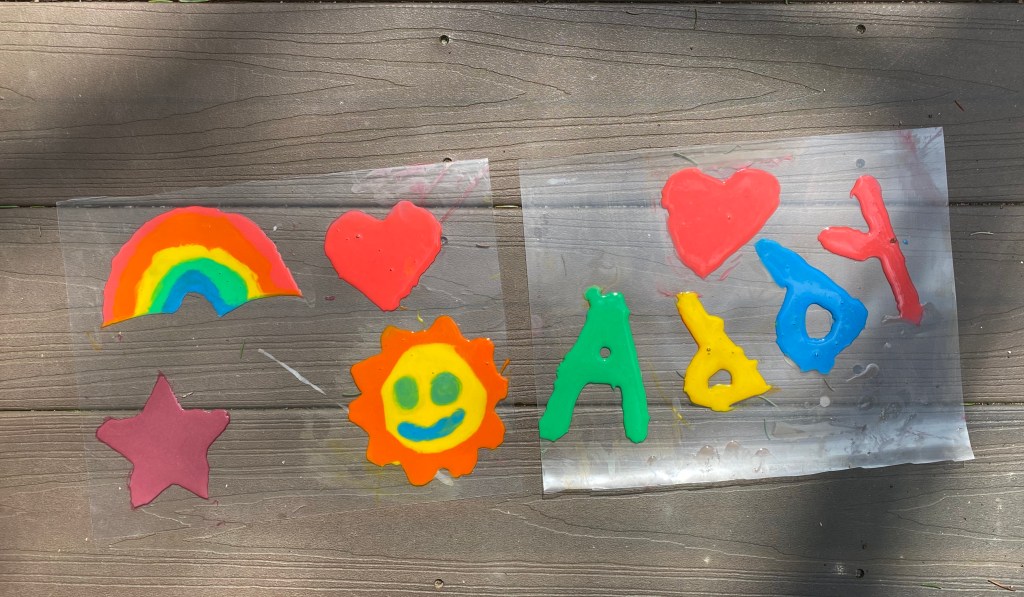
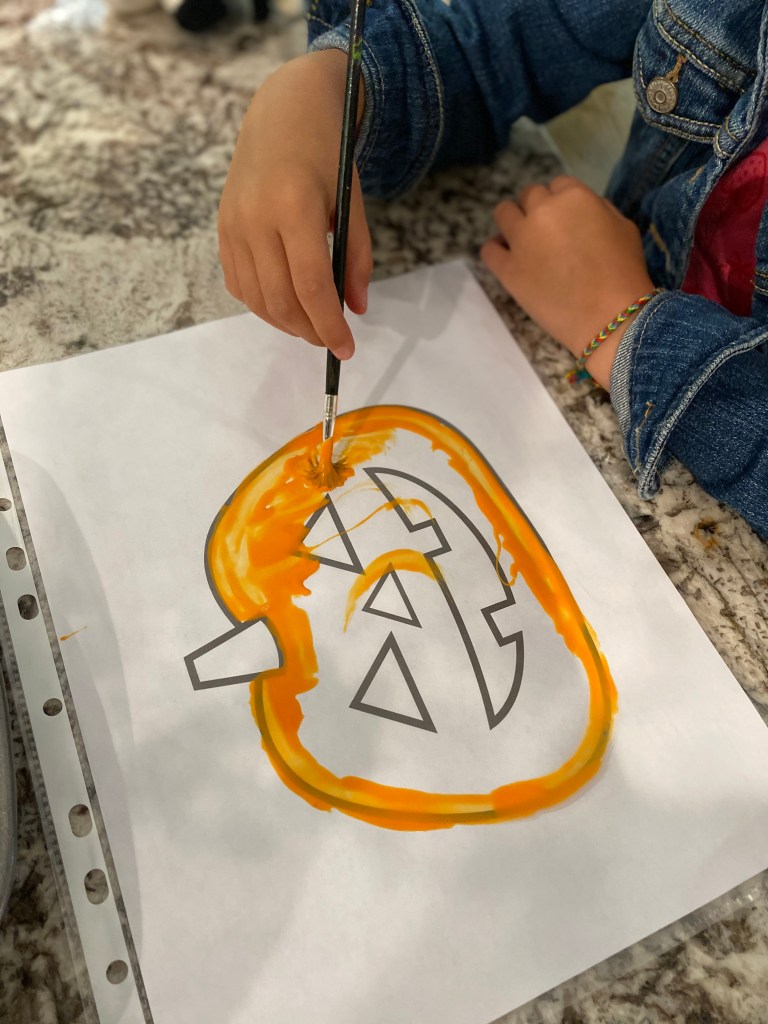
Ahead of time I printed out simple outlines of images my daughter likes. This is also a fun project to do for holidays. You can make pumpkins for Halloween or candy canes at Christmas time- endless possibilities! See pumpkin example below.
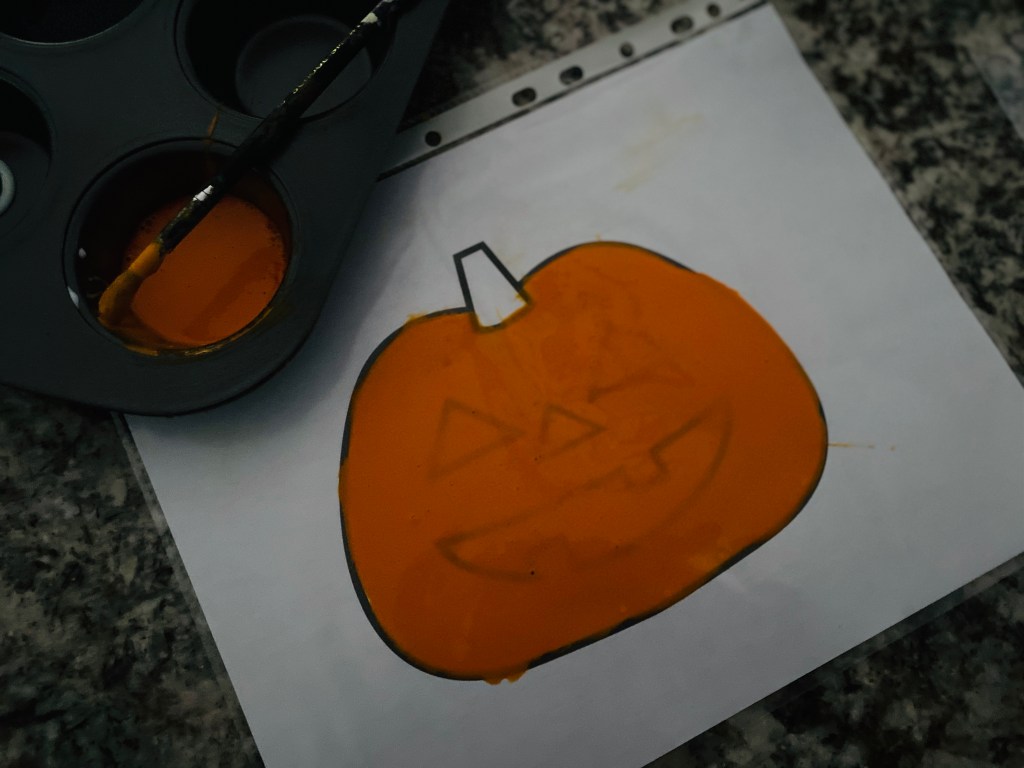
In a muffin tin, mix the glue, dish soap, and food coloring together. Repeat for each additional color. Put the page protector close to the muffin tin. If using image outlines, place in page protector. Paint directly onto the page protector. Paint the mixture on very thick or in layers (at least 2-3). If you mess up, simply wipe up with a wet paper towel. Let the designs dry on the plastic sheet protectors. It will take a few hours or overnight to be safe. If doing layers (like the pumpkin) let the first layer dry. Then, once dry, add the second layer on top (green stem/black face).
Once fully dry (they’ll be transparent), carefully peal them off of the sheet protectors. I then trimmed the edges with scissors to make them cleaner/neater. Place on windows and enjoy!
Note: Color fades on window clings from sun over time.
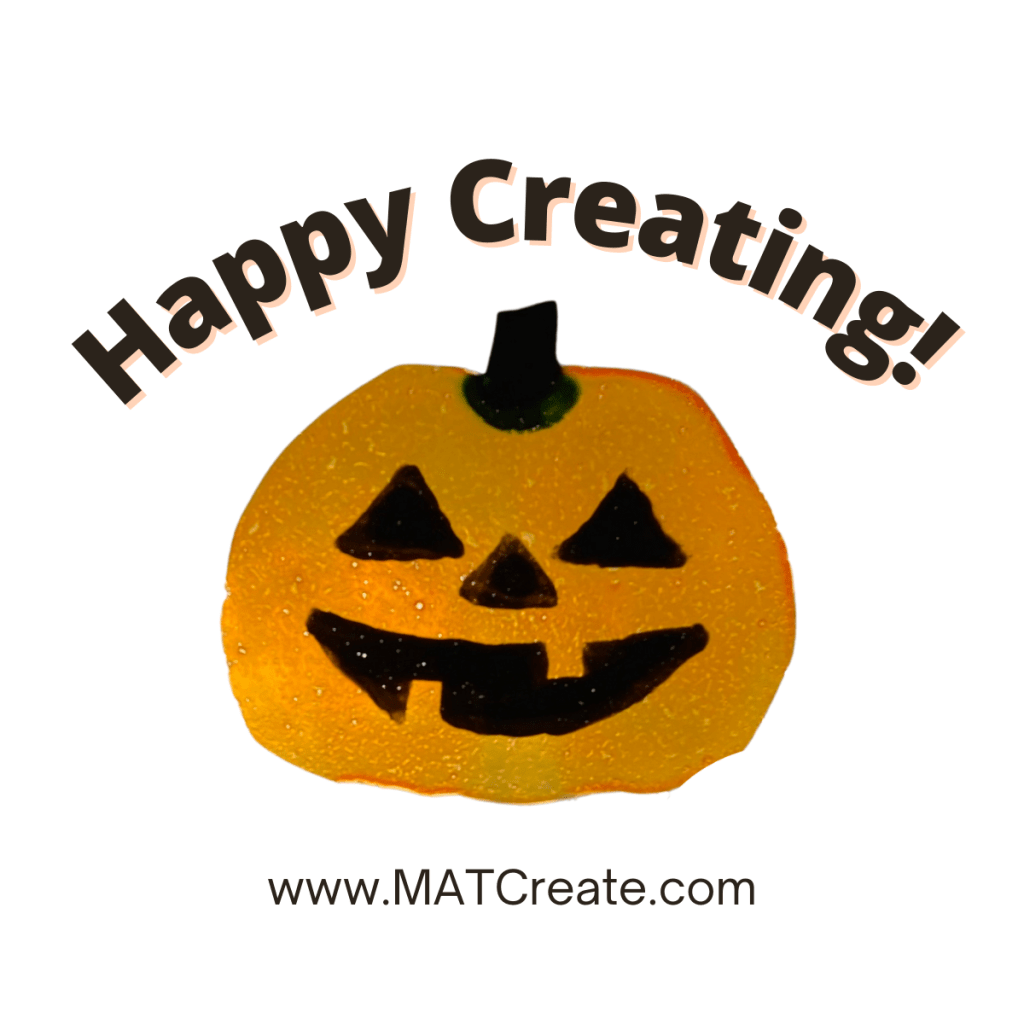
Example Pumpkin window cling:

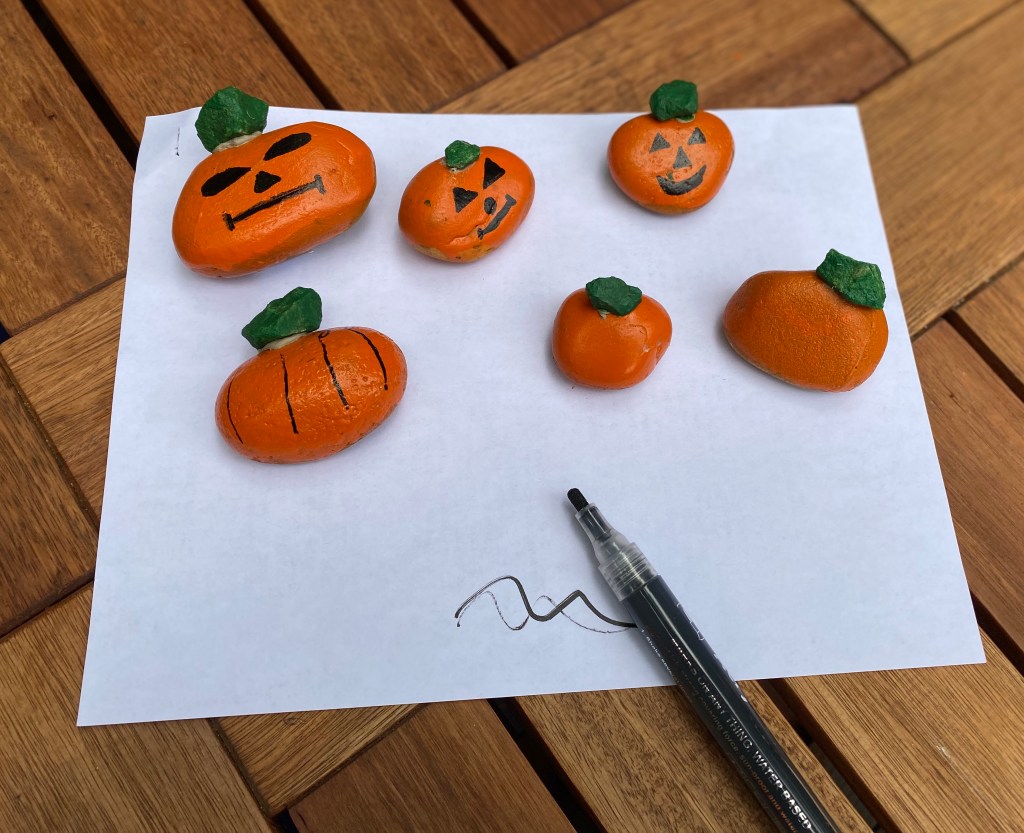
DIY Pumpkin Rocks

Create little pumpkin rocks to decorate for halloween and/or to share with friends. Simple easy craft that kids love! How many silly, spooky, and happy faces can you draw?
Materials:
- rocks (I used these) any size works
- bucket with water
- orange spray paint or acrylic orange paint
- black paint pens
- green acrylic paint
- plastic table cloth or cardboard box (flat)
- glue
- acrylic sealant
To Create:
1.) Find rocks by going on a rock hunt. Look for big round rocks for the pumpkins and small rectangular rocks for the stem. Or buy a bags at a home improvement store if making several.
2.) Wash rocks off. I just use a bucket of water. Lay out the plastic table cloth (cut in half) or a cardboard box on a flat outdoor surface. Then lay the rocks out on top, a few inches each apart. Let air dry.
3.) Paint Pumpkins. Spray paint them all orange. Be sure to get sides. Leave bottoms unpainted. Let air dry.
*If only making a few you can hand paint them with acrylic paint (just remember paint will stain clothes).
3.) Paint stems. Using green paint, paint the small rocks. Let air dry.
4.) Glue. Once all rocks are dry, using glue, attach the green stem rocks to the orange pumpkin rocks. Let dry overnight.
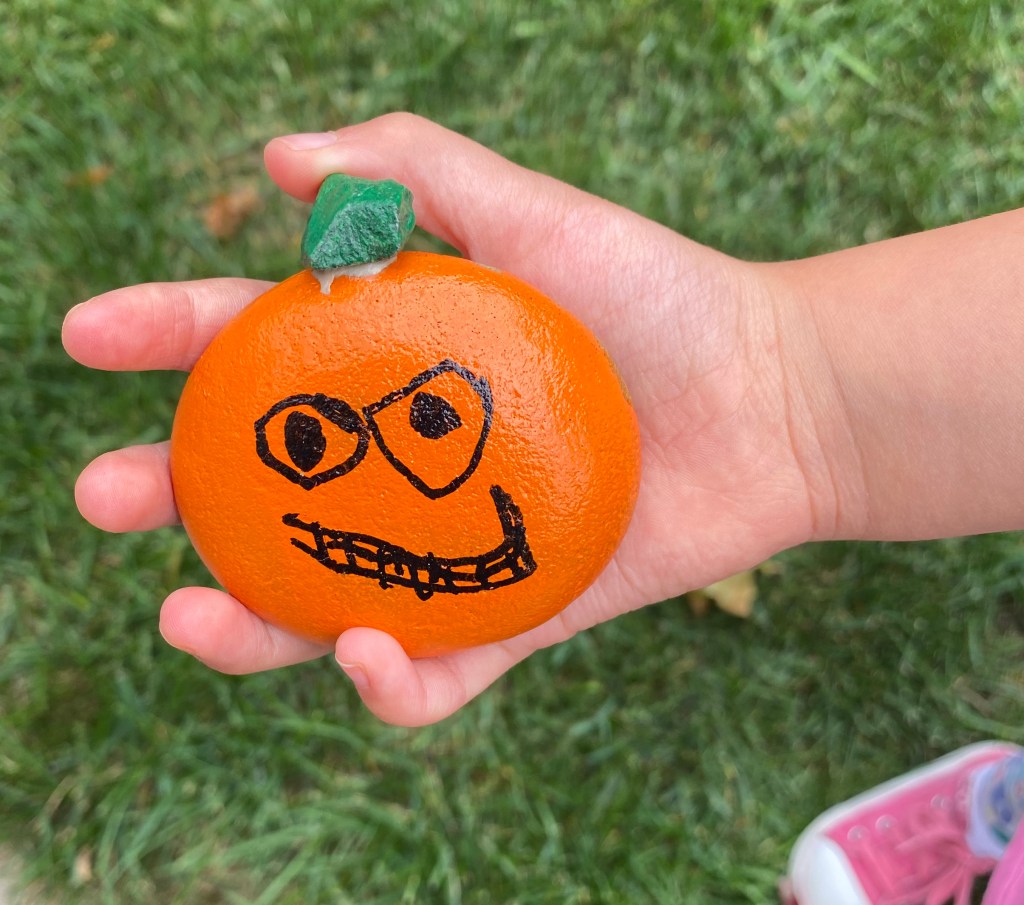
5.) Create Faces. Using paint markers, draw faces on your pumpkin rocks. You can review different shapes to use for the nose, eyes, and mouth. Talk about different emotions you could show as well (happy, sad, silly, scared, mad). You can always search google images for ideas too.
6.) Seal. Spray all of the rocks with acrylic sealant to seal the paint. Let dry. The sealant leaves a residue, so best to use cardboard again underneath.
Once complete, you can place them around your house, inside or outside. Give to friends- as a surprise put in their yard or give directly to them.

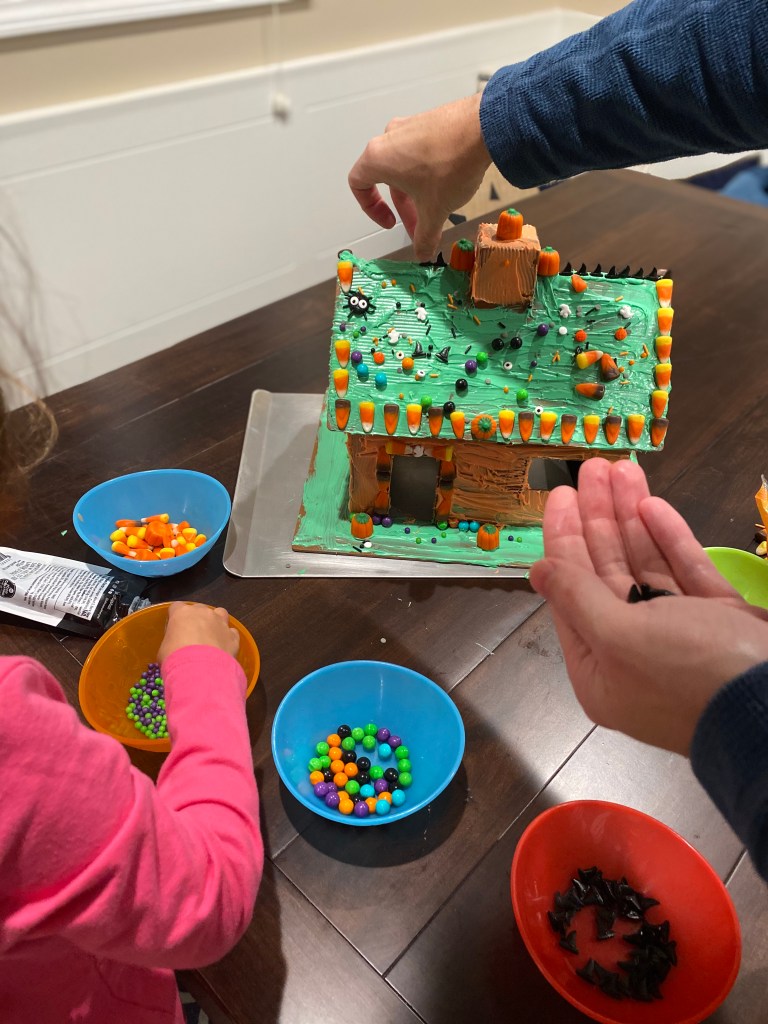
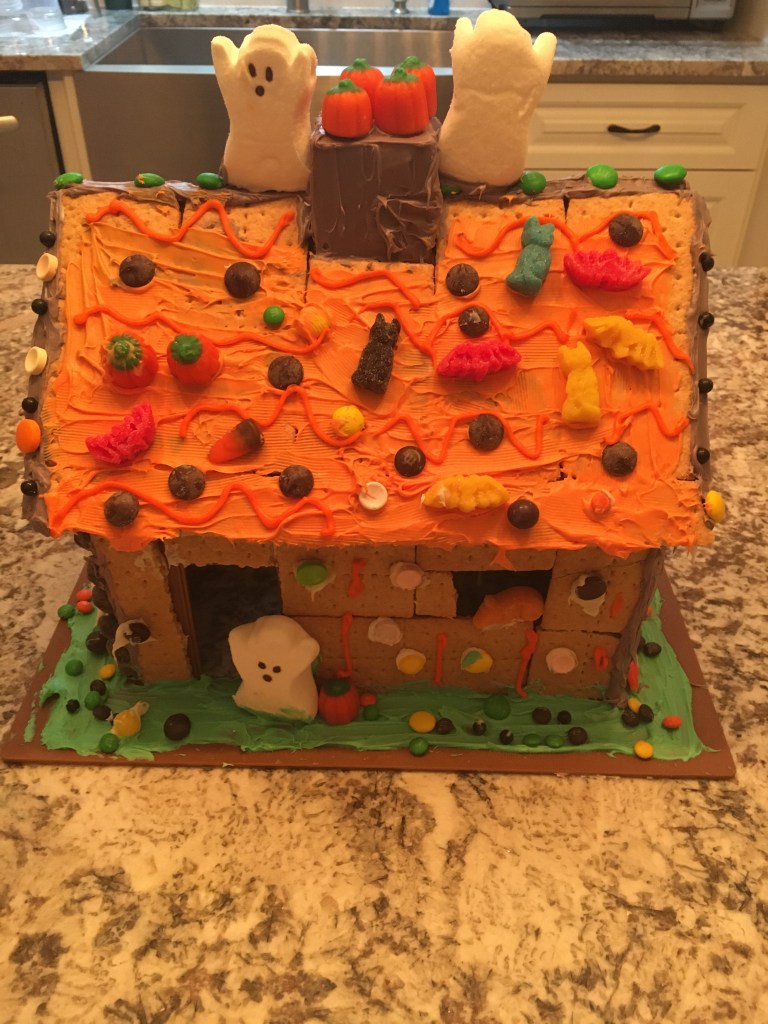
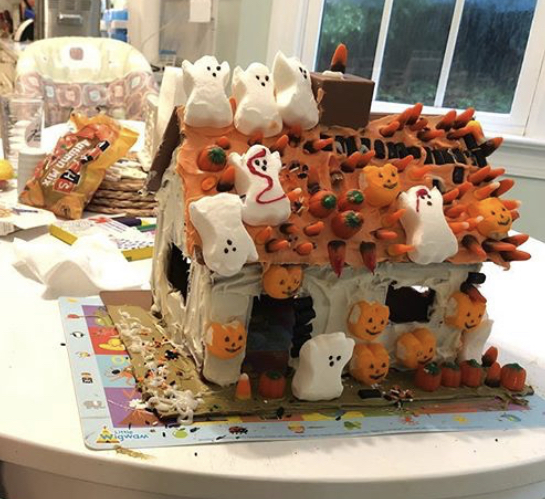
CANDY COTTAGE

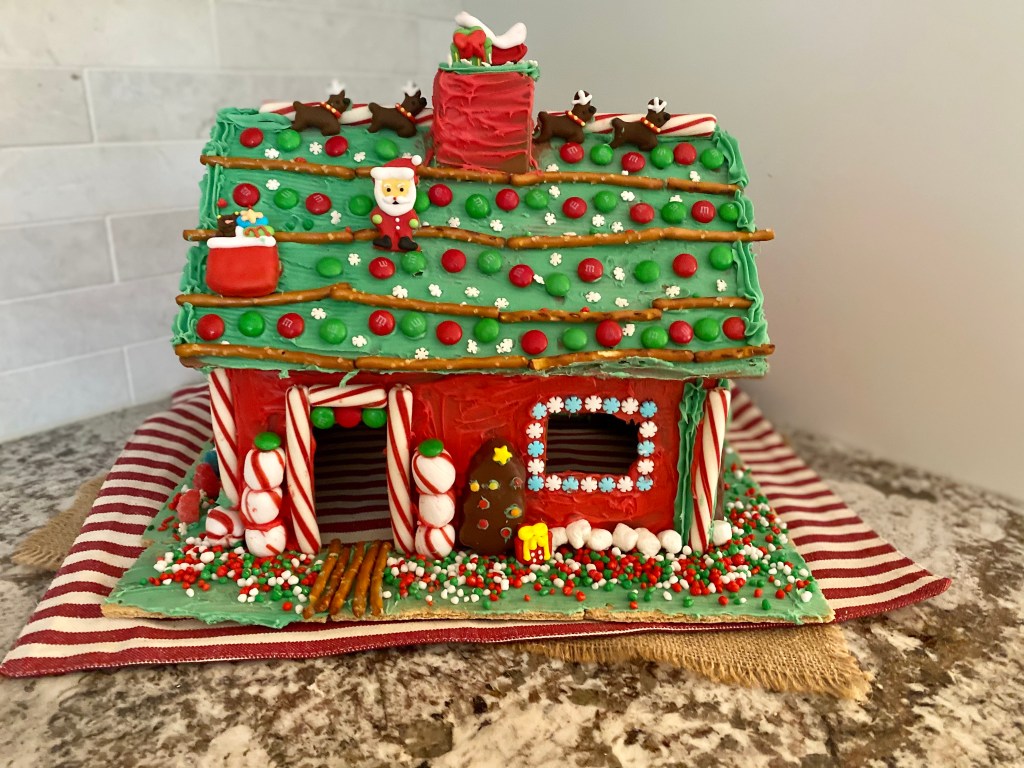
Why only make a gingerbread house/candy cottage at Christmas time, when you can make one at other holidays too? This is a great family tradition to start and the whole family can participate. This activity reviews fine motor skills, patterns, color mixing (icing), story telling/writing, and the design process, and so much more!
This fun tradition started when my mom bought my sister the candy cottage kit and it was a huge hit. So when my daughter was old enough- she got one as well.
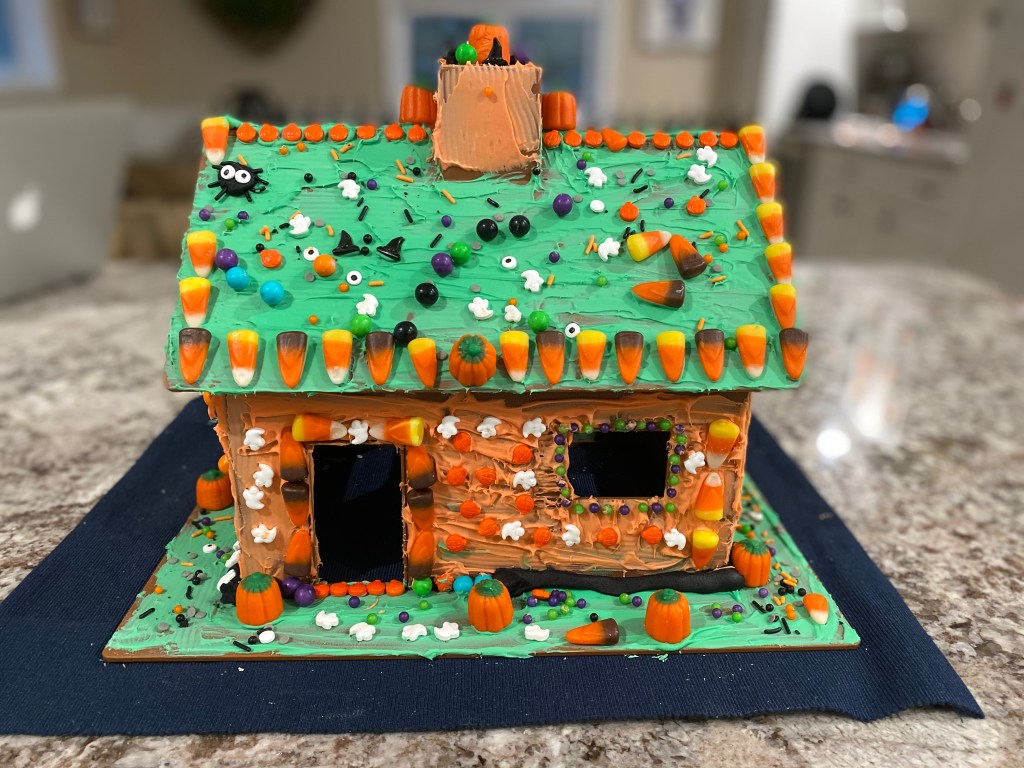
My daughter looks forward to making a gingerbread house every Halloween, Christmas, Valentine’s Day, and Easter. She loves snacking as she decorates of course. We sit ours on our kitchen island on display and always get lots of compliments from visitors. The house makes a great festive decoration.
Materials:
- icing
- graham crackers
- candy (seasonal), chocolate chips
- Candy Cottage
- small bowls (to put candy in)
- plastic knives (spread icing)
- baking sheet
Activity:
Start by putting the house together- the sides snap together. When complete should look like picture below. Now the fun begins! Place your house on a baking sheet. You can either cover in icing and then place graham crackers on top or just cover in icing (we’ve done both, depends on look you want). Have fun, decorating ideas are endless!

Notes:
- If larger family, each child can have one designated spot to decorate.
- Older children can design a sketch ahead of time & then create it.
- After complete, have your child/children write a story about who lives in the house.
- Super easy to clean up- put in the sink with hot water & icing and candy easily comes off with a sponge.
- If you don’t want to buy the Candy Cottage kit, you can buy a Christmas gingerbread kit and save for other holidays or make your own house out of graham crackers.
Finished Examples (I’ll update as we make more, don’t have pictures of them all):
http://www.MATCreate.com is not affiliated in any way with Candy Cottage LTD.. We just like their product! The cottage template is a bit expensive, but if use for multiple holidays and years- defiantly worth the price.
Happy creating & snacking!

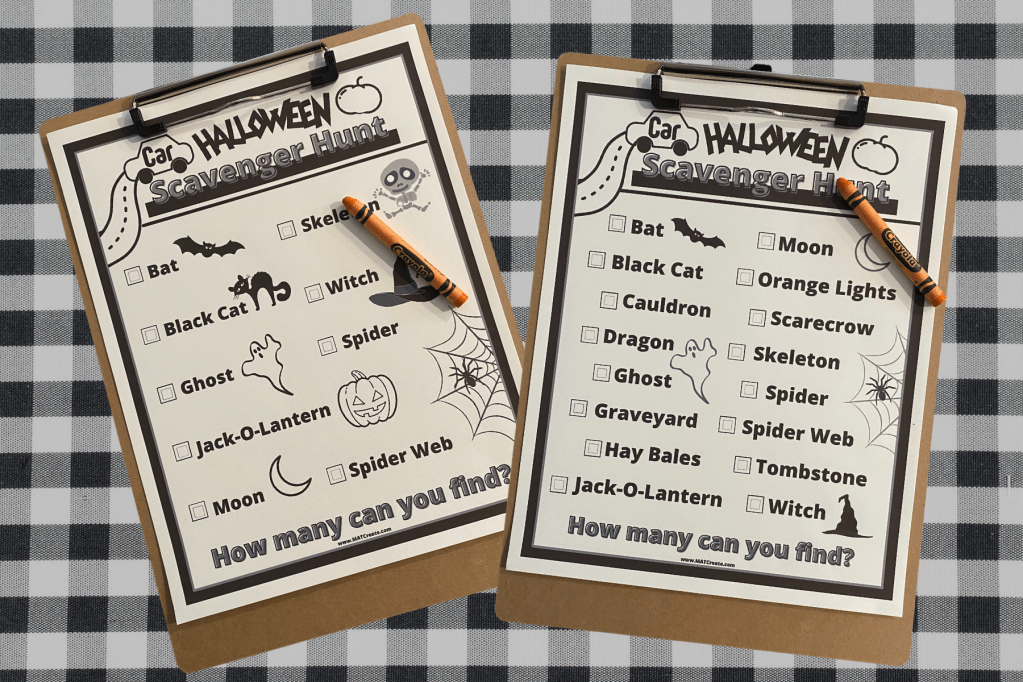
HALLOWEEN CAR SCAVENGER HUNT

For a fun family activity- jump in the car and go on a Halloween Scavenger Hunt! Have a competition to see who can find the most on the list or work together. There are 2 versions. One copy is for younger kids (more simple with pictures) and the other has more to find and less pictures (for older kids who can read).
My daughter loves driving around and looking at Halloween decorations every year. So I decided to make a game out of it. Hope your family enjoys this as much as mine.
Materials:
- Car Scavenger Hunt Printable
- white paper
- printer
- clipboard
- pencil/marker
Print out the handout, attach to a clipboard, grab a pencil/pen, and jump in the car! Be on the lookout! Good luck!
Want to get some exercise? Instead of going in your car, take a walk to go on the hunt!

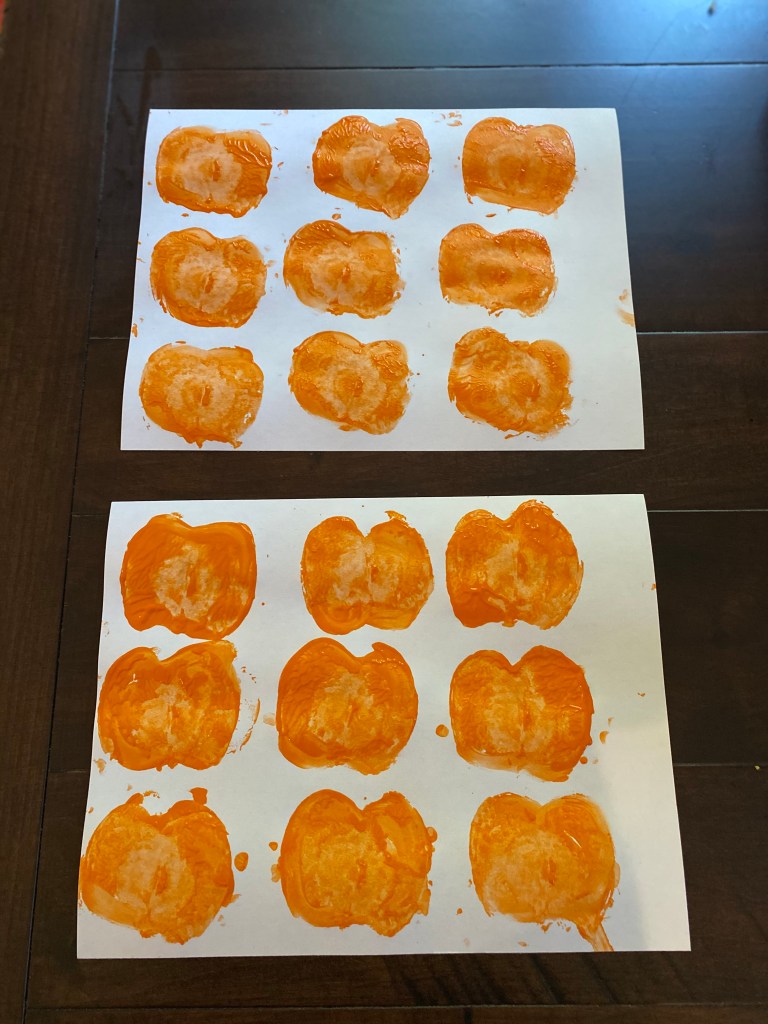
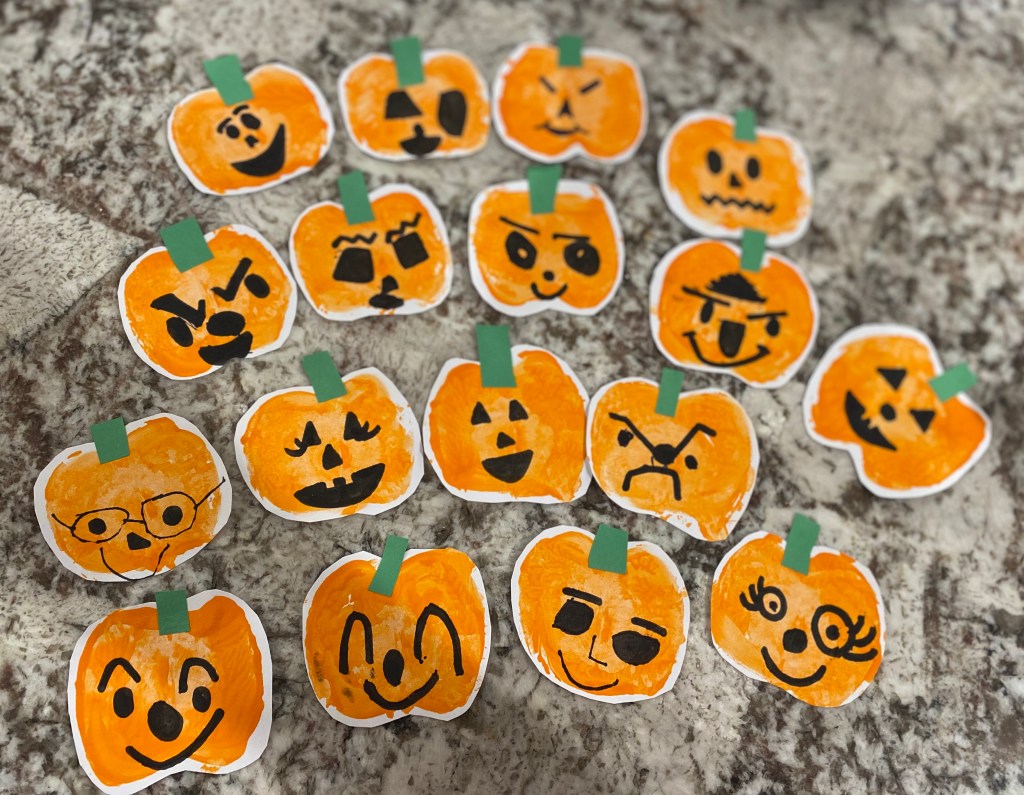
JACK-O-LANTERN PRINTS

Time to get festive! Make simple jack-o-lantern prints with an apple. Fun and cute craft to decorate your home or share with others!
Materials:
- apple (cut in half)
- orange tempera paint
- paper plate
- white cardstock
- paintbrush
- green construction paper or green marker
- scissors
- glue stick or glue
- black marker (we used a dry erase marker, more fluid)
- string/twine/yarn/ ribbon (optional to hang)
To Create:
1.) Cut apple. Begin by cutting an apple in half (down the center). Spread out orange paint on a paper plate (easy clean up). Then rub the apple in the paint. Make sure entire inside of apple is covered with paint (just lift up to look). Or you can paint the apple inside with a paintbrush. Then, use the apple like a stamp. Press/stamp it onto the white cardstock. If not enough paint, add more and re-stamp the same spot. Complete several times. We did two sheets with 9 on each sheet see below). Let dry.
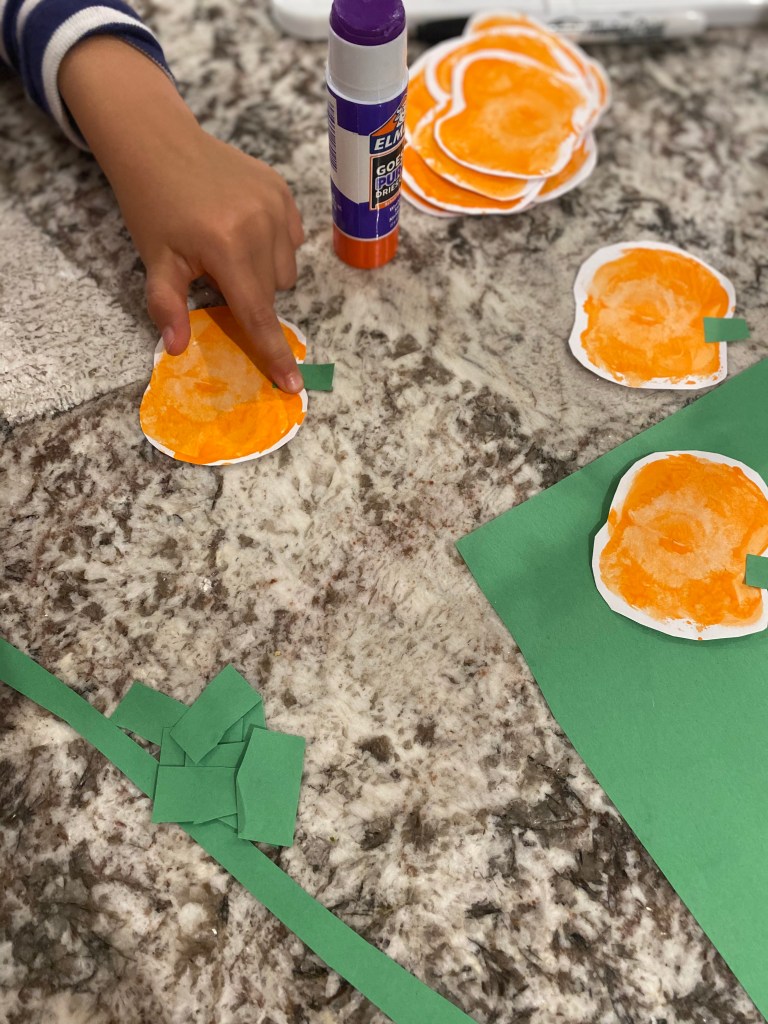
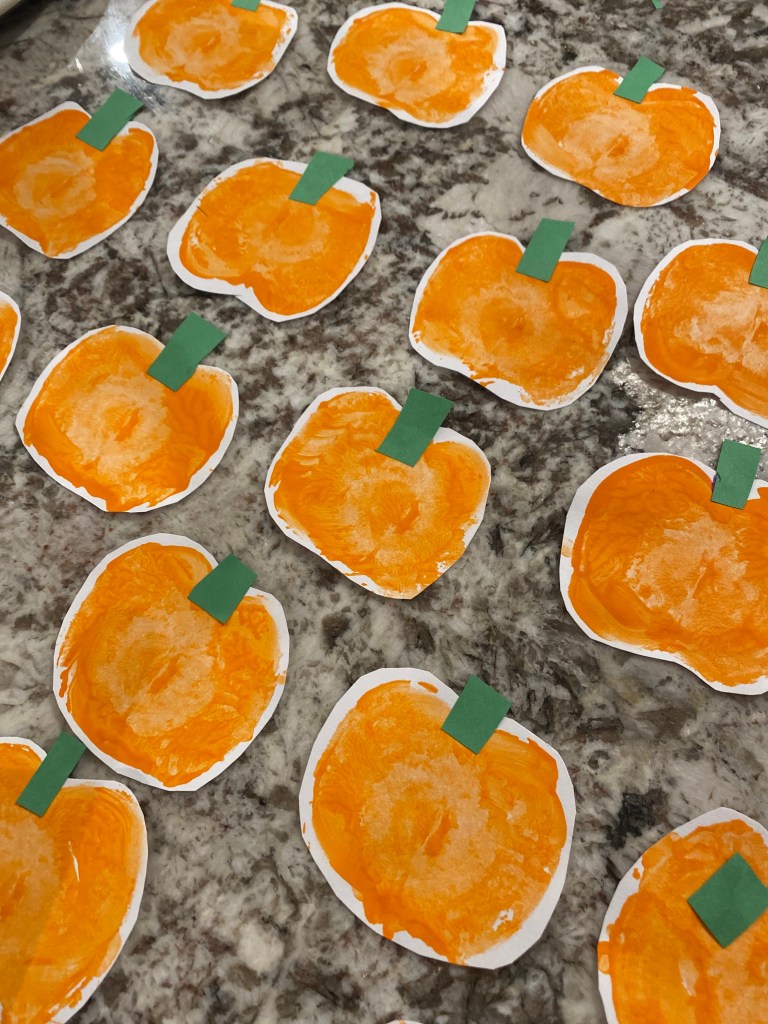
2.) Cut out! Once dry, cut out pumpkins. Either an adult can cut out or older children. Then, from a full size sheet of construction paper, cut thin strips lengthwise. Cut small rectangles then out of the strips (small kids an do this). With a glue stick or glue, place one stem on each pumpkin (see below).
Note: You can add the stem with a green marker before you cut out instead of using construction paper & draw faces first before cutting out.

3.) Add faces! Create Jack-O-Lanterns out of the pumpkins by adding faces. Use a black marker to draw on the faces. Older kids can cut out the eyes, nose, and mouth from black construction paper as another option. This is a great time to review feelings through expressions. Children can make the pumpkin faces showing lots of different feelings. Some examples- happy, sad, mad, silly, confused, scared, excited. You can also add accessories- bows, glasses, etc.. Great opportunity to review shapes as well & talk about what shapes could be used for the eyes, nose, and mouth.

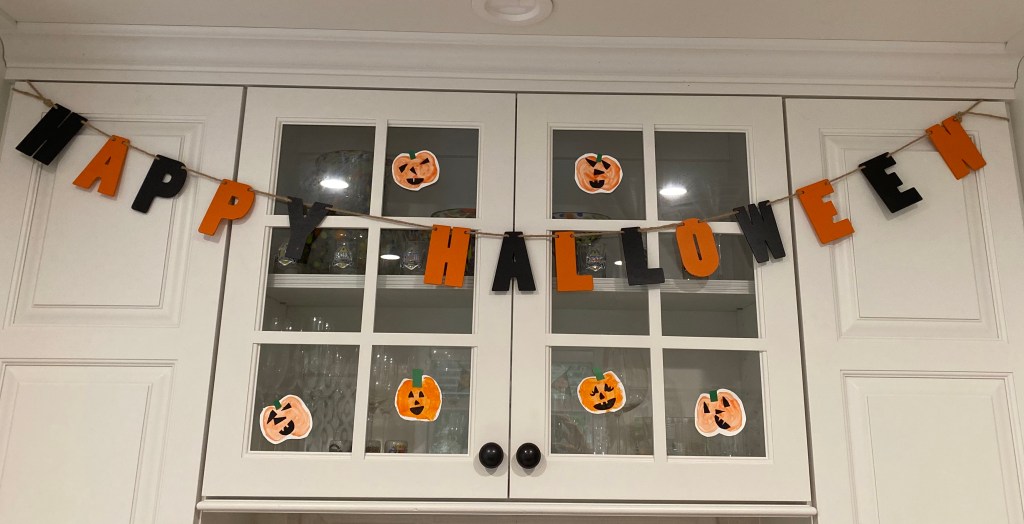
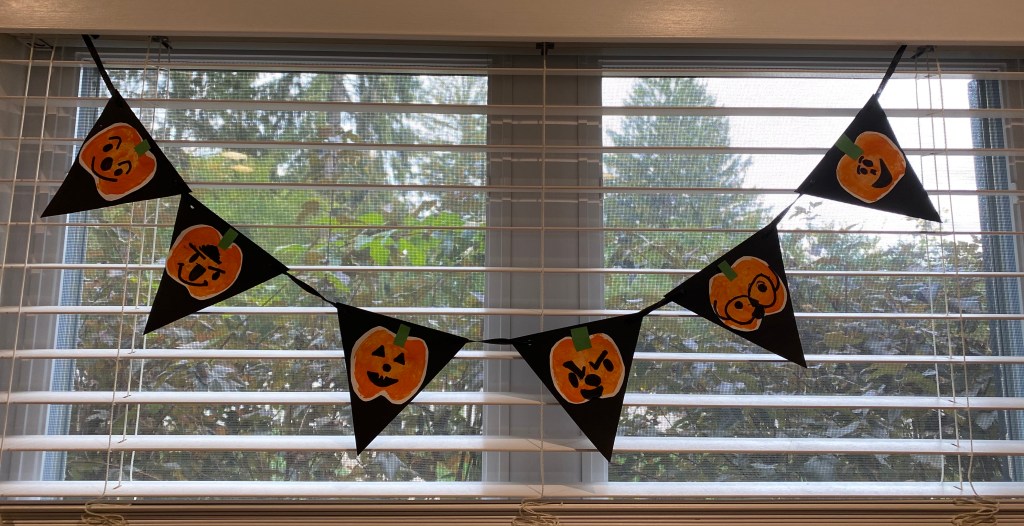
Finished Ideas:
- Halloween cards for family & friends. Make a card out of construction paper and glue a pumpkin onto the front and have them sign their name and decorate inside of the card. Or see option below.
- Make a Jack-O-Lantern garland and hang in your house.
- Decorate a room or your entire house in them- hang all over.
- Play a game! Hide the Jack-O-Lanterns in your house and have someone else find them.
Examples:

*For the cards, we simply printed the apples on top of each other. The top pumpkin we just made with a paint brush (didn’t have an apple small enough). After dry, we added grass, created the faces, and outlined the pumpkins in sharpie.

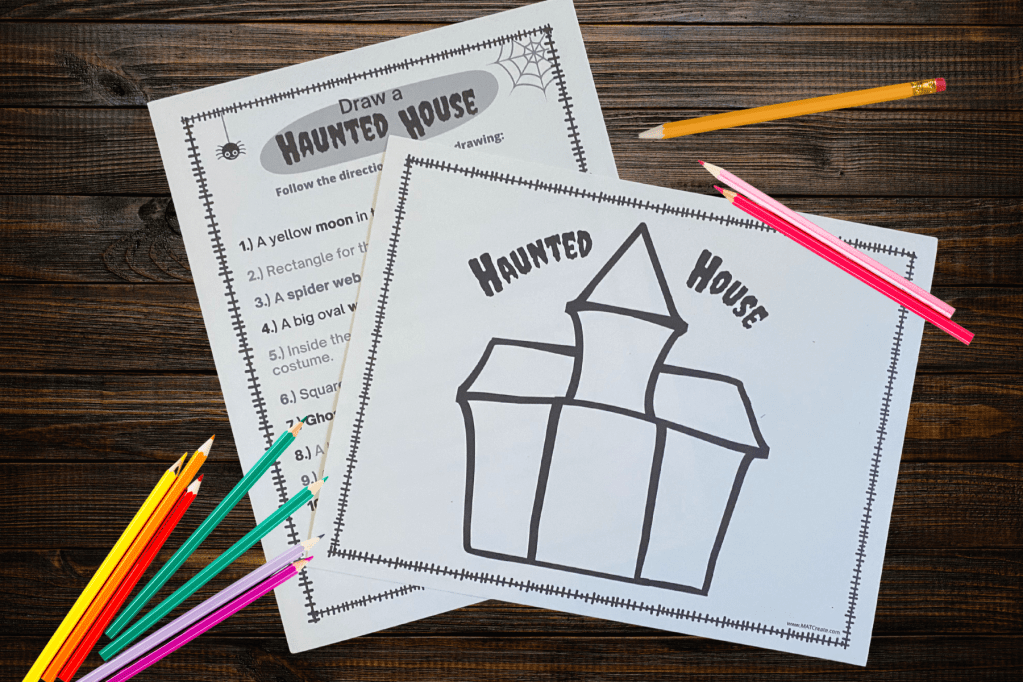
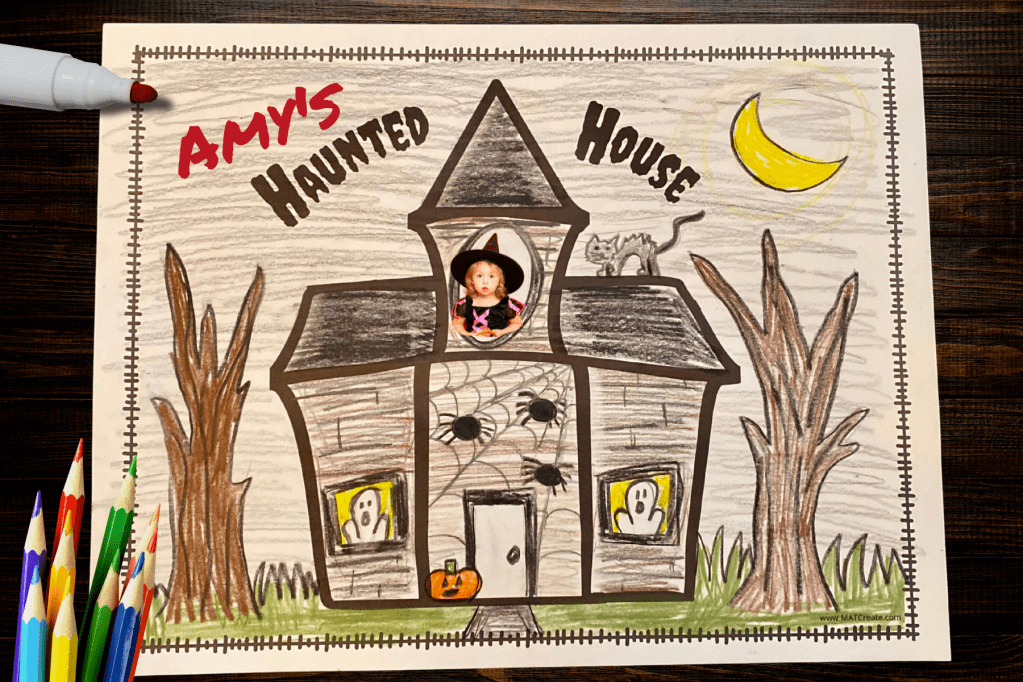
DRAW A HAUNTED HOUSE

It’s that spooky season again, which means it’s time to draw a Haunted House! Happy Halloween. This activity is great because it enforces following directions, reviews shapes, & colors- all while having fun creating.
Materials:
- Haunted House template & directions
- printer
- white cardstock or regular copier paper
- pencil
- markers/crayons/colored pencils
- Photo of child (optional)
To Create:
1.) Print out templates on white paper (2 sheets).
2.) Have your child write their name above “Haunted House”(see example).
3.) Draw the steps #1-10 on the handout with your choice of medium. *If you use a pencil first, you can erase any mistakes. #5 can be a drawing or glue a photo there instead (see example).
Some How to draw links: Spider Web – Black Cat – Ghost– Spooky Trees
4.) Add color! Color in all of your amazing drawings, if you haven’t already.
5.) Give as a gift or hand up as a Halloween decoration in your home.
Don’t want to follow the directions? Us the house template and decorate it however you want!
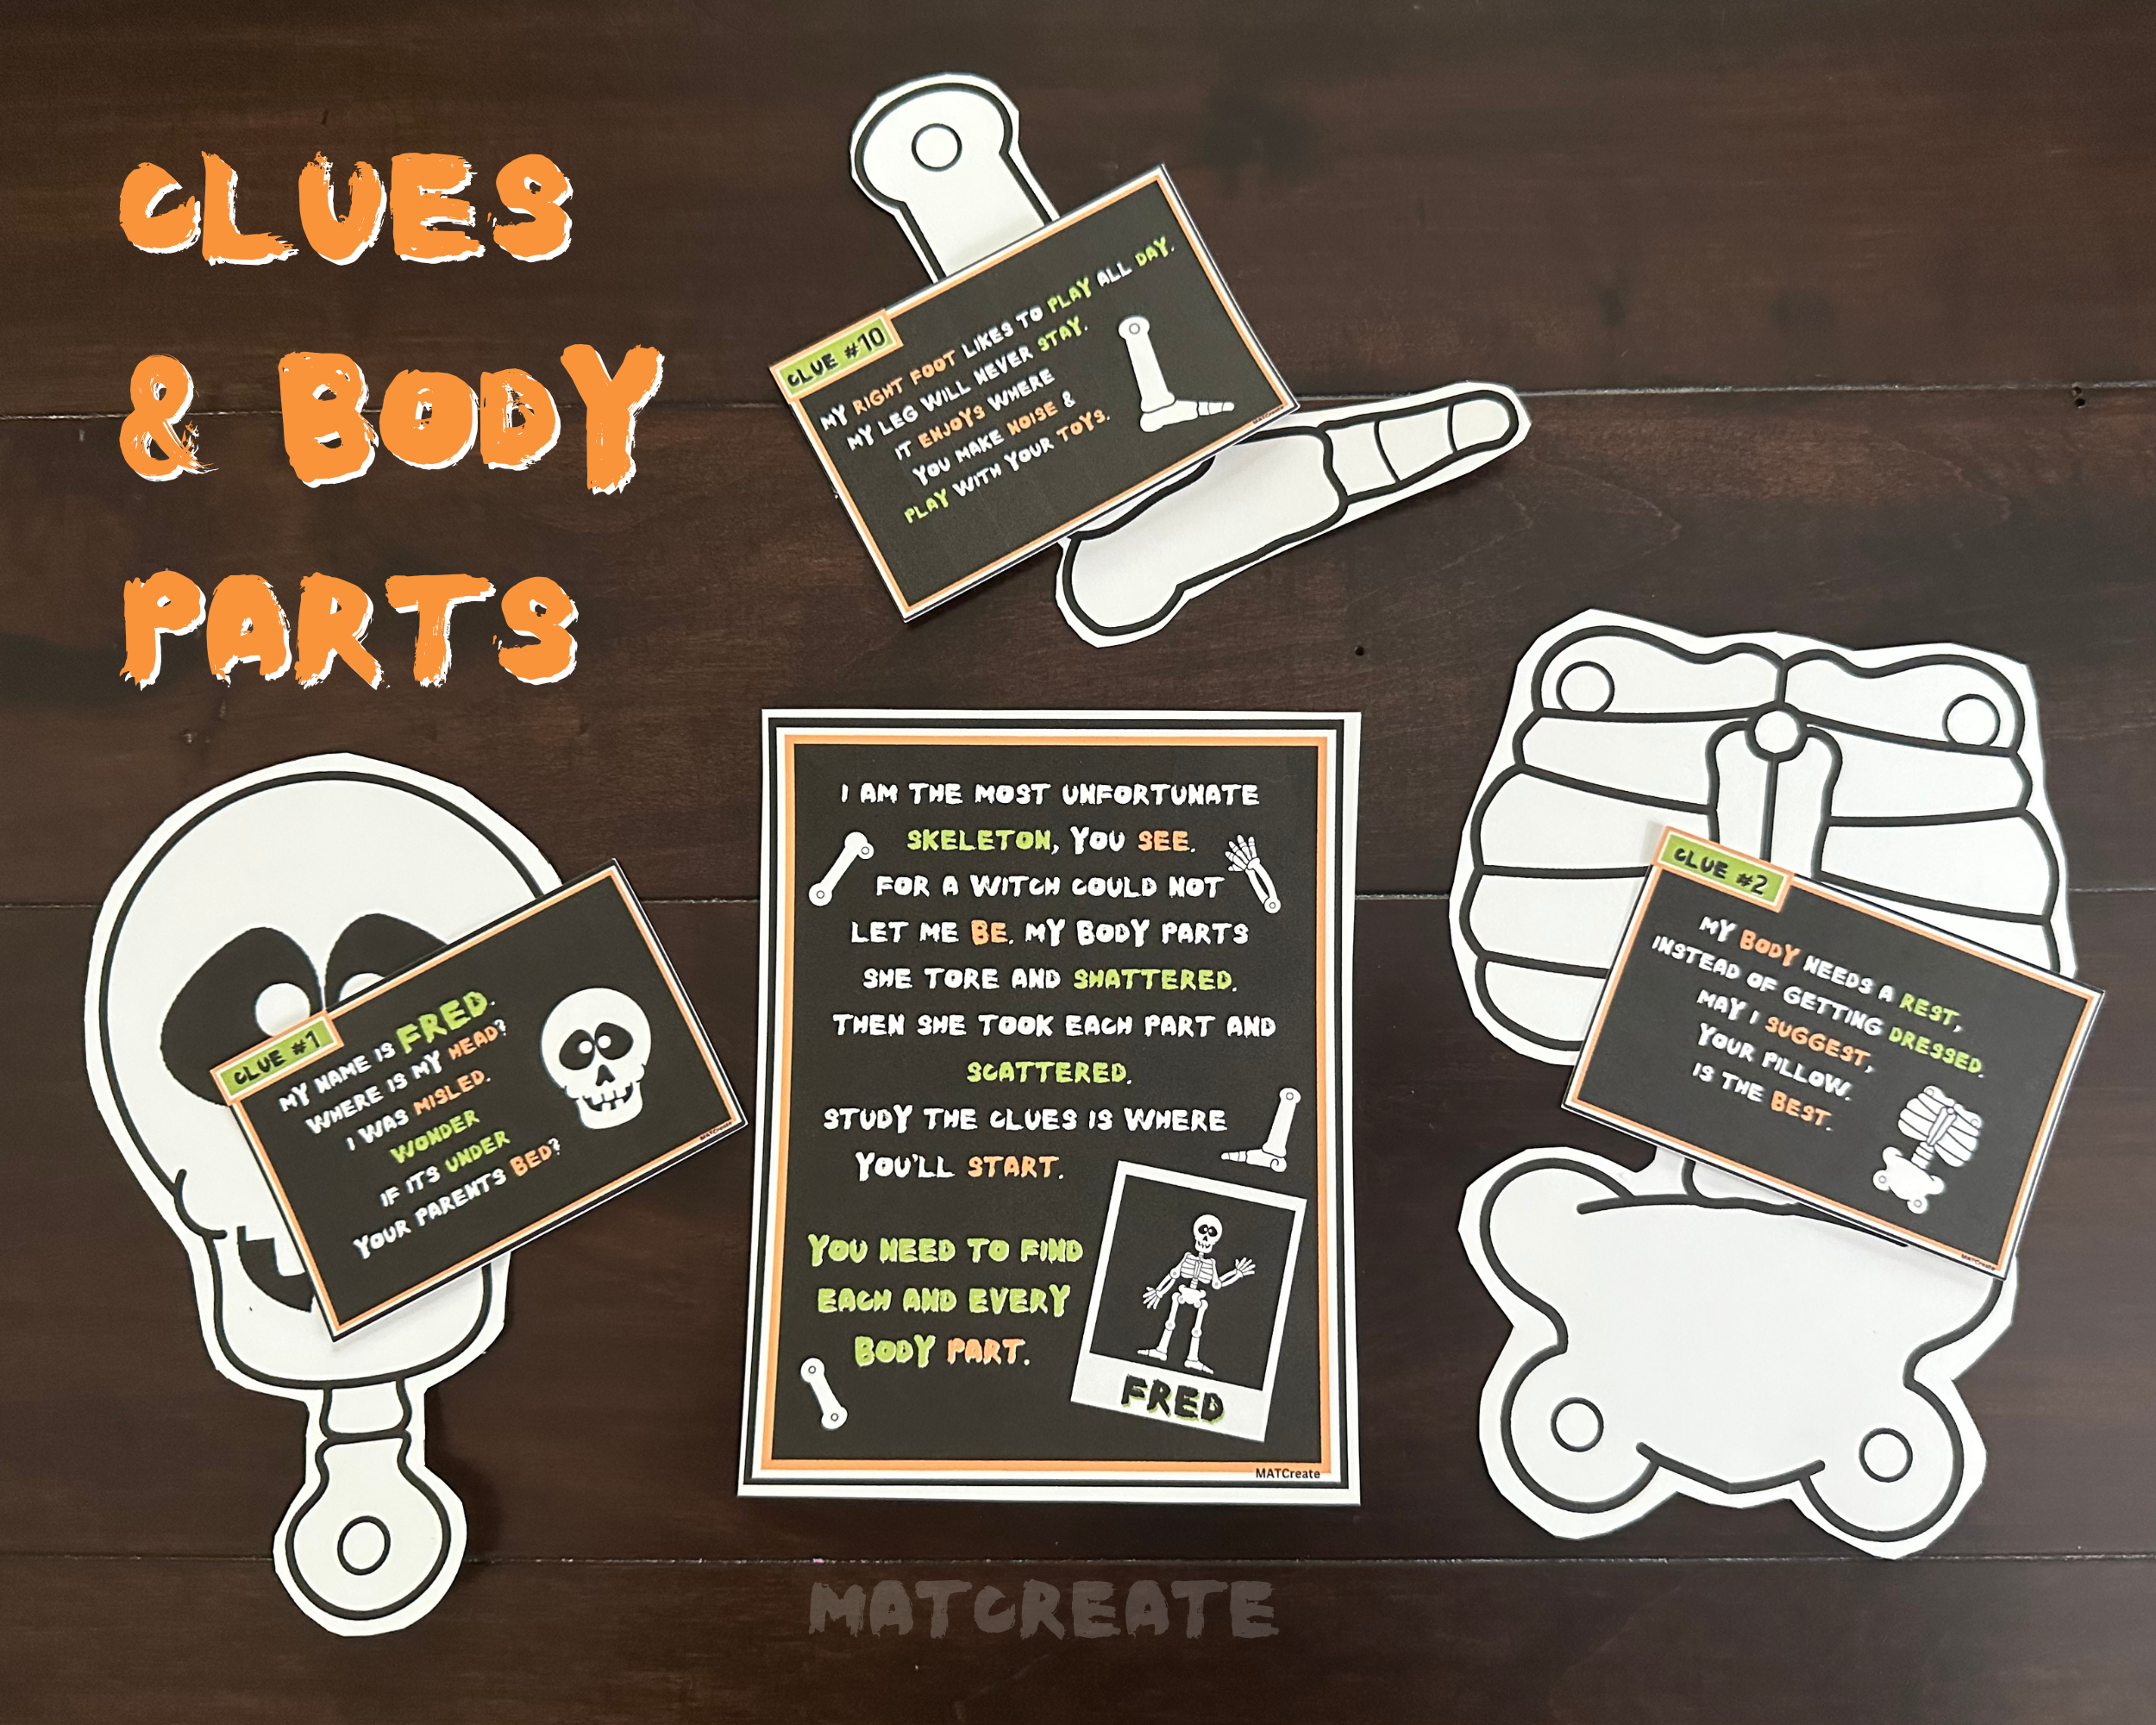
Skeleton Scavenger Hunt

Let the Halloween fun begin! Poor Fred the skeleton ran into a mean witch and she scattered him everywhere! Help Fred get himself back together by following the 10 clues to find each body part. At the end of the scavenger hunt, Fred will be complete again. Good Luck!
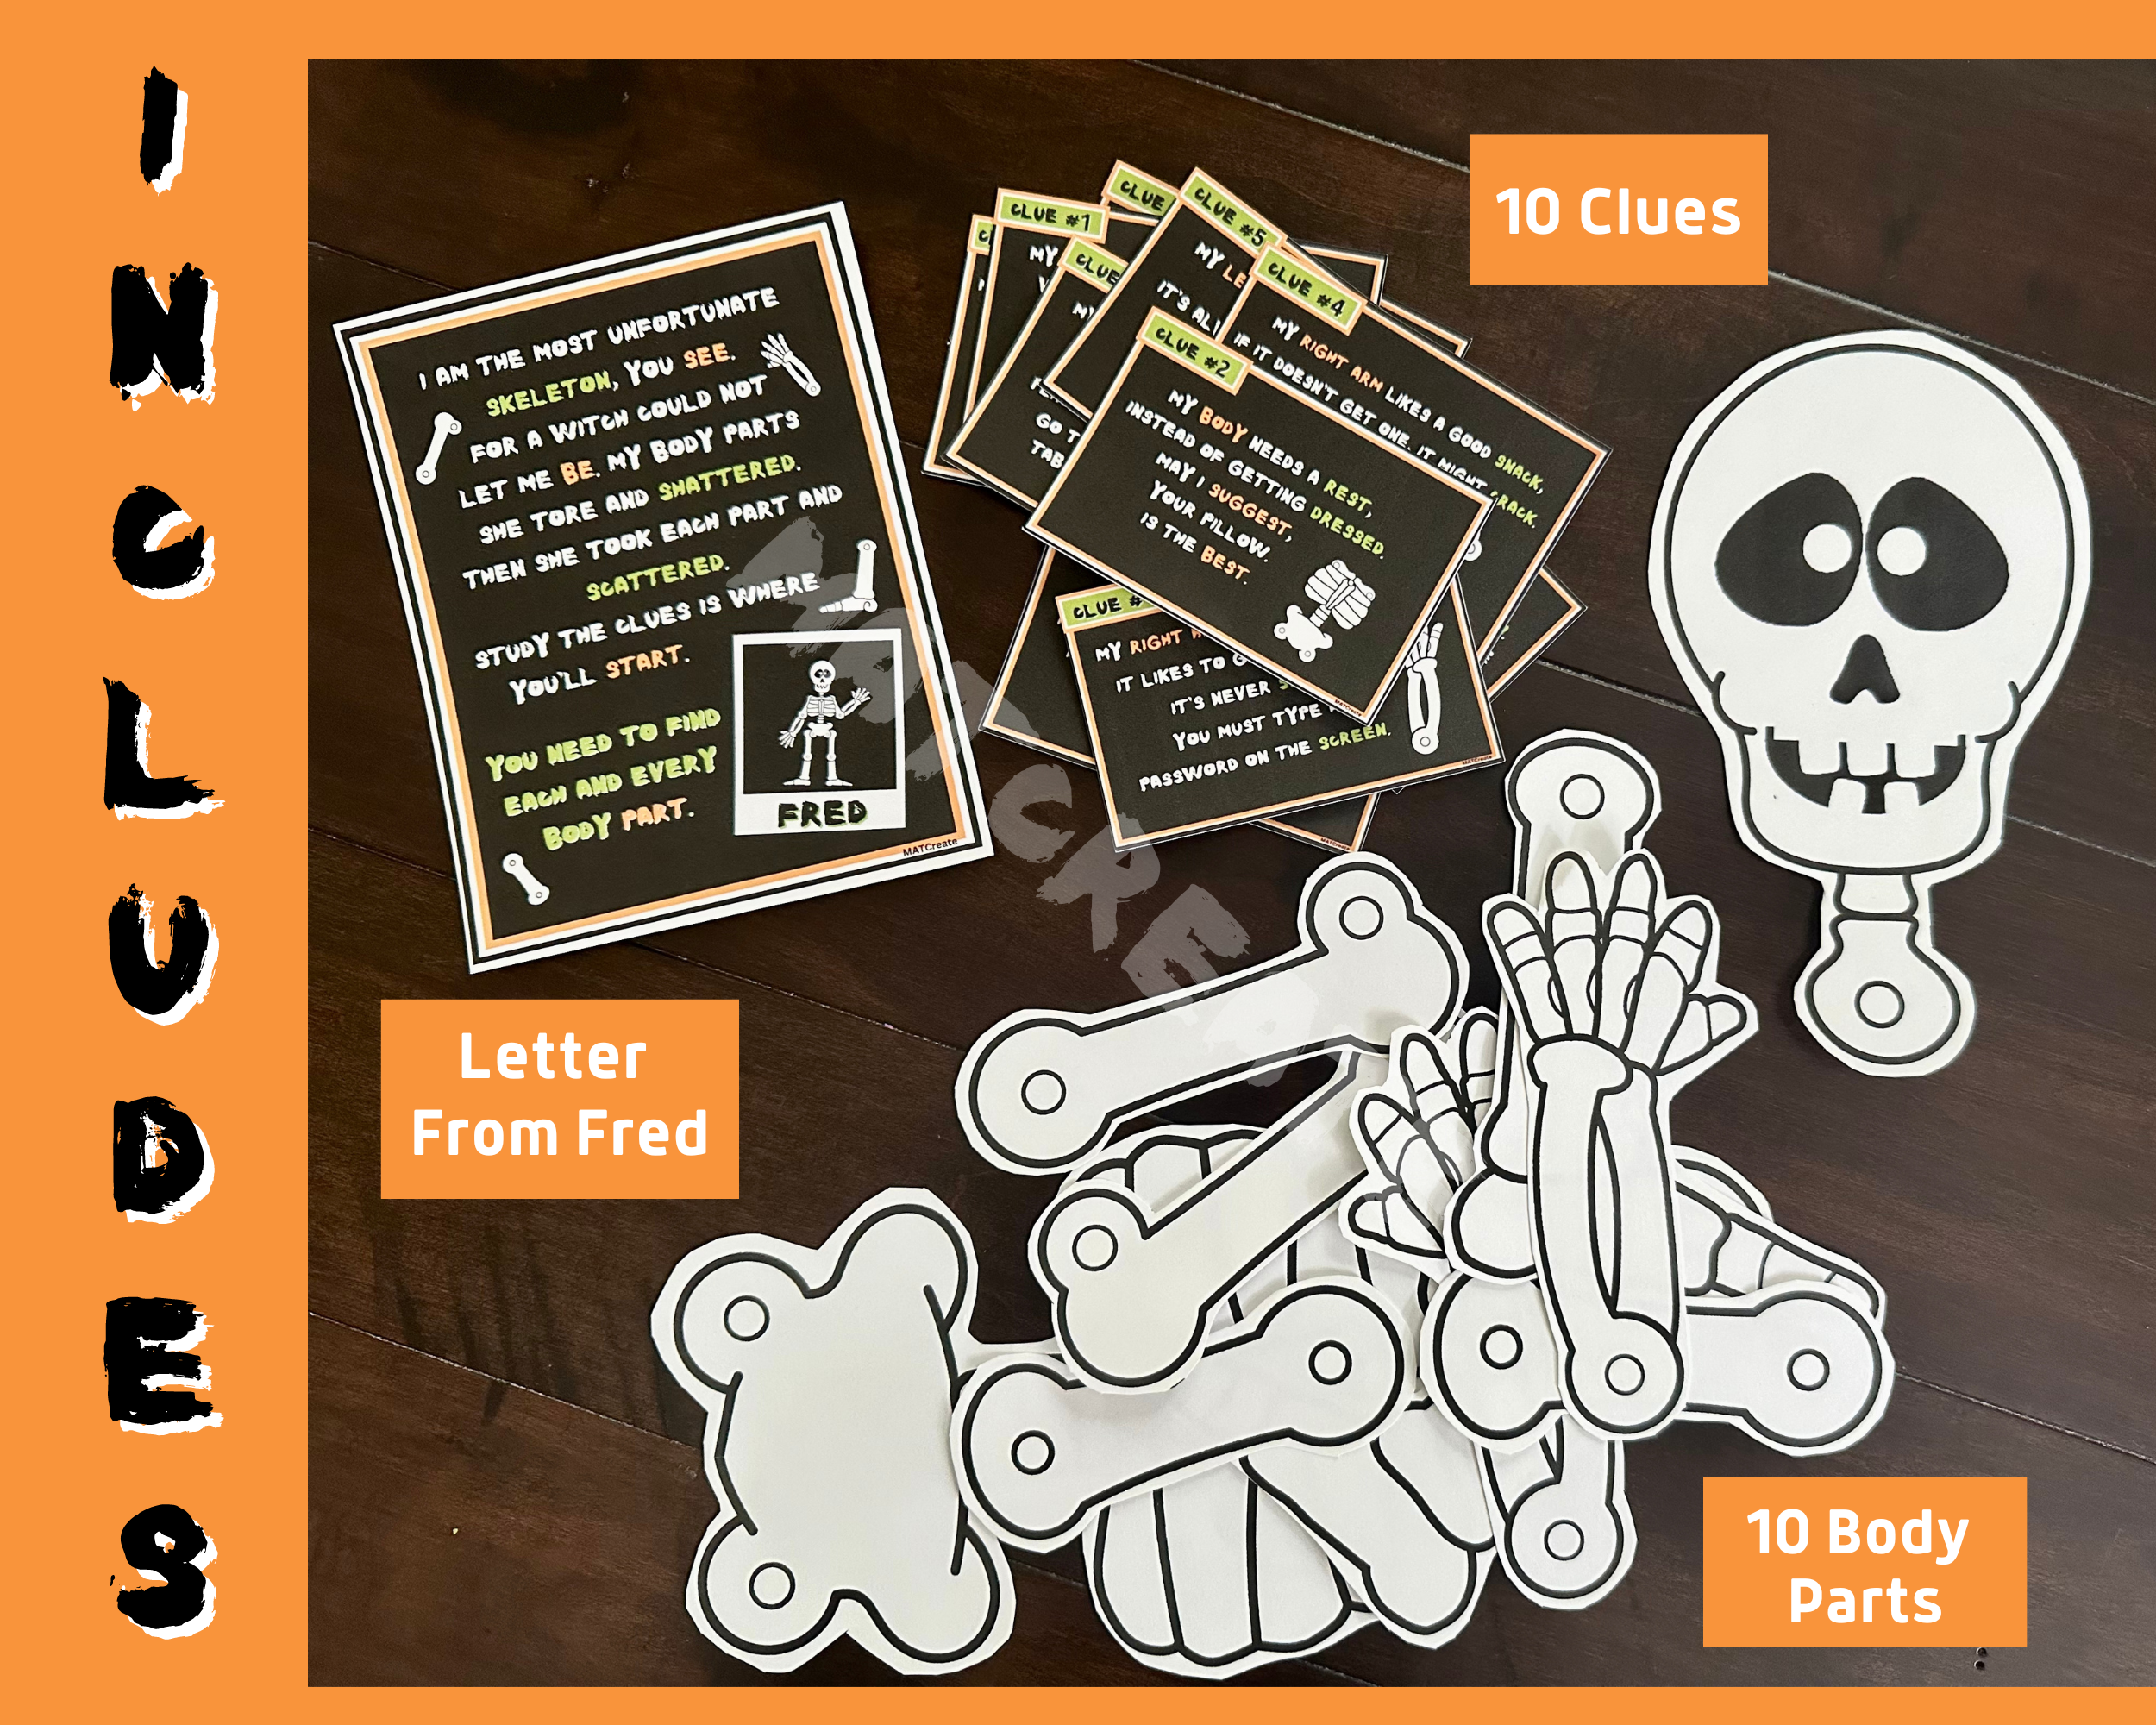
Option #1: Skeleton Scavenger Hunt – Instant Download
Includes:
- 10 Clues
- Letter from Fred
- 10 Body Parts
- Hiding Clues Cheat Sheet
Additional supplies needed: white cardstock, brad fasteners(to assemble him), scissors, printer, hole punch

Directions:
1.) Download the file and print on white cardstock paper.
2.) Cut out the clues, letter, and body parts. Make a hole with hole punch in each circle join( where pieces overlap). Optional to add a hole on top of head to hang (see example).
3.) Match the clues up with body parts.
4.) Using the hiding sheet, hide the clues with their body parts.
5.) Let the FUN BEGIN! Give the letter from Fred and the first clue to child/children. As the scavenger hunt goes on you can attach the body parts back together using brads or wait until the end and put him back together.
*Complete Skeleton is 18.5 inches tall.
Done? You can use Fred as a Halloween decoration, hide his body parts again, make him a Halloween costume to wear, or play hide and seek with him. Of course he only hides 🙂
___________________________________________________________________________________________________
Option #2: Skeleton Scavenger Hunt
1.) Order on Etsy. *White Plastic skeleton is 36″.
2.) Open the package and hide!
3.) Let the FUN BEGIN! Give the letter from Fred and the first clue to child/children. As the scavenger hunt goes on you can attach the body parts back together or wait until the end and put him back together.