ROCK GARDEN

Make a fun and engaging Rock Garden with your child. Begin by going on a scavenger hunt for rocks. Then, paint a few rocks that you find to add color to your garden.
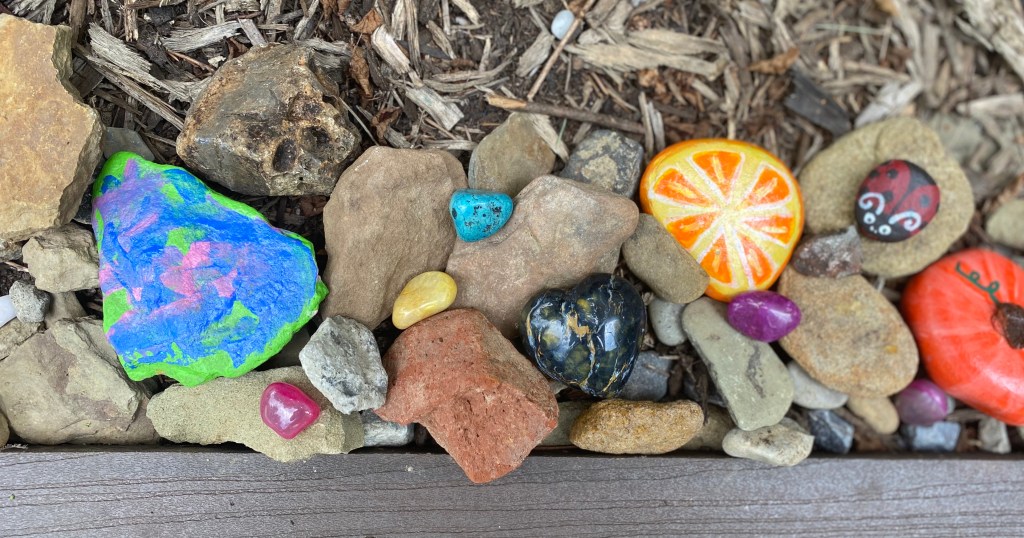
We’ve been going on a lot of walks lately, which means we have also found a lot of “treasures”. Almost every walk we go on or place we go my daughter finds rocks. Our collection started to become very large, so I decided to make a Rock Garden where she can display all of her treasures. When friends come over they contribute to it or get to pick one to take home.
Materials:
- Rocks (variety of sizes)
- one big rock (to paint Rock Garden on)
- acrylic paint (variety of colors)
- paint brushes
- water cup
- acrylic sealant
- cardboard or plastic table cloth (to paint on top of)
First, find a spot in your yard where your rock collection can go and grow. Second, Make the sign for your Garden. We found one big rock to write her name on & Rock Garden. She painted it with all white paint first. Then once dry, she painted the sides. I helped her write “Addy’s Rock Garden” on the rock to finish it.
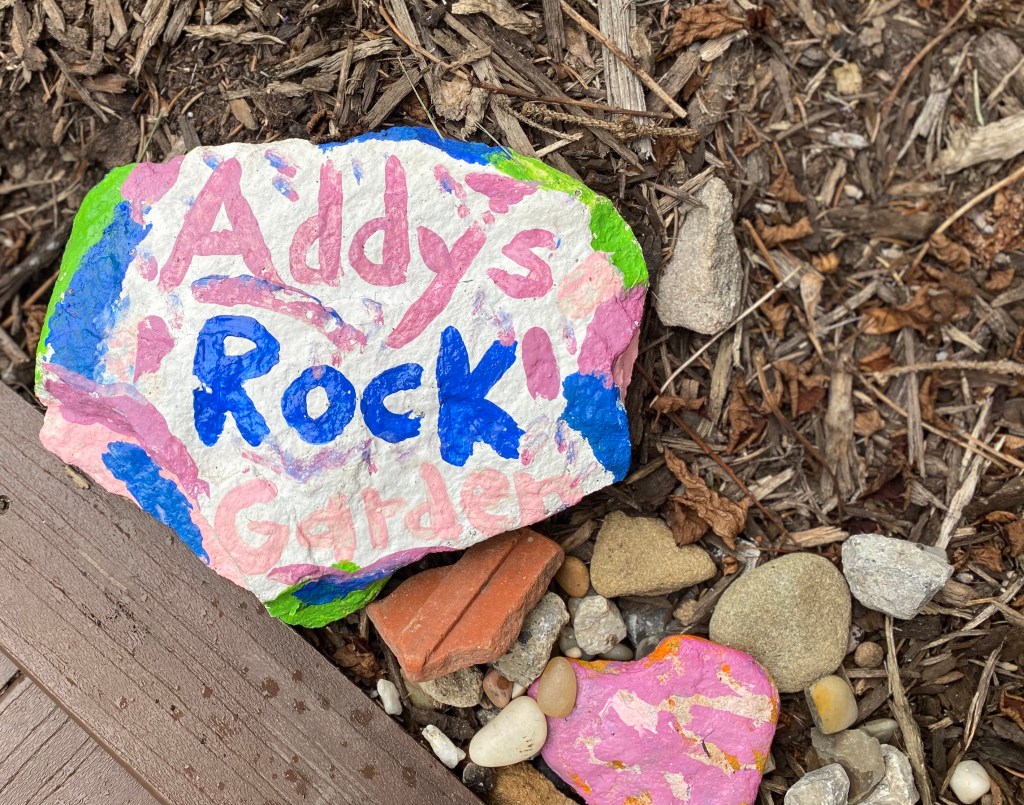
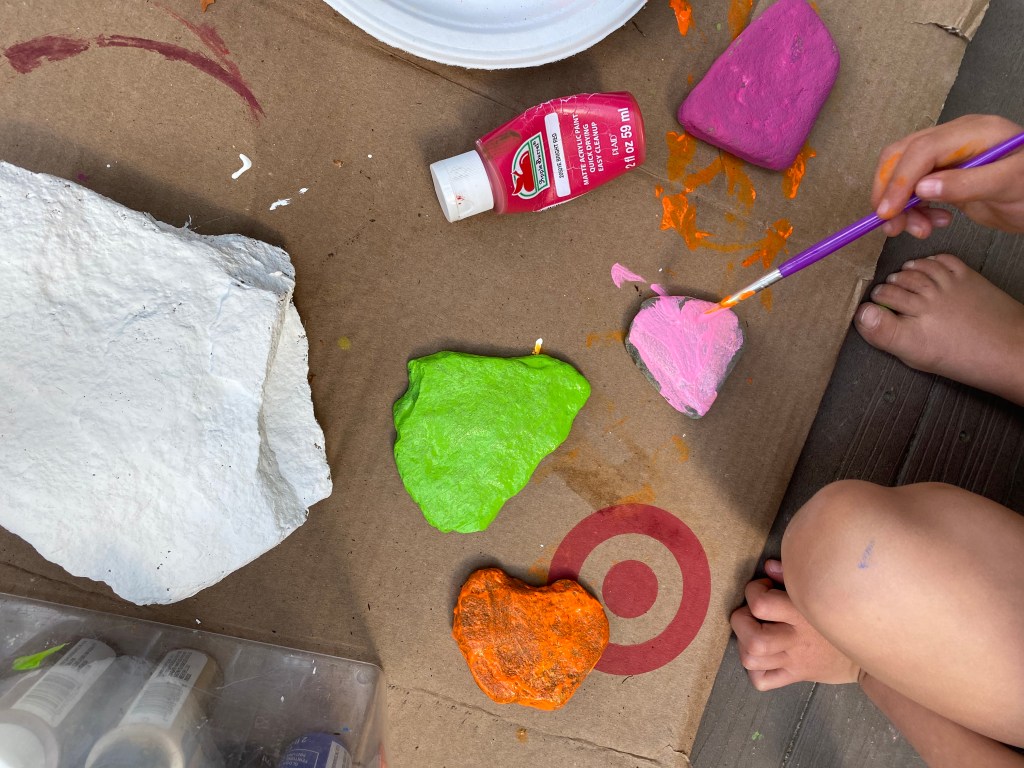
Then, she chose some of her rocks to paint (see picture below). I contributed a few rocks I had painted too.The more people involved, the more fun it is! Once rocks are dry, spray with acrylic sealant. The sealant is a clear coat and helps protect from outdoor weather elements.
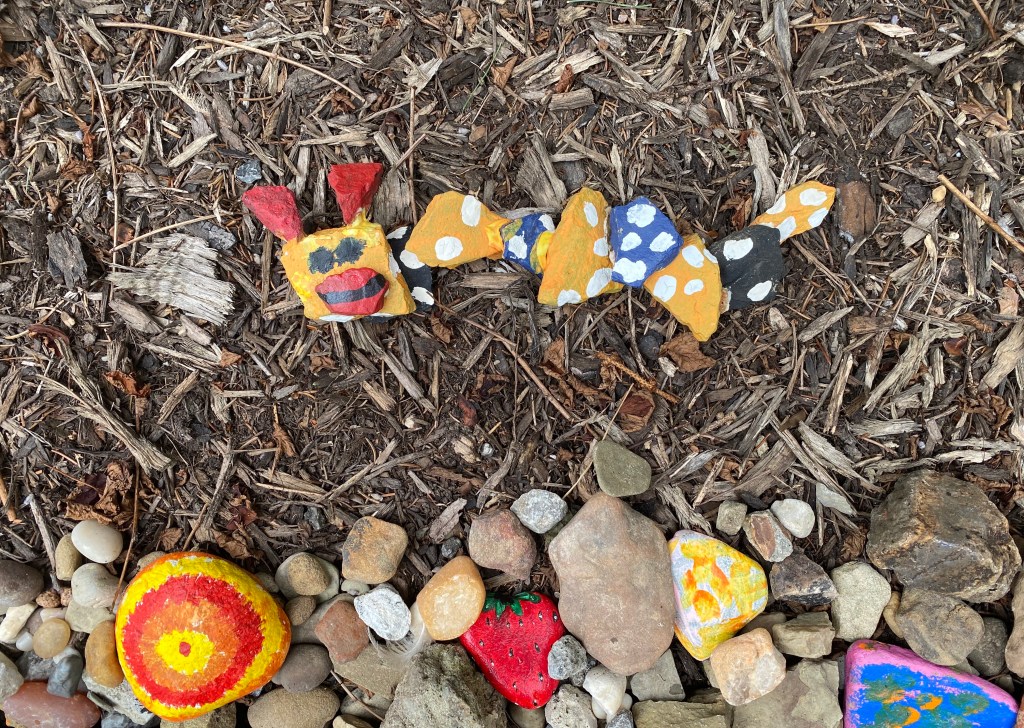
Caterpillar
To create the caterpillar, we looked for thin rocks with a flat side. We then used two little rocks for the antenna and one for the mouth. Lastly, we painted the rocks and assembled/glued together once dry. You could make all sorts of creatures by combining rocks together. Use your imagination!
Activities with Rock Garden:
Utilize your new Rock Garden by completing some of the activities below… the ideas are endless! Feel free to share in comments what all your child/children do in the Rock Garden.
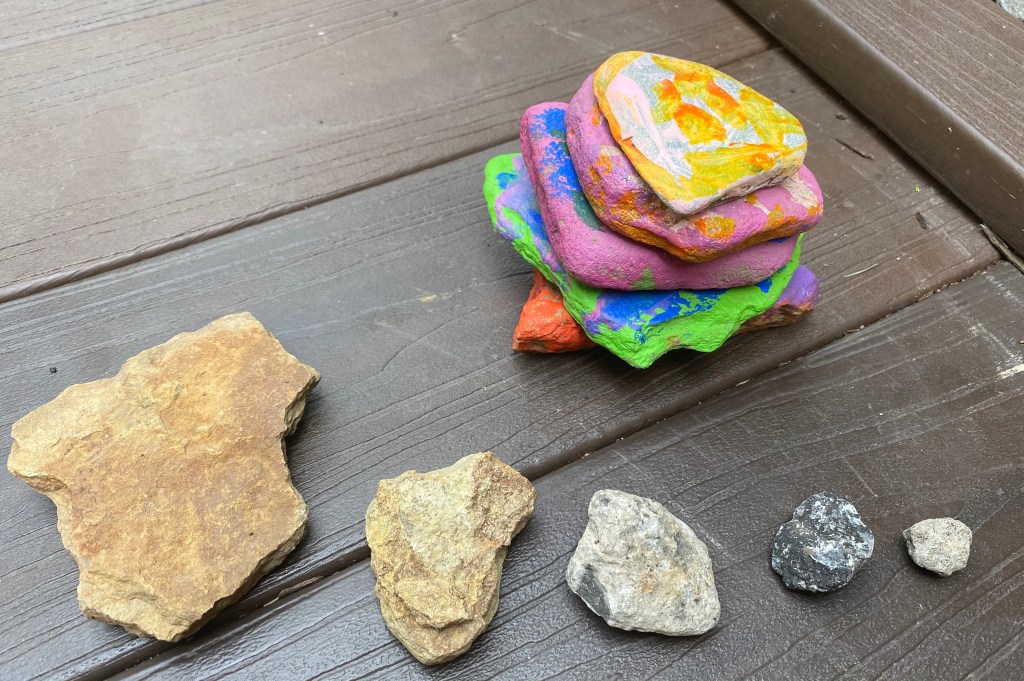
- Sort rocks in order by size, color, and shapes
- Look at rocks and talk about what they look like/could be, use your imagination!
- Share or trade rocks with friends
- Continue adding rocks – keep the garden growing
- Use as an area to play with toys (Example: have a Paw Patrol rescue happen when a figure gets stuck under a rock, have Barbie visit and jump on the rocks, or make into a construction site for PlayMobil and have them move the rocks around).
- An adult or other child can hide surprises in the Rock Garden and other child/children have to find them (I randomly put plastic butterflies or unicorns in it to surprise my daughter).
EASY SUN PRINTS

Who doesn’t love a simple activity with supplies you already have? Watch how the sun changes the color of your paper. This is a perfect outdoor activity and mess free!
Materials:
- construction paper
- Small items of various sizes (plastic animals/insects/frogs, puzzle pieces, coins, jewelry, leaves, flowers, buttons (try to use objects with a flat side)
- tape
- baking sheet
- sunscreen
- paintbrush
- paper plates (to put sunscreen on)
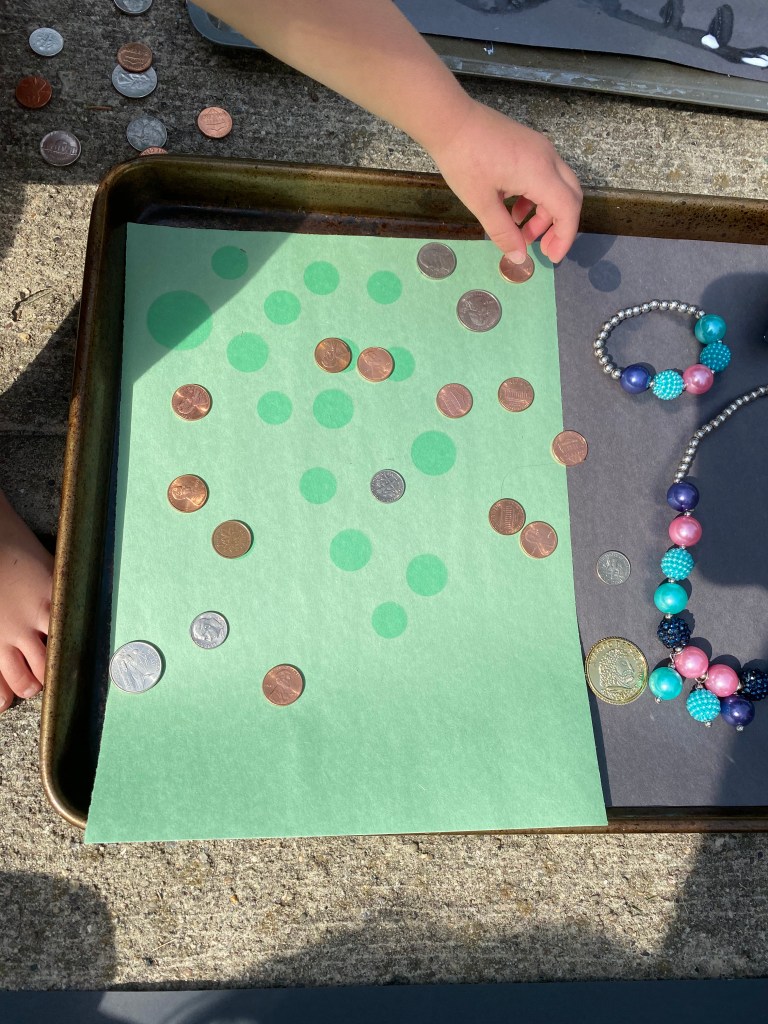
Option #1: Object Prints
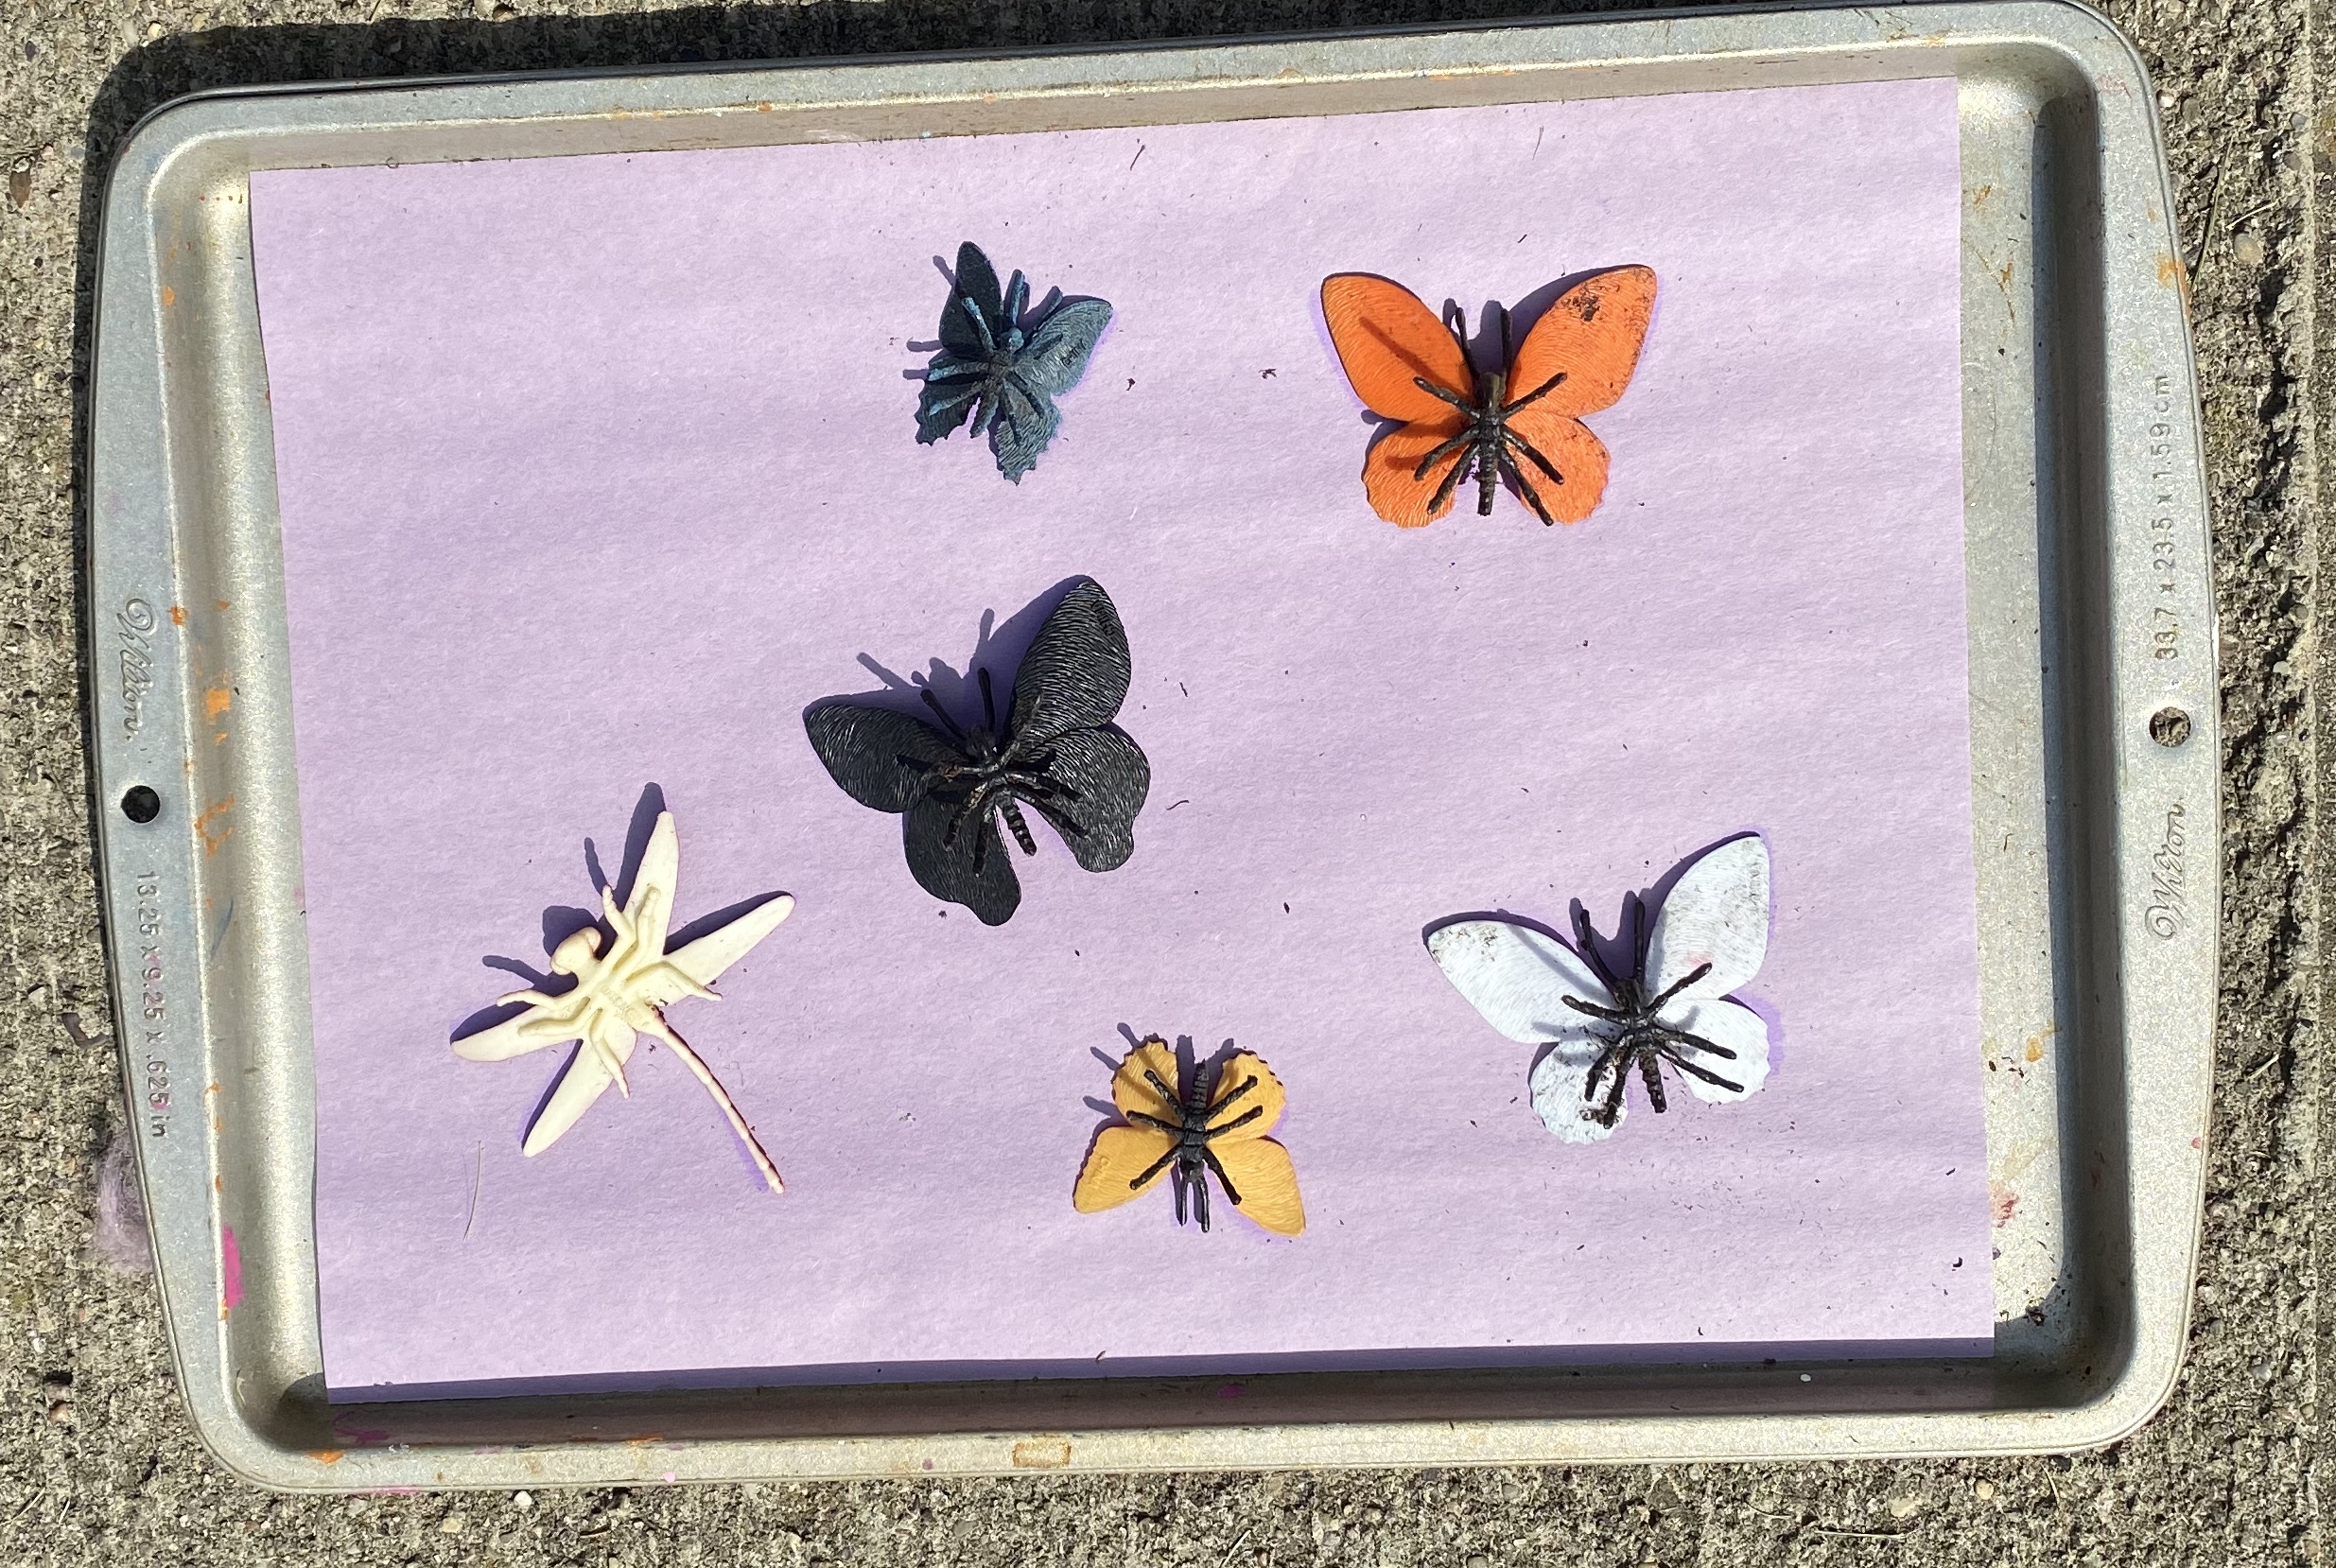
Have all of your supplies ready before you begin. On a sunny morning, place your construction paper on top of a baking sheet. Put tape under the paper to secure it to the baking sheet. Find a flat surface outside in the sun (avoid shaded areas.) Arrange the objects quickly on the construction paper. You can create a pattern, scene or just place randomly. Wait several hours and then remove your objects to see the power of the sun! The longer your project is out in the sun, the more contract you’ll see in your paper’s color.
About after an hour make some observations about your project. Does your paper look darker or lighter? What do you think is happening underneath the objects? Are the objects warm or cold (careful not to move)?
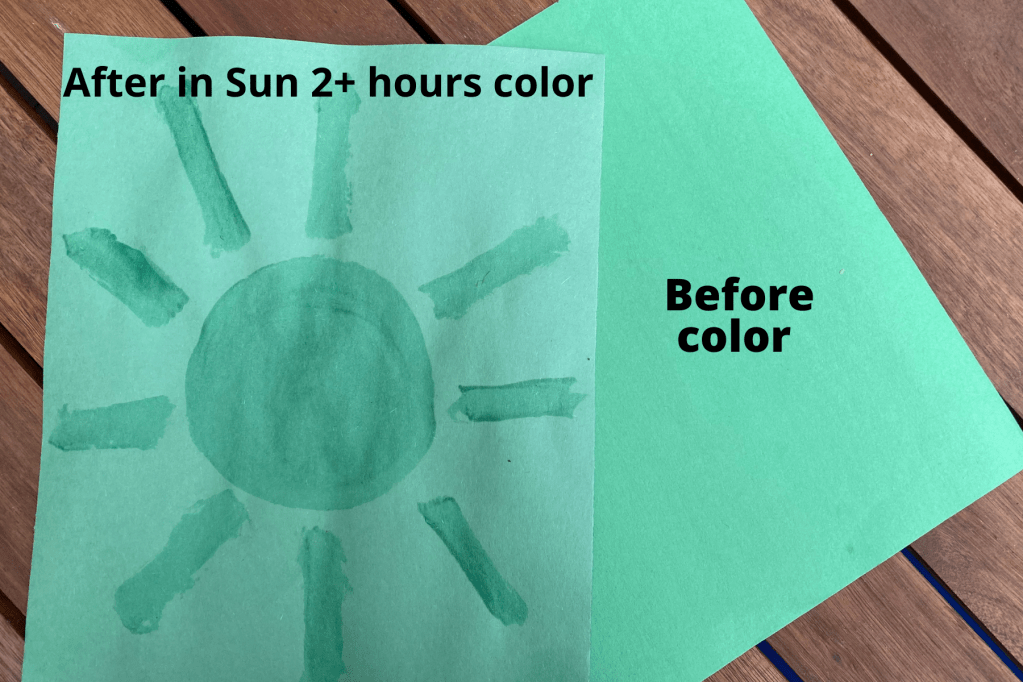
Conclusion:The objects on the paper blocked the UV rays of the sun- leaving the paper under them the original color. Where the objects were not, the paper faded because of the sun’s strong UV rays.
Move the white circle with arrows to see the before and after image below. We used pool toys & rocks for Example #1 and plastic insects for Example #2 (from the dollar store).
Example #1:

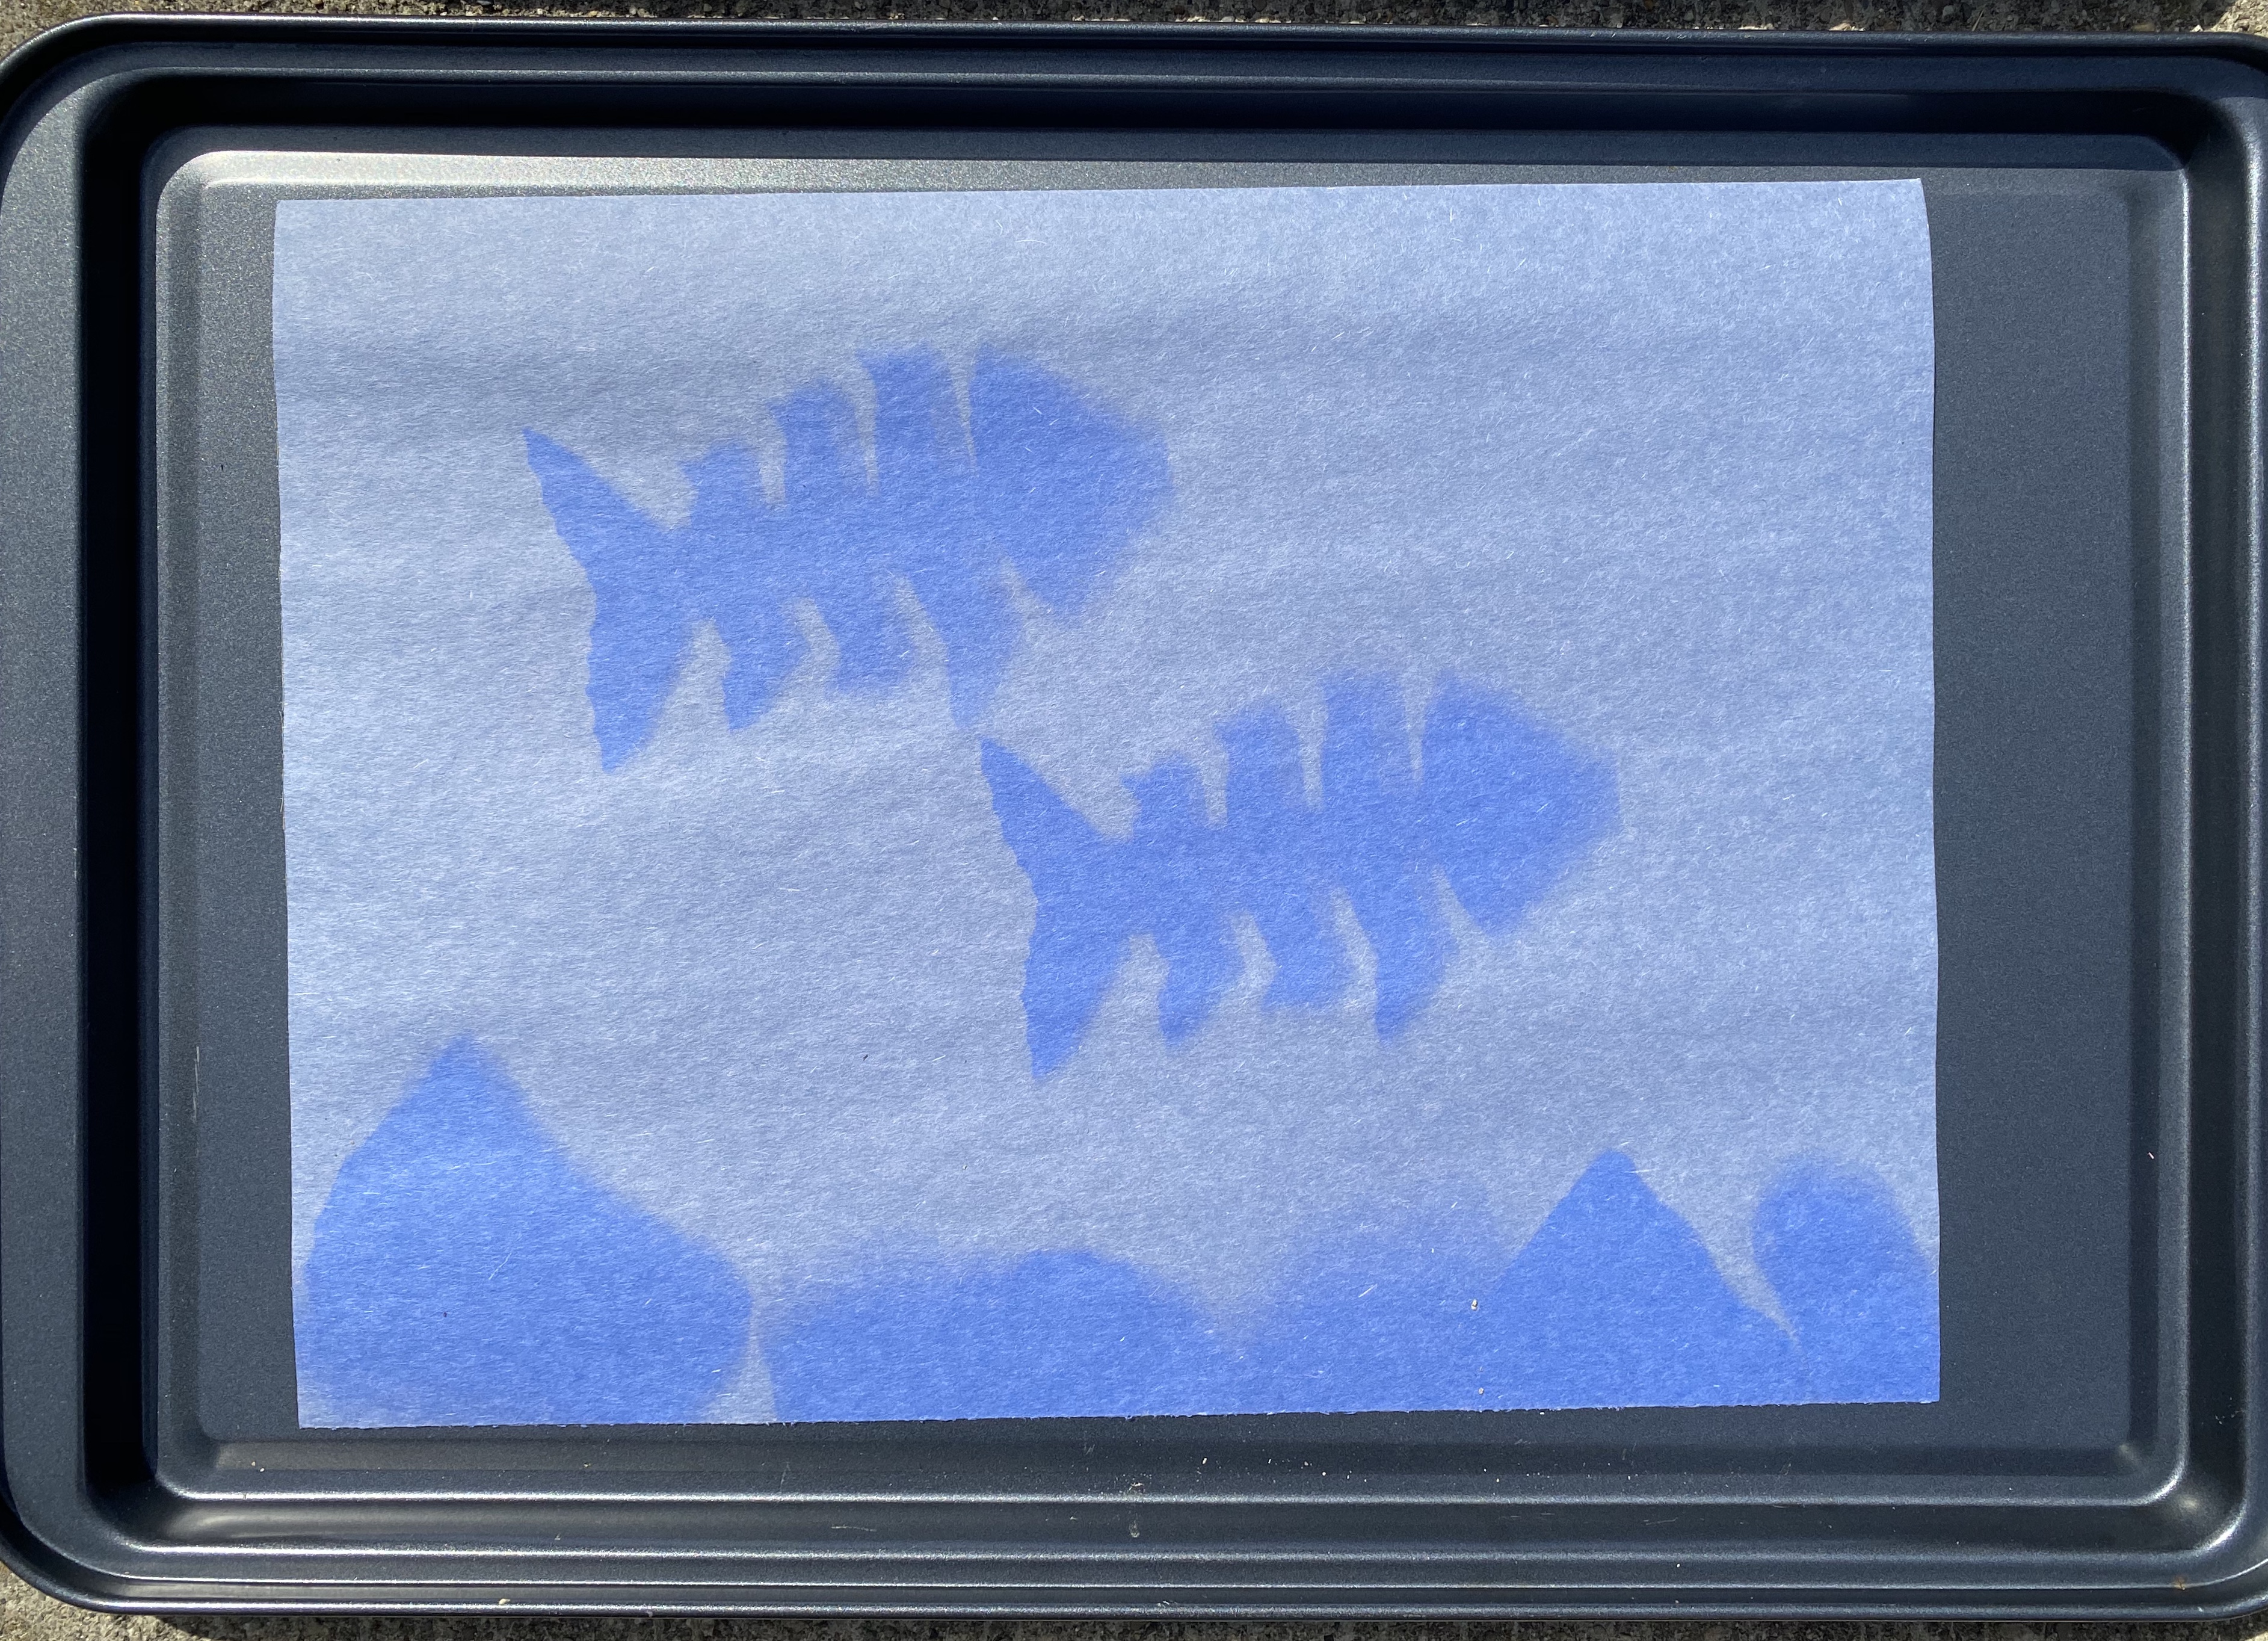
Example #2

Option #2: Sunscreen as Paint!

Place construction paper onto baking sheet and secure with tape on the bottom. Using a paint brush, paint an image onto the construction paper. Create an abstract image or draw a certain object. Then, place into the sun for several hours.
About after an hour again- observe what you see. Has the suntan lotion dried? Still white? Has the paper changed colors? Any other observations?
Conclusion: The area where you placed the suntan lotion did not change in color because the suntan lotion protected it. But, where there was no suntan lotion, the sun’s strong UV rays faded it.
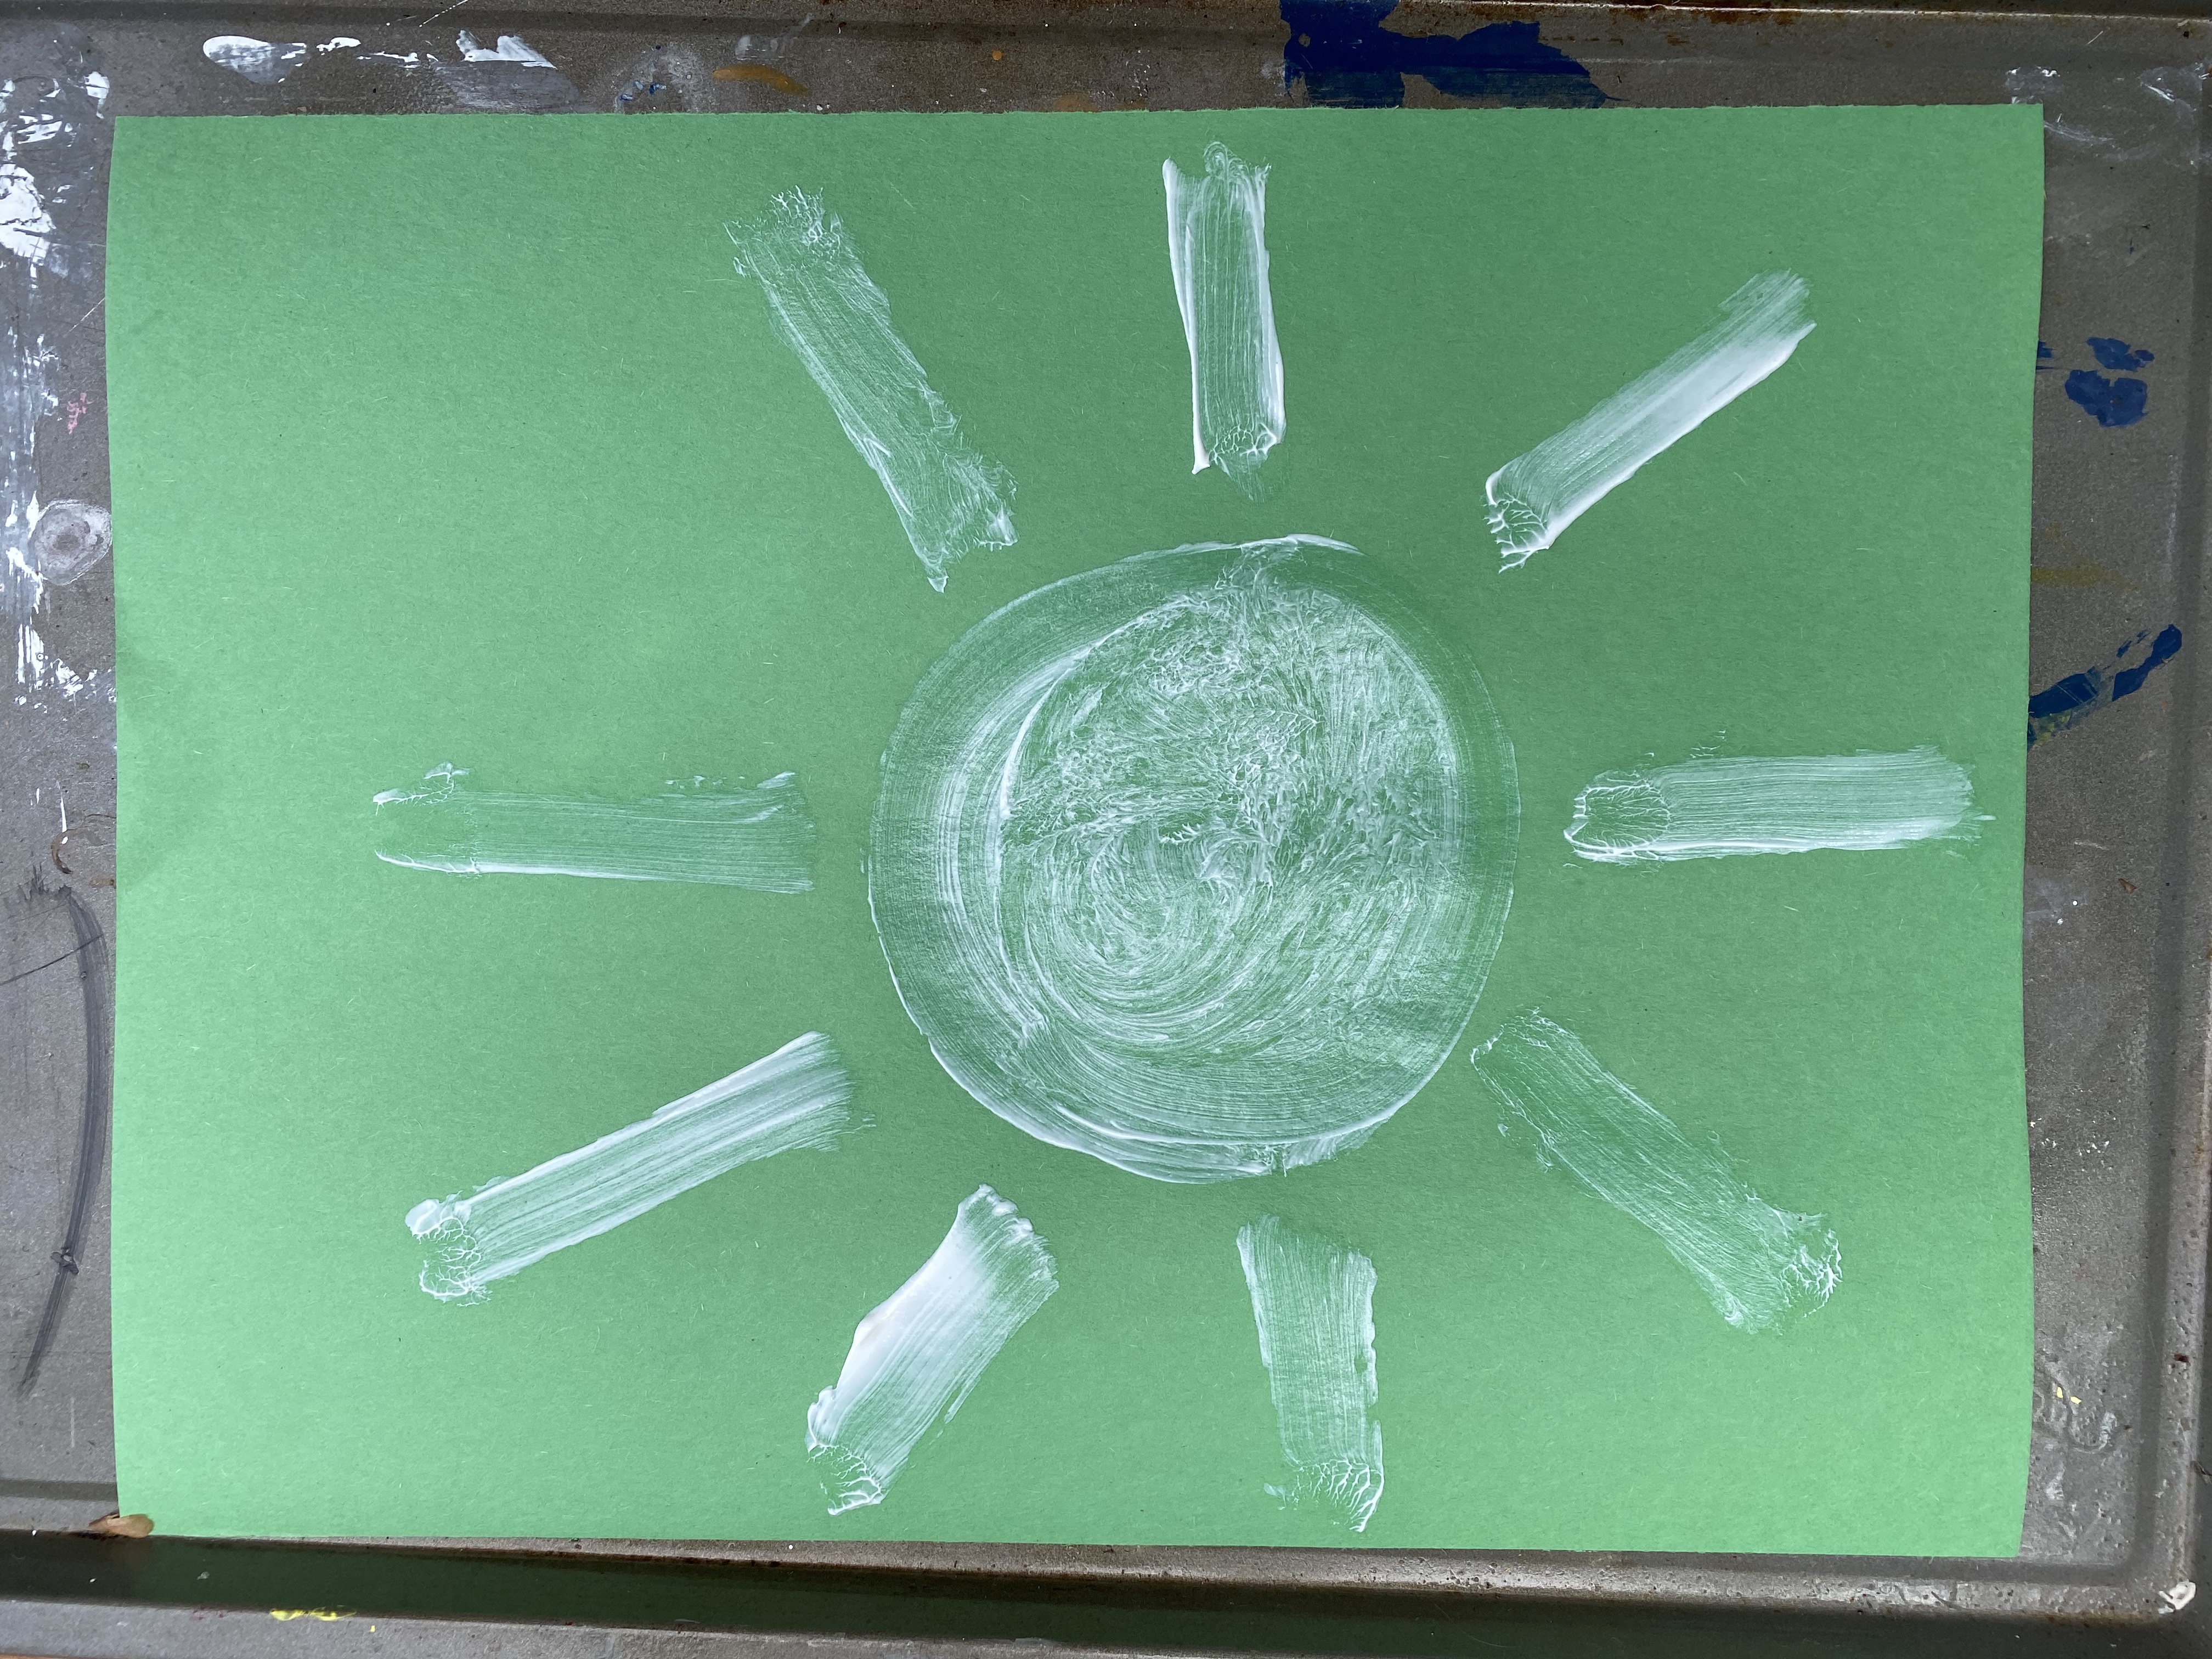
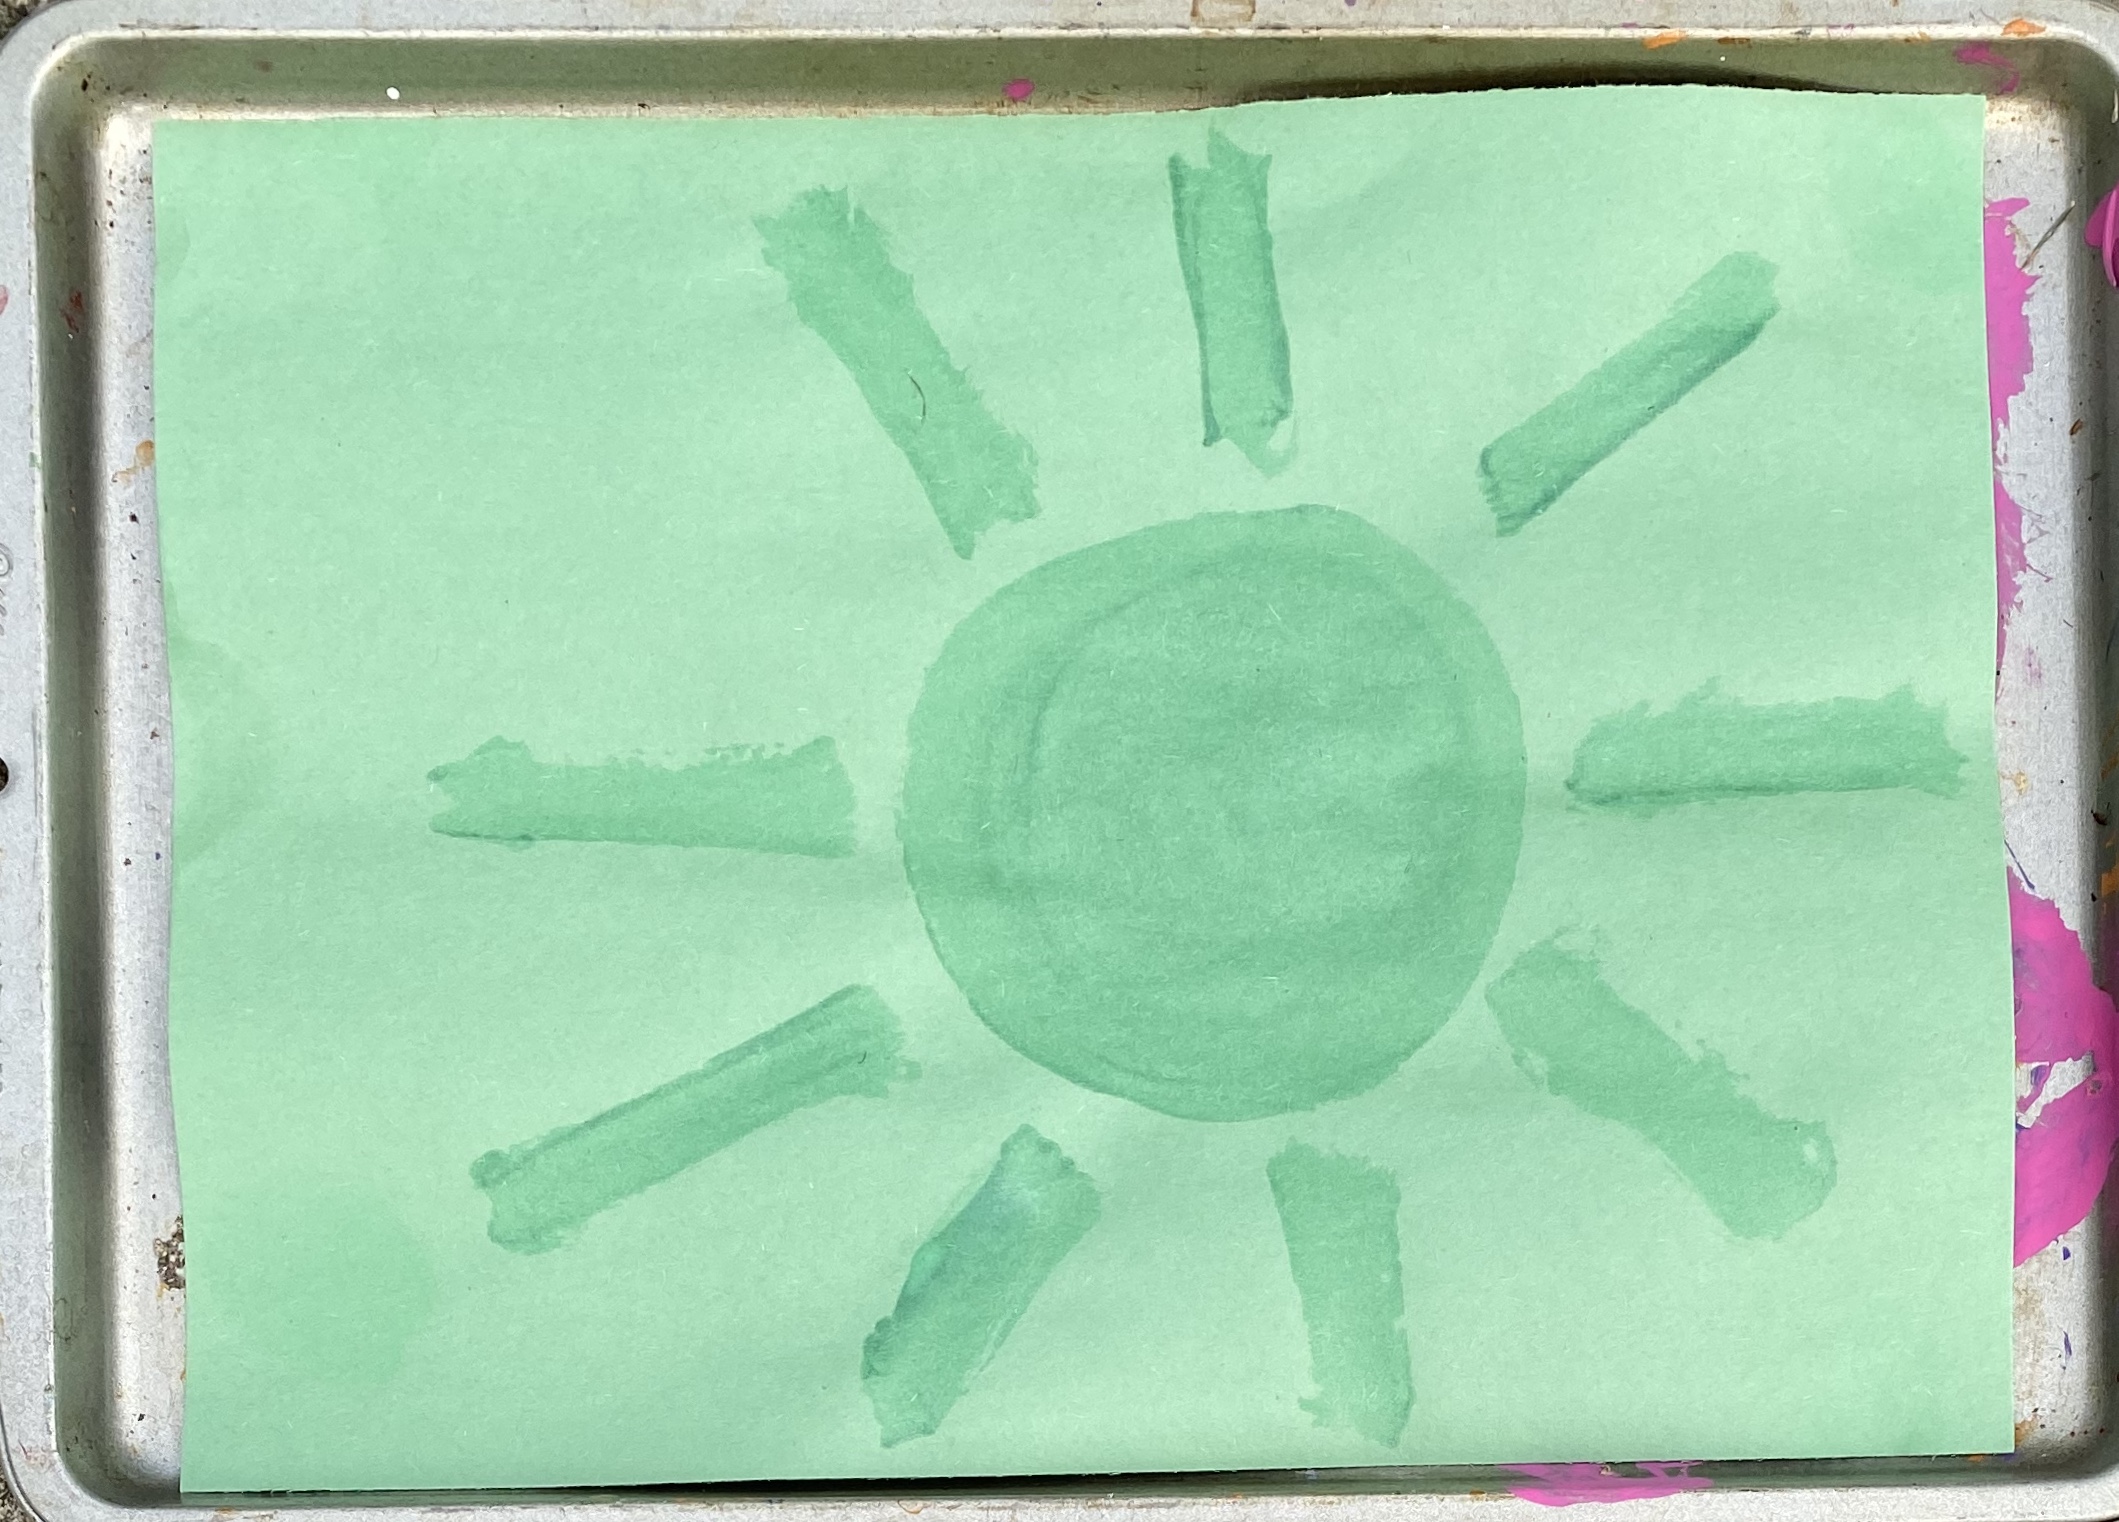
Time exposure is really fast in the sun. You can see by the photo on the left the original color of the paper vs. paper after several hours in the sun.
This is a great example of how suntan lotion protects you from the sun too. Next time your child refused to wear it, remind them of the sun’s power in this activity.
You can also buy sunprint paper where the results are even more vivid.

Daddy’s Heart & Me

Make a cute keepsake for Daddy! Best for ages up until 5 years old.
I made this for my husband when my daughter was two. This was definitely a favorite & it’s still in his office today. Hope your family cherishes this gift as much as mine.
Materials:
- template
- cardstock
- printer with color ink
- photo (optional)
- white tempera paint
- foam brush
- 8×10 frame
To Make:
Apply photo to template before printing or apply later. Print out template on cardstock. Apply white paint (or your choice of color) to child’s hand with foam brush. Make sure entire hand is covered. Slowly have child place hand down with fingers spread apart onto heart. Press down on their hand when on the paper to make sure all paint sticks. If any area needs more paint, apply with brush or your finger. Let dry. Apply photo if haven’t yet. Once complete, place in frame.
- I liked the look of a black & white photo, but it can be color too- whatever works for you.Your child can also draw a photo too. I did a white handprint on our copy and I liked how it showed up nicely. Any color works.
- You can also write the date on the back of frame or no the template.

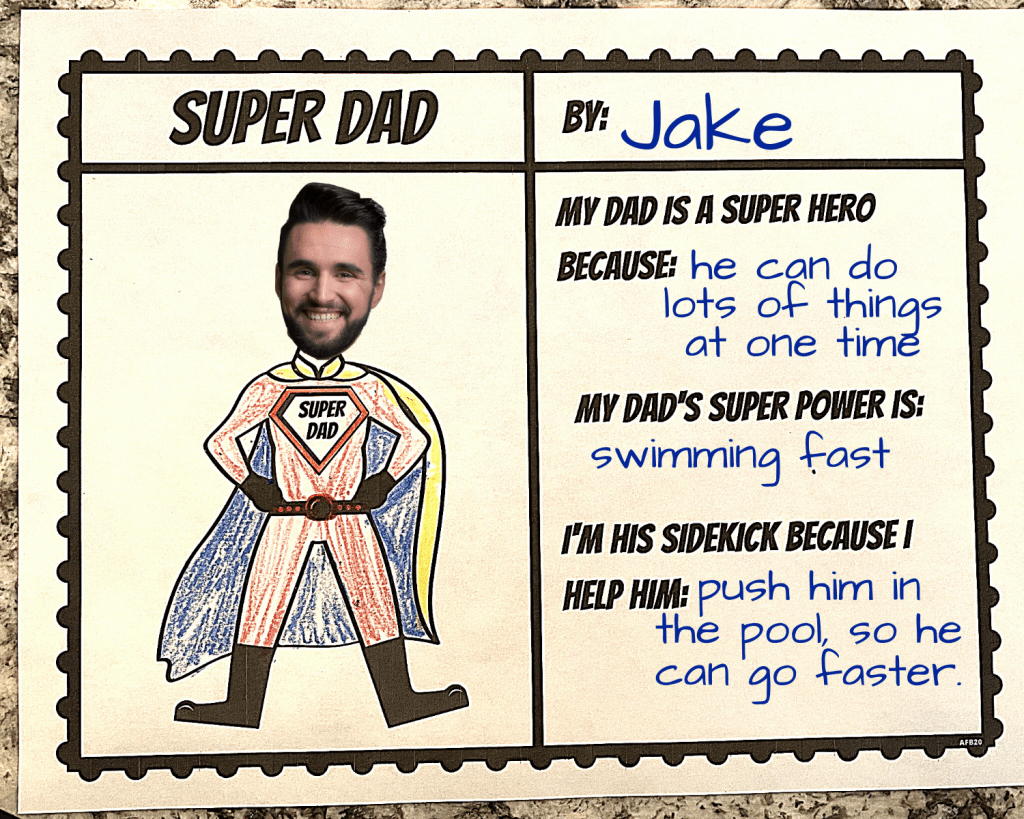
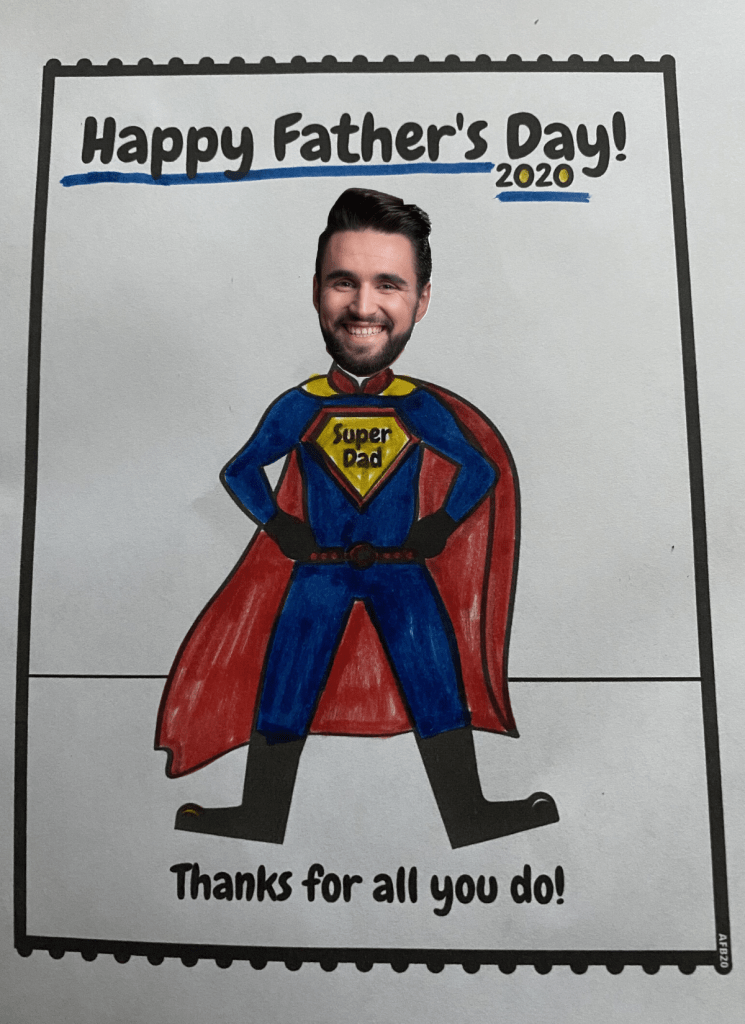
FATHER’S DAY- SUPER HERO DAD

In our house my husband really is a Super Hero– man of many hats. I’m sure its the same in many other houses too. This project is the perfect way to tell him! My daughter saw me designing this one and loved it. She keeps asking me how long until she can help turn Daddy into a Super Hero. She has a tendency to ruin surprises (just can’t help herself, so excited), so i am waiting until the last minute for her to “turn Daddy into a Super Hero”.
I made two different versions, plus an award. Lots of options for you! One version is for younger kids to color in the Super Hero outfit. The other version is for older kids to color in as well, but also answer a few questions about what makes their Dad a Super Hero Dad.
To begin, you can either add a head of their dad to the digital copy on your computer, or you can print this document out and glue a photo on. If gluing a photo on, wait until your child/children color it. By doing this you will avoid them accidentally coloring his face or if glue not dry, smudging it up. If a photo is too much, just have your child draw their dad’s head on the body. The best way would be to draw in pencil first, then outline in black marker, add color last (for older kids).
If you want to add a photo to the digital copy- I recommend the link below to take the background out of your photo (its free). Its tedious work, but its worth the patience! You can also google “background burner” to find other options.
Fill in the reward below and it’s ready. You could even have an award ceremony and give it to him. Great photo opportunity! Below there is a large copy of the “Super Dad” logo that’s on the printable. It can be printed out and pinned onto a t-shirt. The printable would be great if you do an award ceremony or to wear just for fun. A superman shirt would be a great gift too.
To Make:
- printer
- white cardstock or regular printer paper
- Super Hero Dad- About & Picture
- Super Dad Picture only
- Super Hero Dad Award
- Super Dad Badge
- markers/colored pencils
- scissors
- photo of Dad
Hope your Super Dad loves his Father’s Day gift!
Please see Terms & Conditions in the “About” page. If any questions, leave a comment.
Happy creating & gifting!

SMILE IN THE MAIL

Want to surprise a friend or family member? Send a smile in the mail to make a them feel special & let them know you are thinking of them. Make it even better by adding stickers.
My daughter loves getting mail. I honestly don’t know any kid that doesn’t like getting mail. Since she isn’t seeing her friends as much as she used to, we thought sending a little note would let them know she misses them!


Materials:
- Printable template (each card is 5×4), 4 per sheet
- white cardstock
- markers/crayons
- stickers (optional)
Process:
1.) Print the cards on white cardstock and cut out.
2.) Personalize! Have your child sign their name at the bottom. The back side is blank, they can decorate it/make more personal. An illustration of them & their friend would be super cute. My daughter loved making “pictures” for her friends on the back. She used crayons, stamps, and more stickers to create hers.
3.) Add a surprise (optional). We put stickers in with our cards.
4.) Place in an envelope. If hand delivering, your child can write the person’s name and decorate more. Or if sending in the mail, have your child write the recipients address(if able).
5.) Mail it! Have your child place in your mailbox for the carrier to pick up or drop off in a USPS blue mailbox.
Happy creating & surprising!
FATHER’S DAY – HANDPRINT TREE

Who doesn’t love a child’s handprints? It’s amazing how fast they grow. Cherish their little hands by using them in this keepsake.
Materials:
- paper plates
- tempera paint (washable)
- tree template
- cardstock paper
- marker/pen (to sign child’s name)
To Make:
Place tempera paint on paper plate. Spread paint out (as big as child’s hand). Have your child dip his/her hand in it (hand flat down). Or you could apply the paint directly onto their hands with a paint brush. Once complete, sign the bottom with their name and don’t forget to date it!
- Please see Terms & Conditions in the “About” Page for usage. To copy for personal use, simply click on link above. Thank you!
Happy Father’s Day!

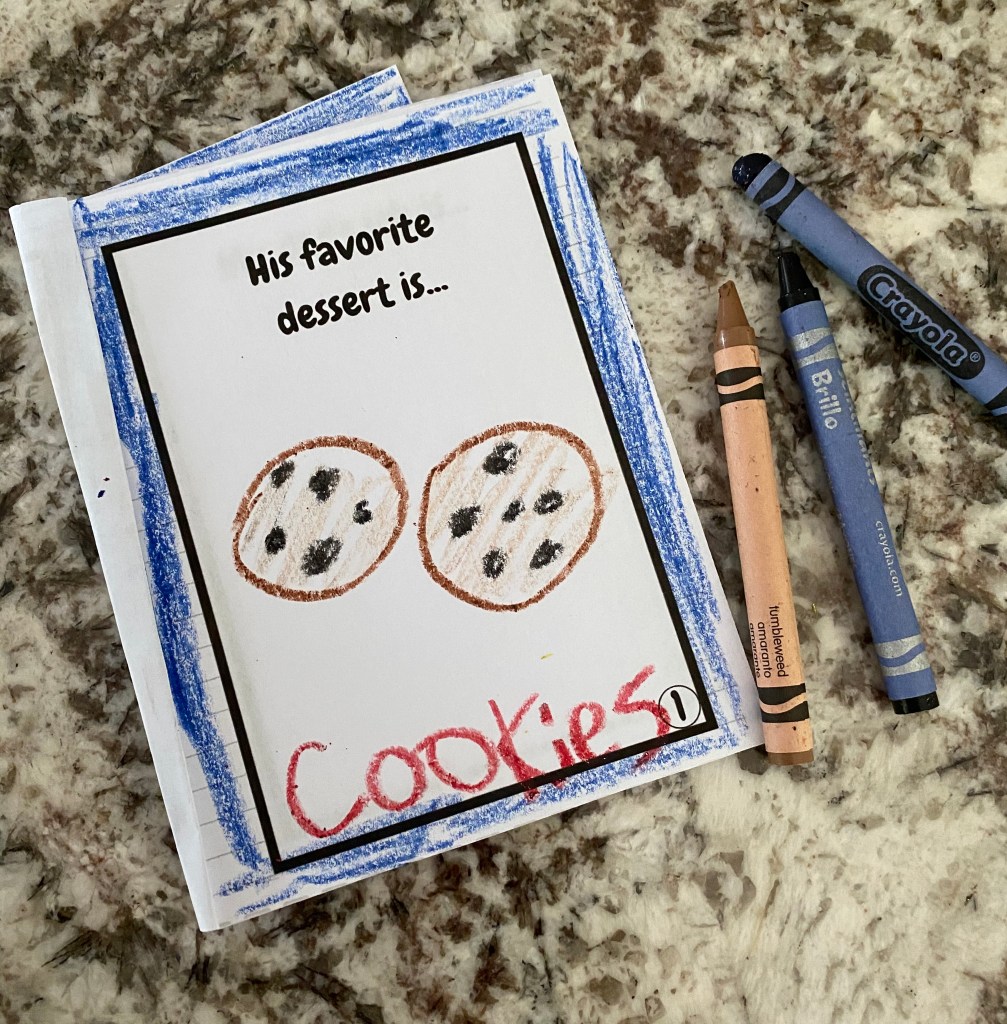
ALL ABOUT MY DAD MINI BOOK

I always love asking my daughter questions about her dad and seeing how she answers. We keep all of her projects in a scrapbook. It’s fun looking back and seeing how her answers have changed over the years.
Last year we did a questionnaire. This year I decided to mix it up a little and do something very similar, but in a mini book form. I asked mostly different questions from last year. I’ll post that questionnaire soon. This year she is also able to make the illustrations and write out his favorite things too. You can write the answers or if your child is old enough, they can.
Materials:
- Scissors
- Book Template
- Crayons/markers/colored pencils
- White paper (regular or cardstock)
- stapler
To Make:
On the first page should be a picture of their dad- head or full body. On the last page should be a picture of them together. If you have multiple children, you can have them each make a book, or have multiple answers on each page. If each making a book, i would do it separately with them- so they don’t copy of each other’s answers. If doing one book, I would have them or you put their initial next to their illustrations. See “We” page below for last page if multiple children completing.
Once all of the pages were done, then I stapled the pages together.
Have fun creating & answering! Maybe you’ll learn something about your husband from your kids, that you didn’t know! 🙂
- If you would like to ask questions that I didn’t ask- I provided a blank sheet, so you can choose your own questions (see below).

Happy Father’s Day!
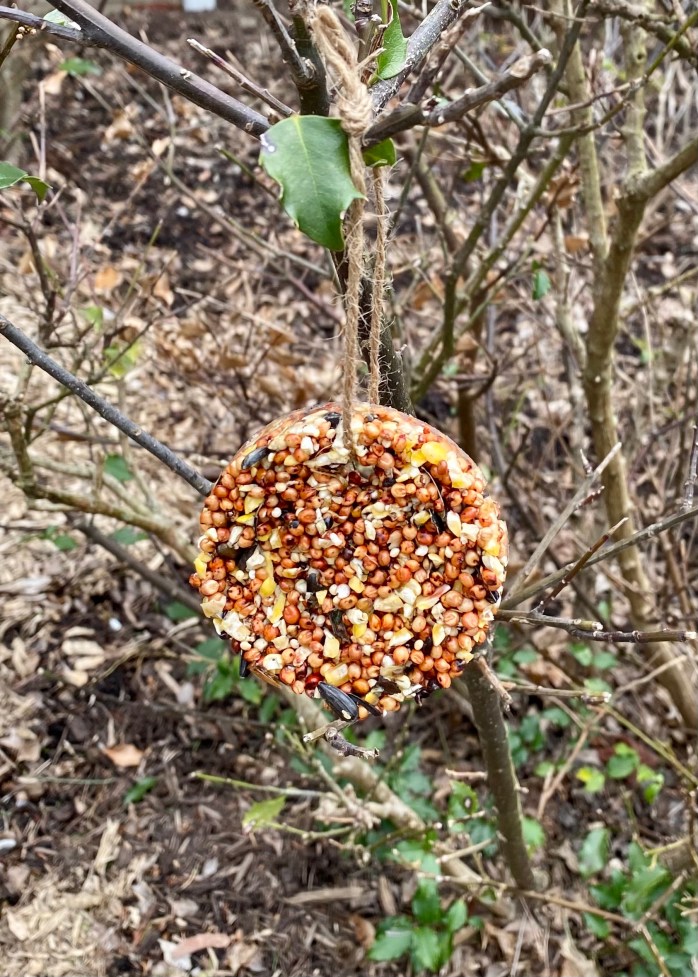
HOMEMADE BIRDSEED ORNAMENTS

Celebrate Earth Day (April 22nd) by feeding the birds! Make these simple quick birdseed ornaments from two ingredients- gelatin & birdseed. Then let the birds enjoy a tasty snack!
Materials:
- 2 envelopes of gelatin
- 2 cups water
- 3 cups birdseed
- cookie cutters
- twine
- toothpick
- spoon
- parchment paper
- baking sheet
- large bowl
- spoon
To make:
1.) Line a baking sheet with parchment paper. Place cookie cutters on top.
2.) Place birdseed in large bowl.
3.) Boil 2 cups of water. Once boiling, add 2 envelopes of gelatin and remove from heat. Stir until completely dissolved.
4.) Place water solution in bowl with birdseed. Stir together until all birdseed is coated with water solution/wet.
*You may need to add a little more birdseed depending on how absorbent your birdseed blend is.
5.) With a spoon, scoop birdseed into the cookie cutters. As placing the birdseed into the cookie cutters, press firmly down, compacting the birdseed in the cookie cutter to avoid air pockets. Fill until full at the top of mold.
6.) Use a toothpick to poke a hole into the top the ornament (for the string to go in once dry).
*Careful not to make the hole too close to the edge.
7.) Once the birdseed is completely hardened, gently slide the ornament out of the cookie cutter. A few pieces of birdseed may fall off.
8.) Slide the twine through the hole and hang outside! Let the birds enjoy.
*If the hole is too small, use a needle to push through and make it bigger.

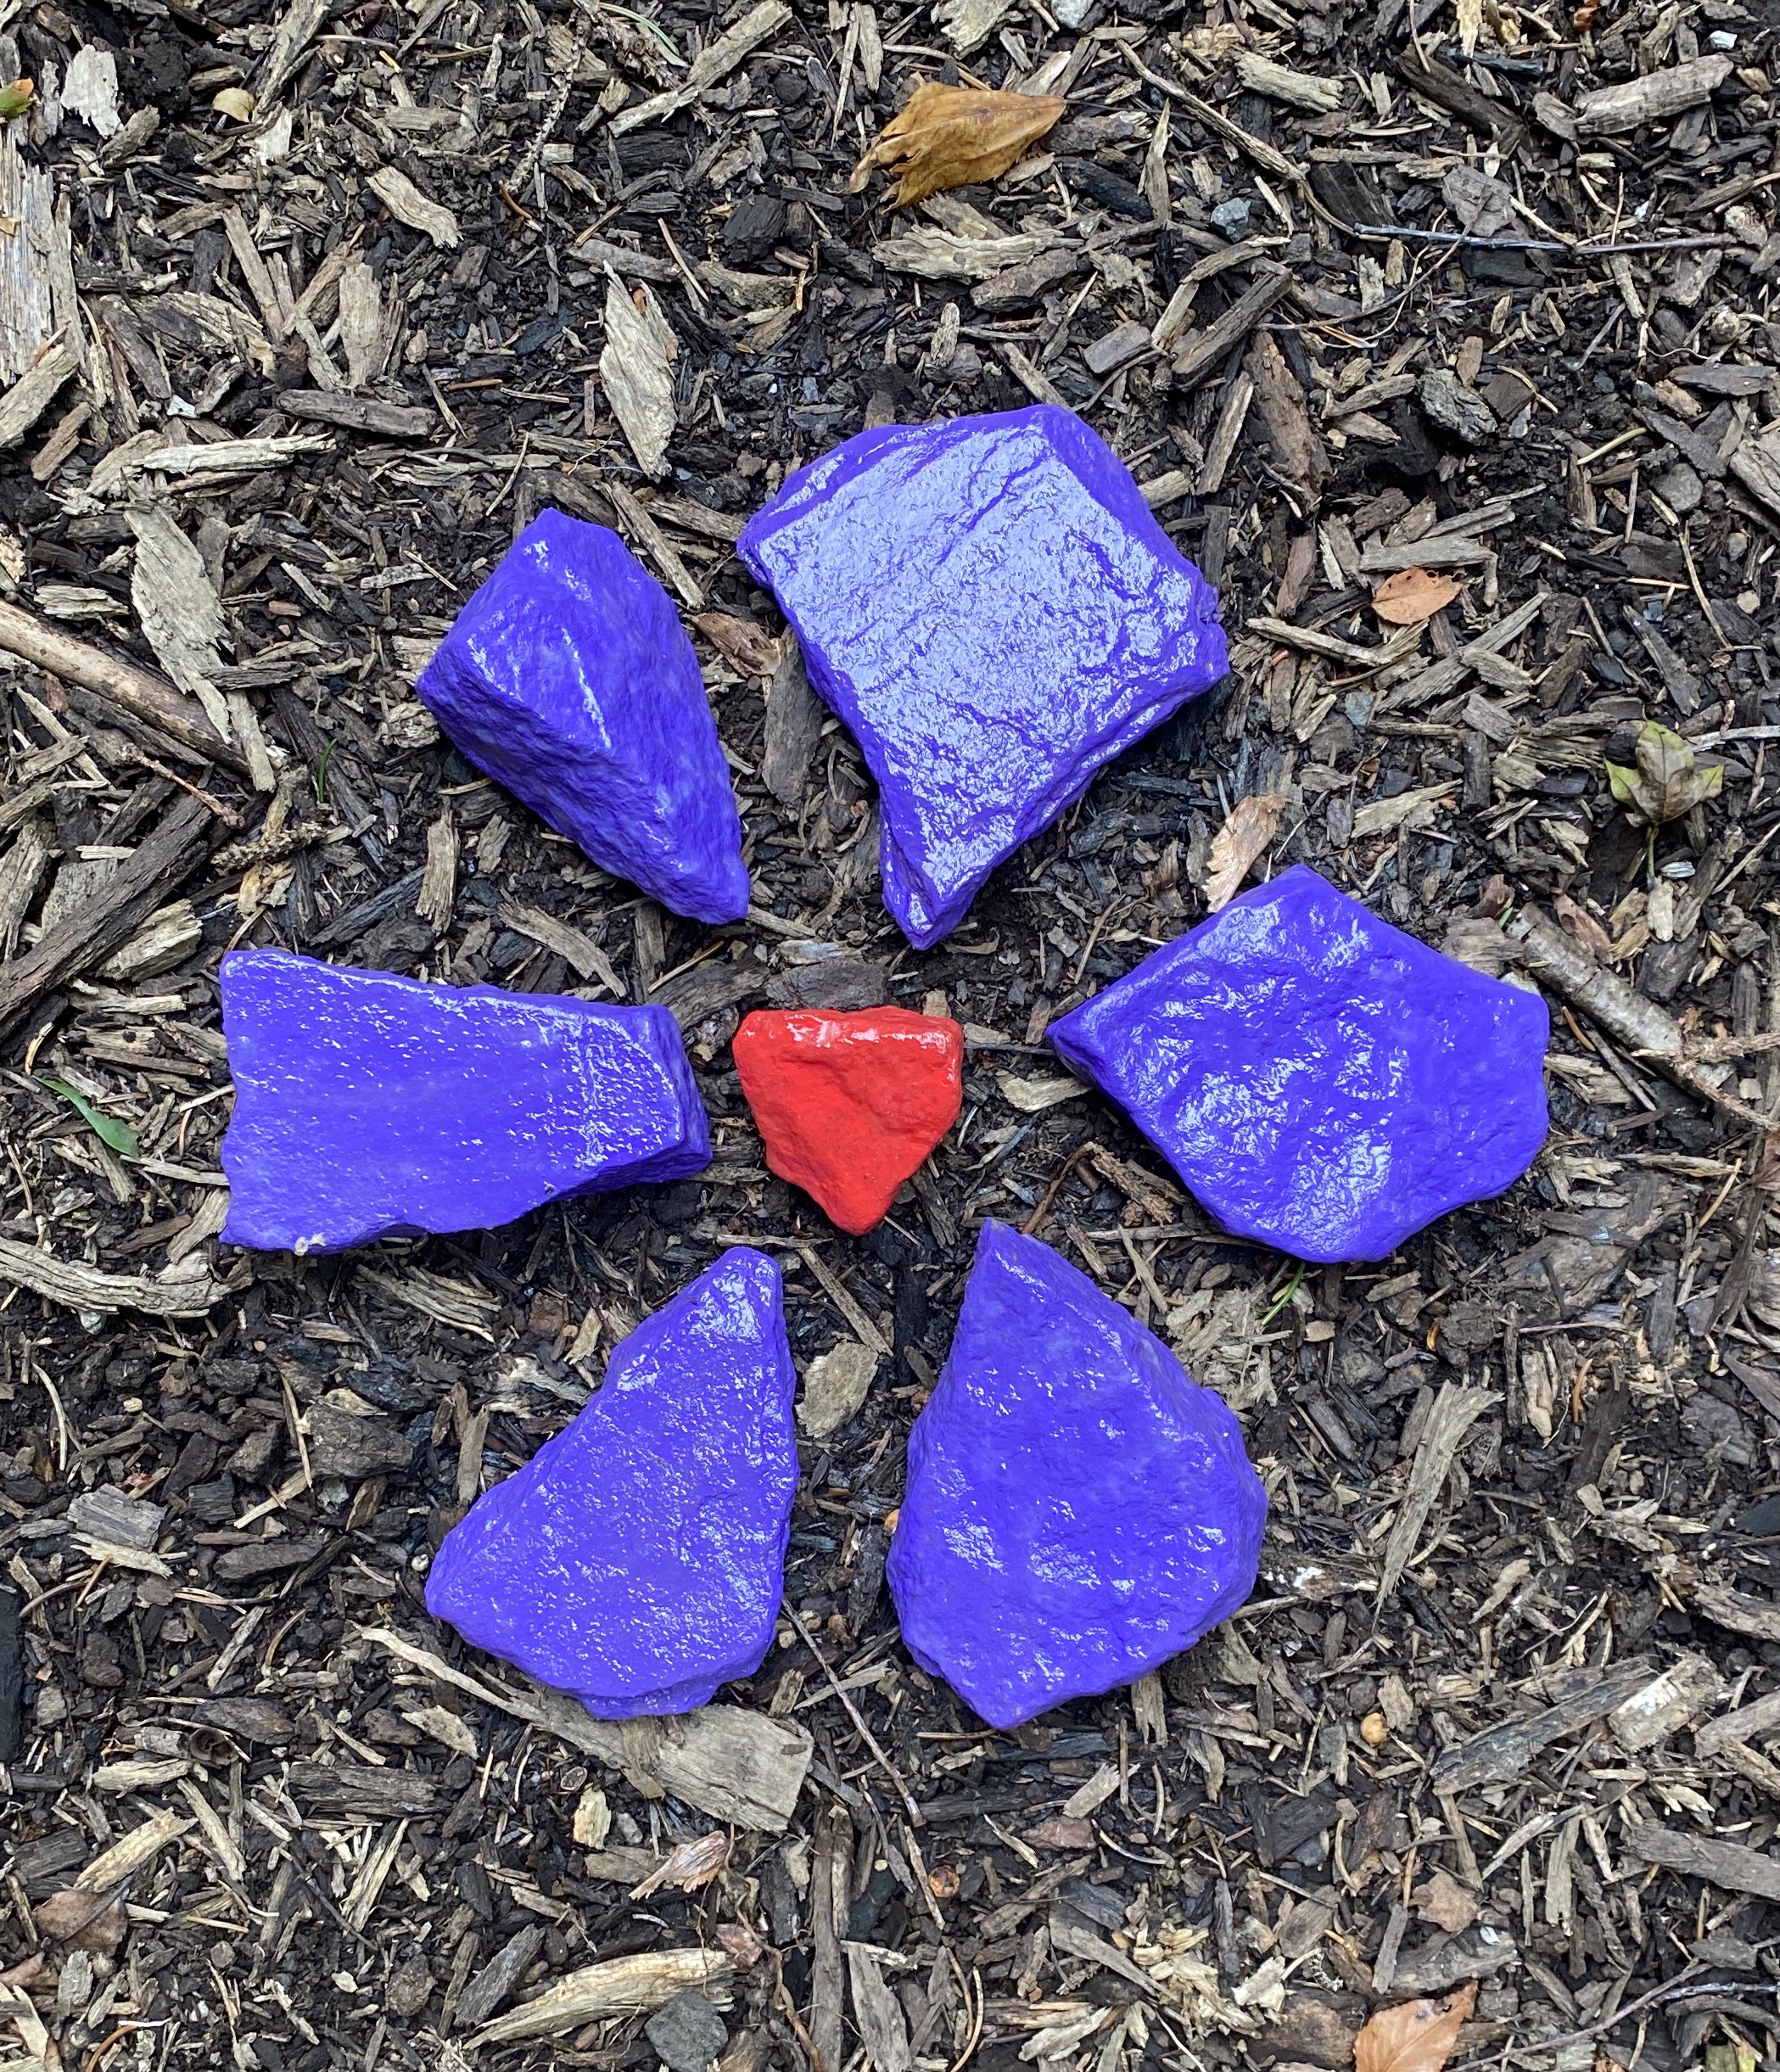
ROCK FLOWERS

Add a pop of color to your garden in the fall or spring before all of your flowers bloom. These rock flowers are super easy!
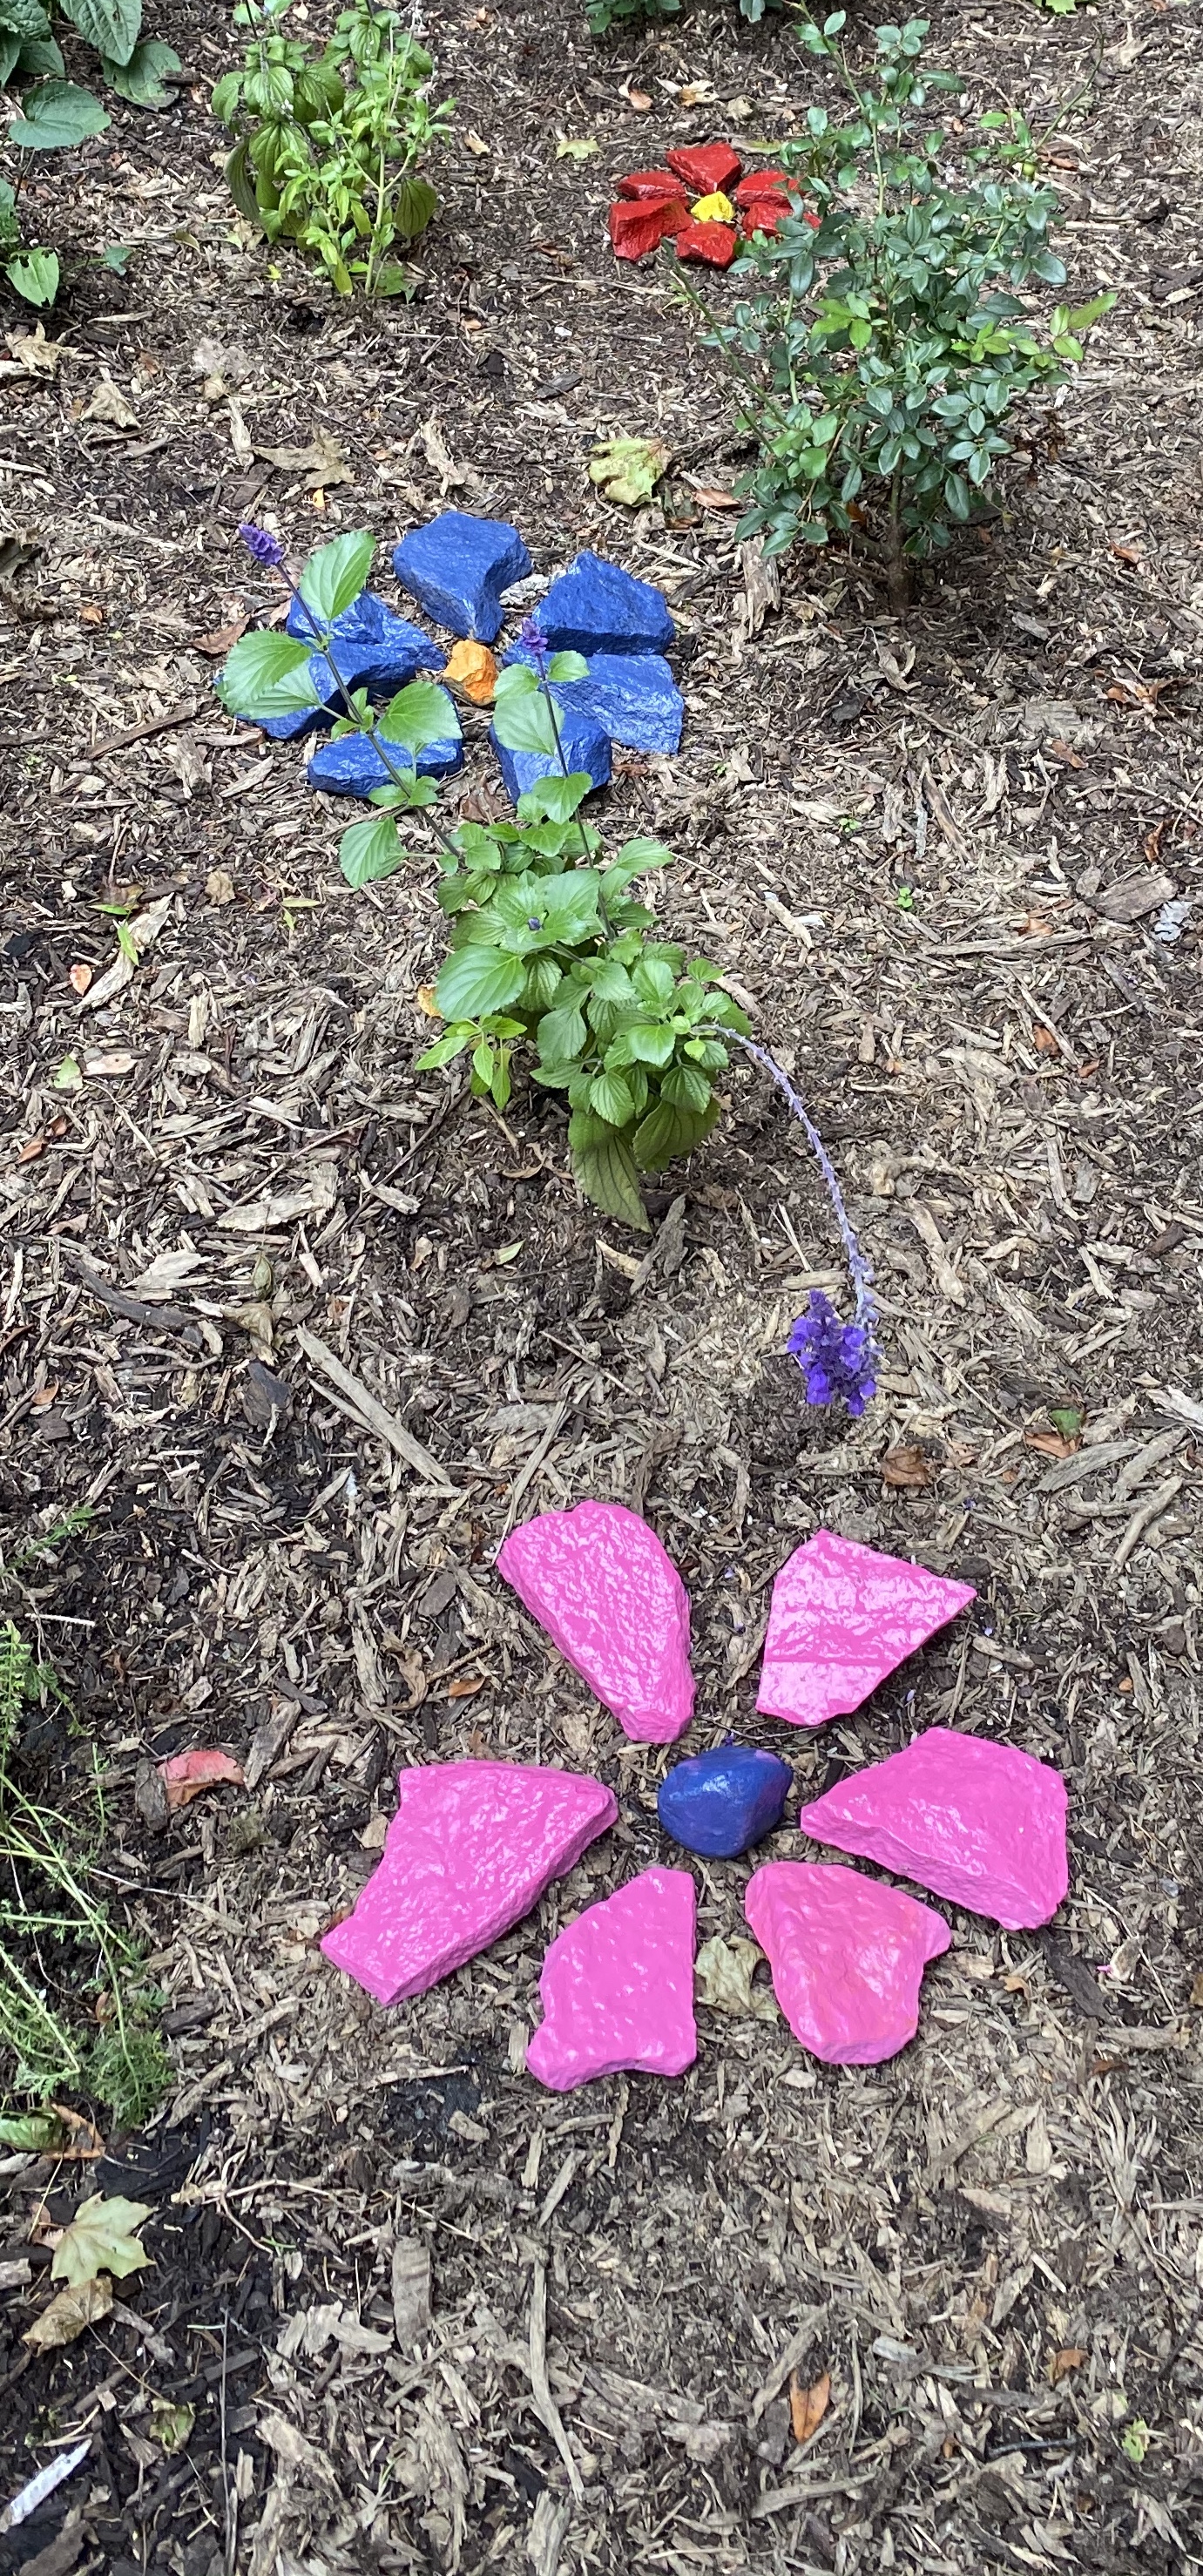
This summer my daughter and I made a flower garden. She is obsessed with flowers and picking them- so we made her own special garden where she can pick her flowers, not mine throughout the yard. We wanted to add more color and make it kid friendly. That’s how this project came to life.
Materials:
- Rocks
- bucket (for the rock hunt)
- acrylic paint
- paper (for under rocks when painting)
- Modge Podge
- acrylic sealant
Procedure:
1– Go on a rock hunt! Don’t forget your bucket.

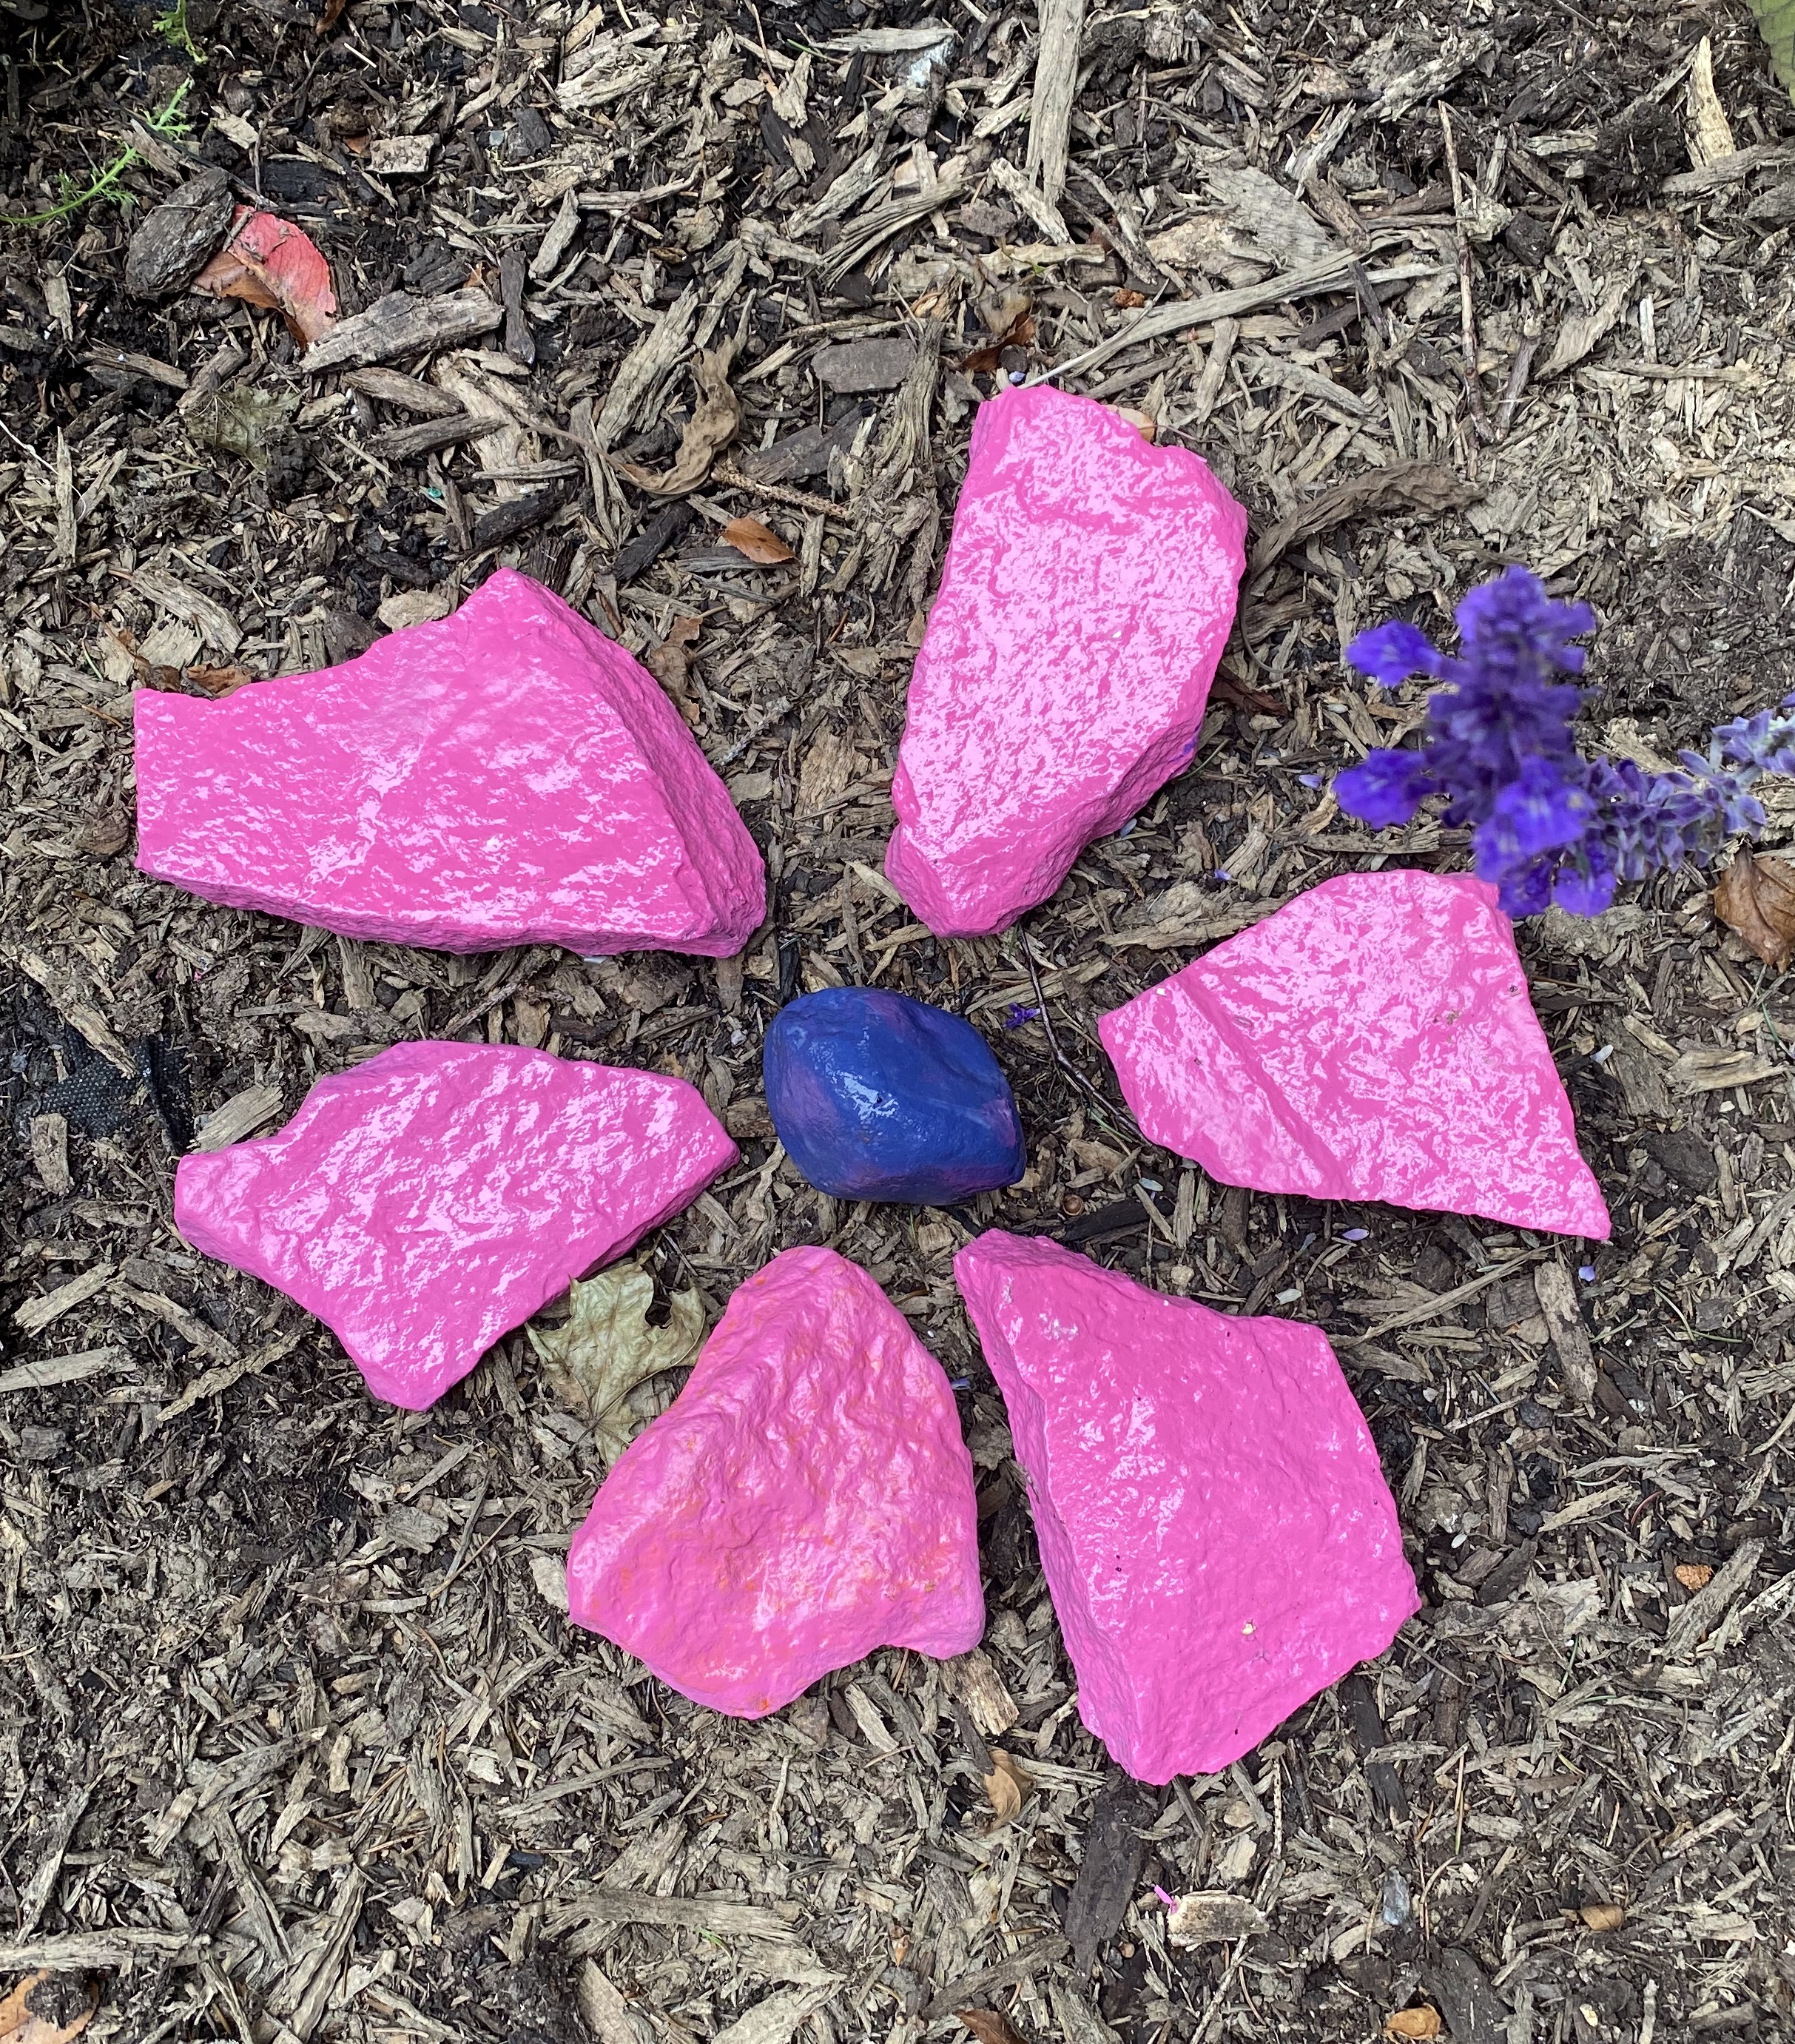
While on the rock hunt, I always lay out the rocks to make sure I like the layout and then take a picture. The picture makes it easy to put back together after painting. I try to have 5 to 6 for each petal and a stone for the center.
2– Wash off the rocks with water once home. Rinse in a bucket with a sponge and a small amount of soap, water. Let dry over night.
3– Paint with acrylic paint. Solid colors, multiple colors- whatever your child wants. Let dry.

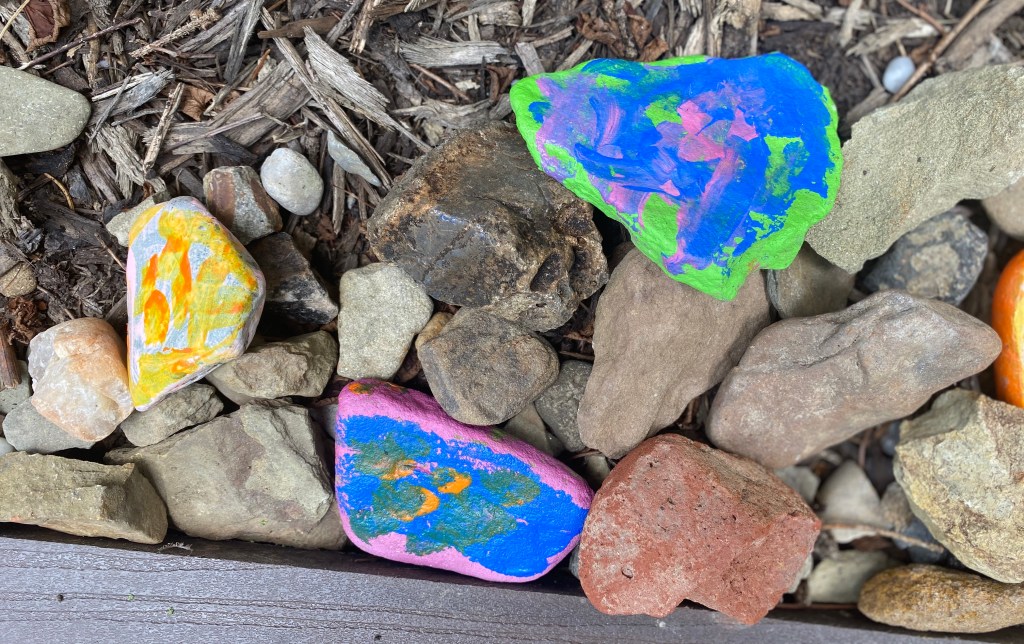
4– Paint with a layer of Modge Podge (optional). Modge Podge gives a luster affect (see below). Once dry again, spray with Acrylic Sealant. This makes them more weather resistant/durable outdoors.
These look great in flower beds, on top of mulch, or in a special place your child chooses.
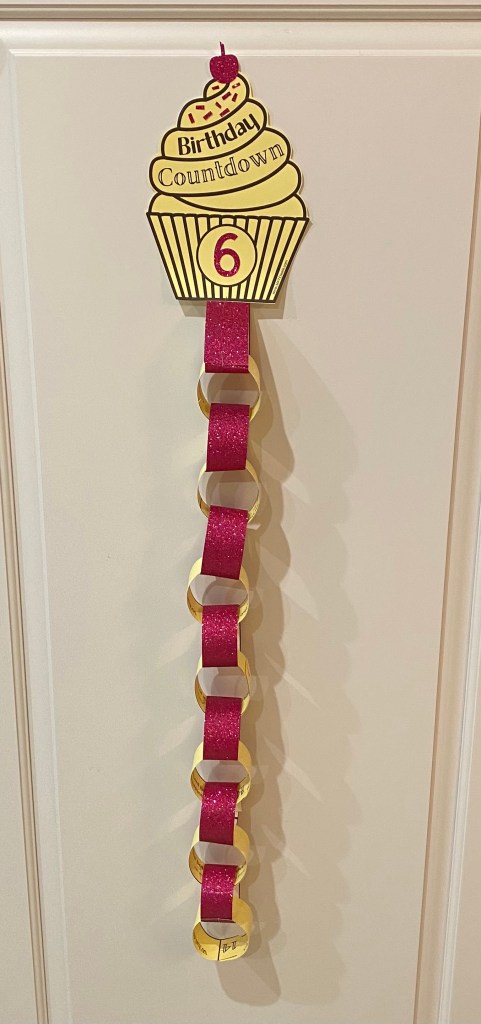
BIRTHDAY JOKEs COUNTDOWN

Countdown until the big day for two weeks. Pull a chain and read a joke each day! Enjoy this fun interactive full of laughter countdown! Who doesn’t love birthdays and jokes?!?
Materials:
- Cupcake template & Joke Chain
- cardstock (color or white)
- printer
- scissors
- stapler
- watercolors, crayons, markers (optional)
To Make:
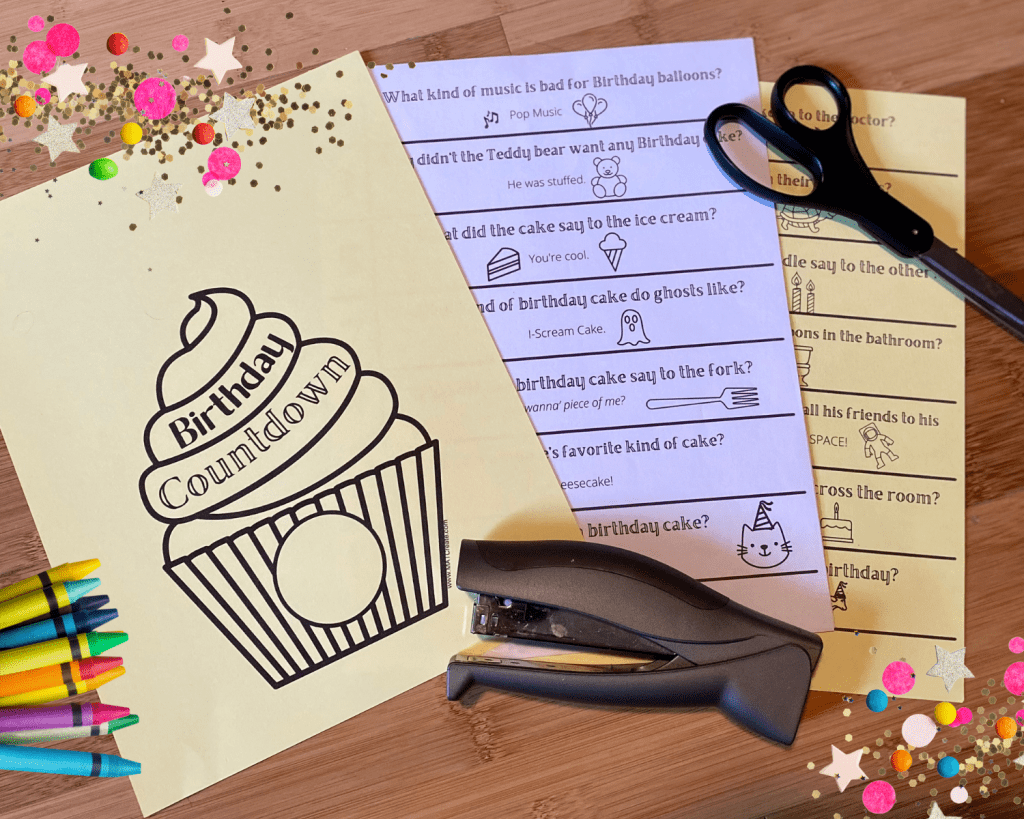
1.) Print. Before printing out the templates, decide how you are going to decorate it and what paper you need. I recommend cardstock vs regular paper because more sturdy. Decorating has lots of possibilities.
For my chain example I used glitter cardstock and yellow cardstock.
2.) Cut out. Cut out the cupcake. Then, for the chain, cut on the solid black lines between each joke (making strips)
3.) Decorate/personalize. Paint with watercolors, color with markers or crayons, add stickers, or just let plain. Let your child decide! Add the age they will be in the circle box.
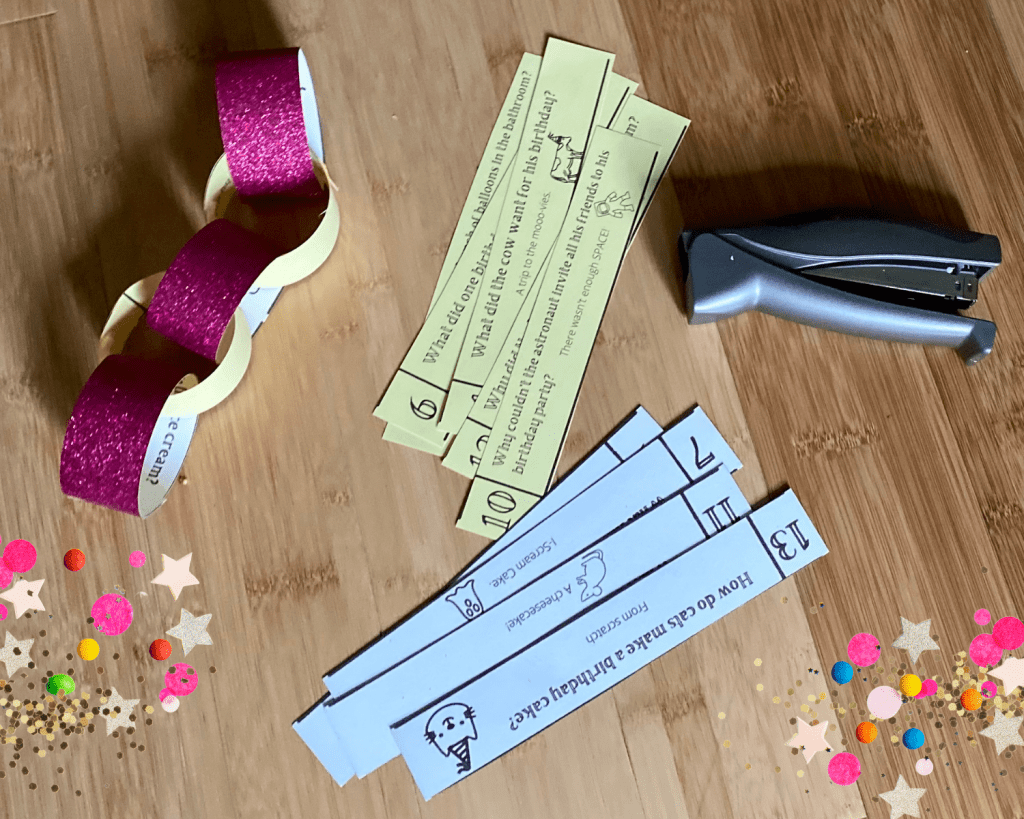
4.) Make Chain. Bend the first joke (day #1) into a circle and staple. Then attach day #2 joke by doing the same thing, except putting through day #1 first. Continue in order until done.
5.) Attach. Attach the chain (day #1 joke) to the cupcake center bottom by stapling (see finished example below).
Let the fun begin! 14 days before their birthday start the countdown! Enjoy!
Happy creating, laughing, & celebrating!